Man, what a BUSY week! I don’t know about you, but May rivals December in craziness around here. End of the school year around the corner, graduations, Communions, birthdays…so many things. All fun things, but it makes for a wild month!
In the little time I’ve had lately, I’ve been devoting to Operation Big Boy Room, as you probably could guess, if you’ve been following me for a little while;) It’s reeeaaaally coming together – just some window framing and a couple tiny touches and we’re about done.
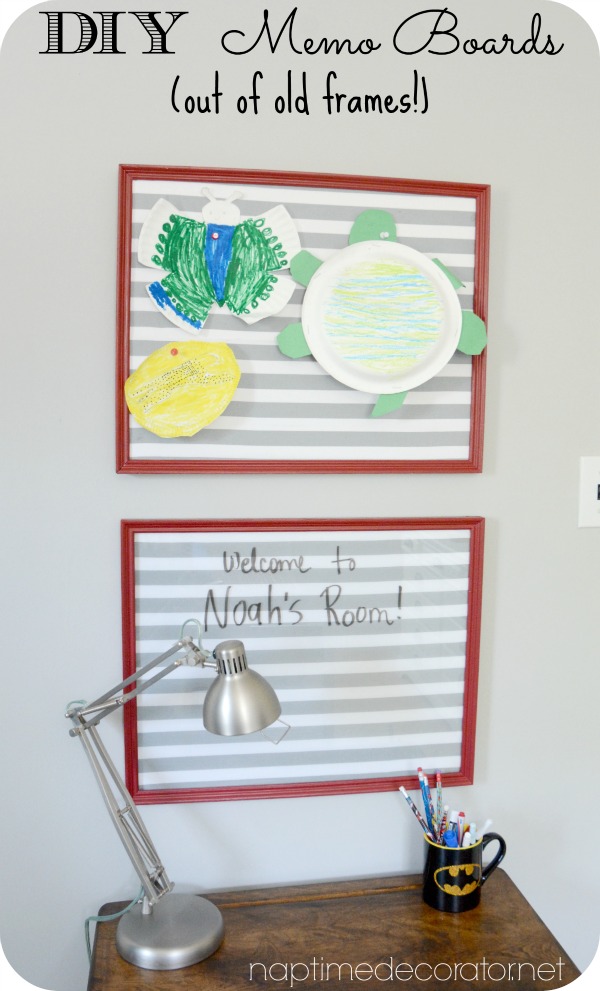
He has a small desk in there (post to come on that one soon – it’s adorable!) and since he’s obsessed with his big sisters’ Dry Erase Boards, I wanted to do something similar. But he already has a giant chalkboard in his room (remember that?), so I didn’t want to do the same exact thing as I did in both my girls rooms (click here to see Dry Erase Board #1, and click here for Dry Erase Board #2 in case you missed them!). I had an idea.
I had these two old gold frames collecting dust. And some fabric I was going to use for his headboard, until I changed my mind and found one I liked more….hmmm….
This was one of those projects that I REALLY wasn’t sure how it was going to pan out until the very end. Luckily, it all went smoothly and now my boy’s got a bulletin board AND a dry erase board! Perfect for his little work station.
Here’s how it all started:
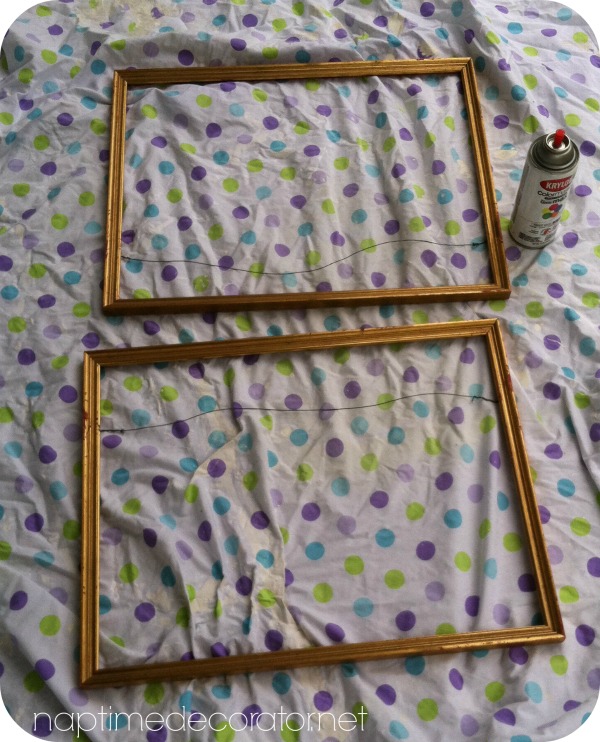
I removed the backing from the frame, and spray painted them white…
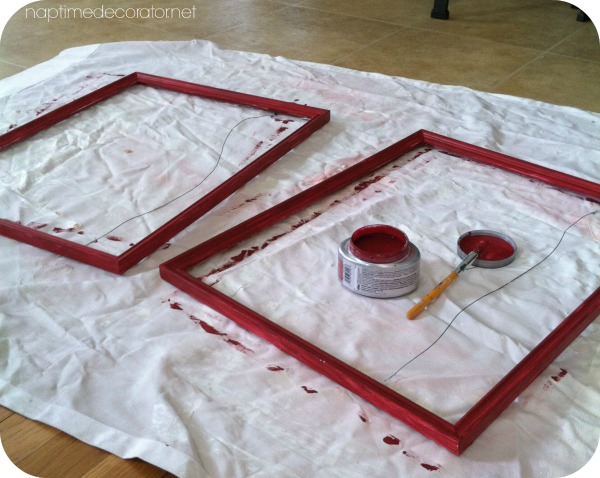
Only, then I decided red would look better!
A quick trip to Lowes for a sample of Valspar La Fonda Geranium Red and we were back in business…
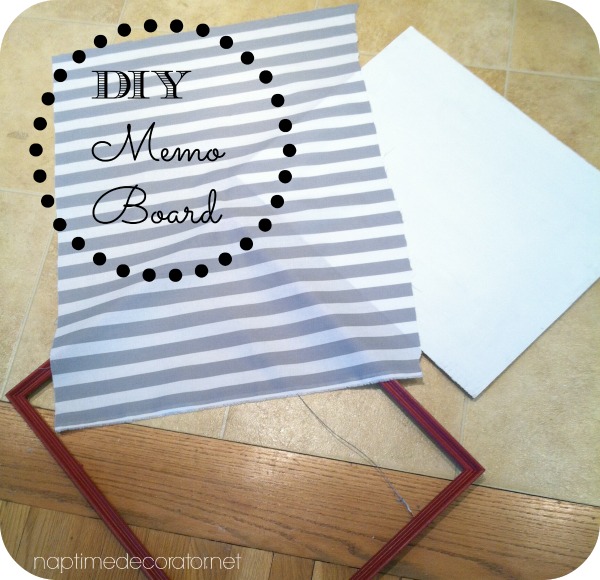
For the Dry Erase Board, all I had to do was tape some fabric around the cardboard insert (I painted it white since the fabric is super thin and didn’t want the brown cardboard showing through). Stuck the glass insert back in, and secured the tab thingys in the back…done!
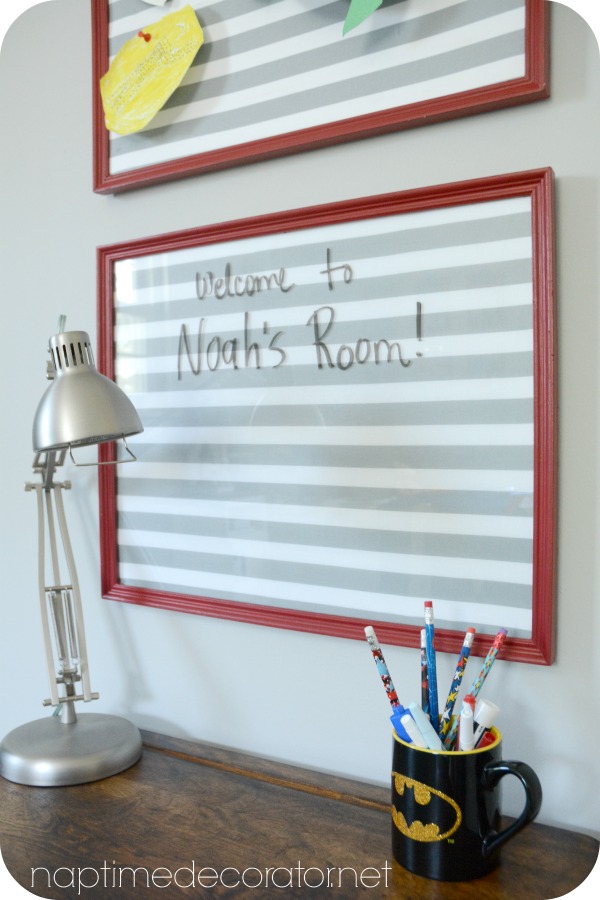
He was SO tickled when he saw this! He writes on it all the time:)
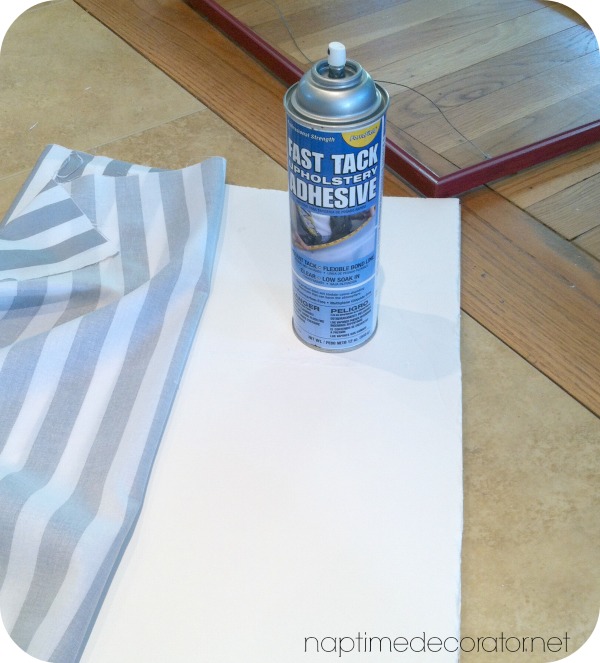
For the bulletin board one, I used some of that foam board – you know, that kind kids use for project displays? I had some here already, so I just used that instead of going to the store to buy cork.
I taped it onto the cardboard insert, and it worked great that it’s already white!
To attach the fabric, I used upholstery spray. This stuff has held up great on my DIY Accessory Board that I made forever ago, so I knew it’d be fine on this, too.
Just sprayed the foam board and laid the fabric on top, smoothing out all the little air bubbles.
Didn’t need the glass insert for this one, so just had to stick it back in the frame, and again, secure all the little tab things all around the back of the frame.
Done!
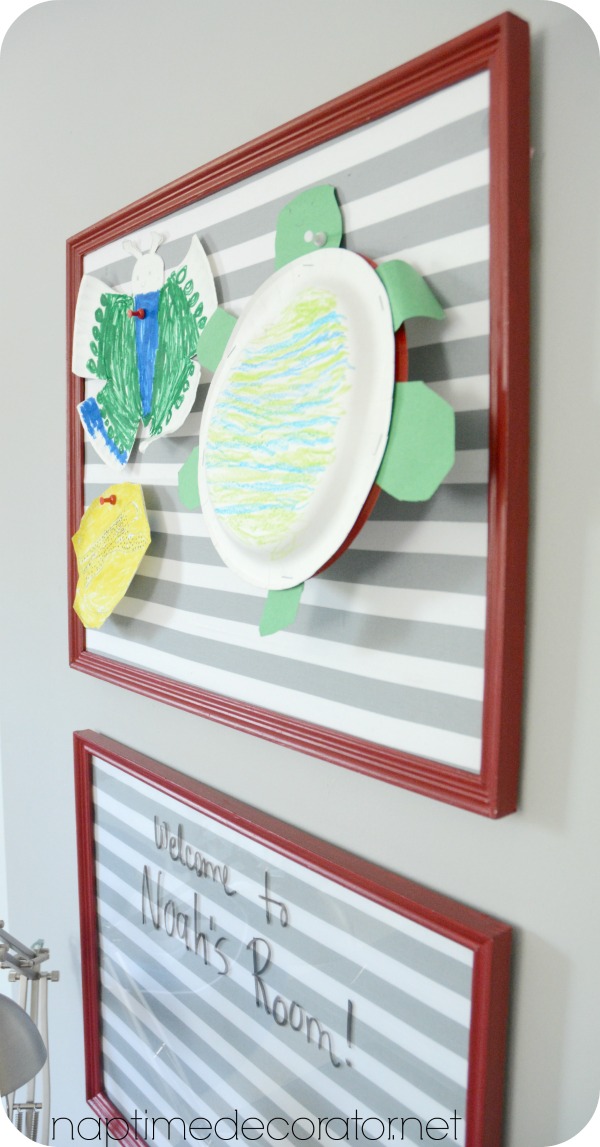
It’s nothing huge, but enough to display his latest masterpieces that he brings home from Kindergarten:)
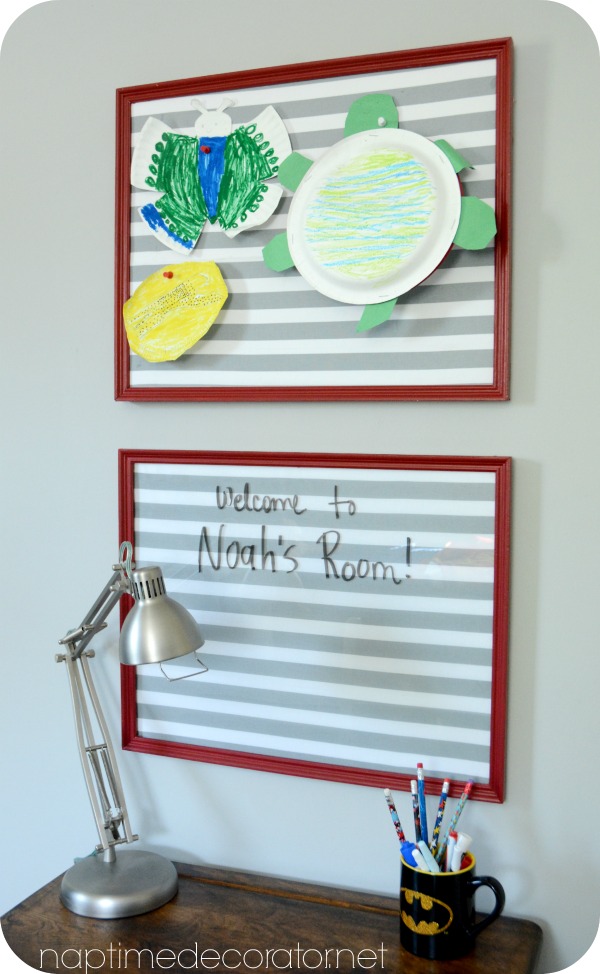
A thrifty way to fill a wall, AND has a function. Win-win!

Getting down to the wire in here, friends – can’t wait to show you!
Have a wonderful Memorial Day weekend!

 Hi there! I’m Liz, a former teacher-turned-stay-at-home mom to three kids, with a passion to create a warm and inviting home on a budget. This blog all started when I’d put the babies down for a nap, and squeeze in a project during those precious couple of hours! My hope is that you visit this page and feel inspired to do a little “naptime decorating” of your own. Thank you so much for stopping by!
That memo board is perfect! I have several frames around here sans glass, so that works well for me 🙂