Well hellooooo! I have missed you! I know I said goodbye in January, but had a feeling maybe I’d pop in from time to time if I had a fun project to share, or something in my heart I wanted to say…welp, this is the time! I just finished up a project over here that I’ve fallen in love with, and I thought, this is something so fun that adds so much character…I need to share with my peeps in case they’d like to try something like this!
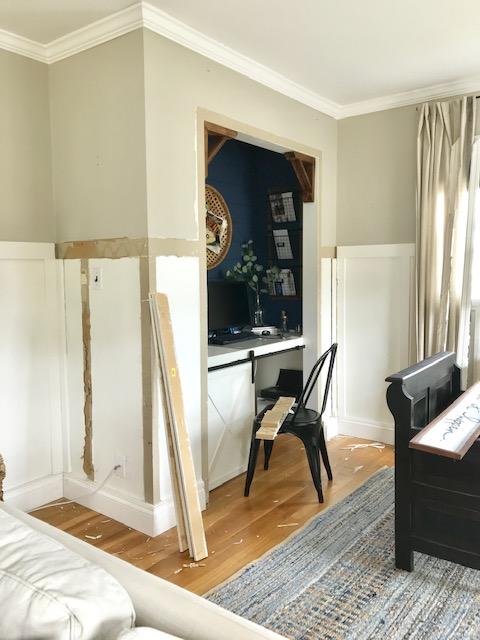
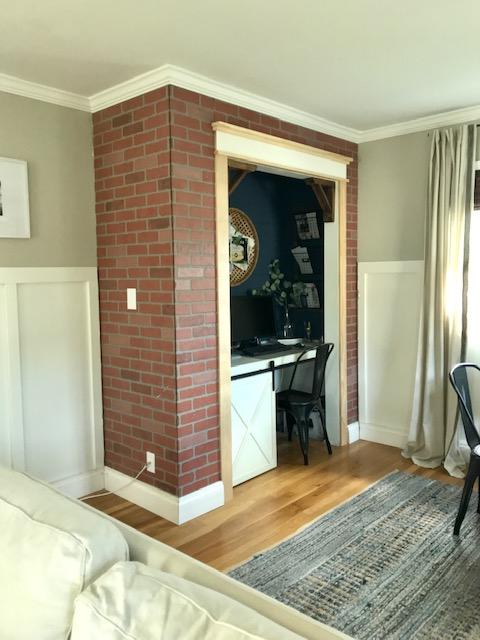
Those of you who follow me on Instagram may have seen this already, but I picked up a 4×8 faux brick panel from Home Depot not long ago. You were probably wondering what the heck I was doing buying THAT, because they aren’t all that pretty;) But I’ve had this brick vision ever since I was at a friend’s house a few months ago. She lives in a GORGEOUS old house with so much charm, and there’s this little brick wall that just looked so cozy to me, and I couldn’t stop thinking about it. So I start googling and discovered these faux brick walls were a thing?! And people were painting them, German Smearing them, both – so many options and they all looked amazing! I decided I wanted to give it a go around our cloffice. There’s this bump out there, and it’s always looked a little awkward to me in the middle of our family room. (This was a closet when we used to have a separate office, and once we tore the wall down and got rid of our designated home office, we turned it into our office…er, cloffice).

So I started ripping out the trim and board and batten. Here’s where things got worse before they got better;)
I did the same trim I used around the kitchen window and hallway doors recently, then cut the brick with my jig saw, used liquid nails to put it up, and then several shots of the nail gun until the adhesive stuck.
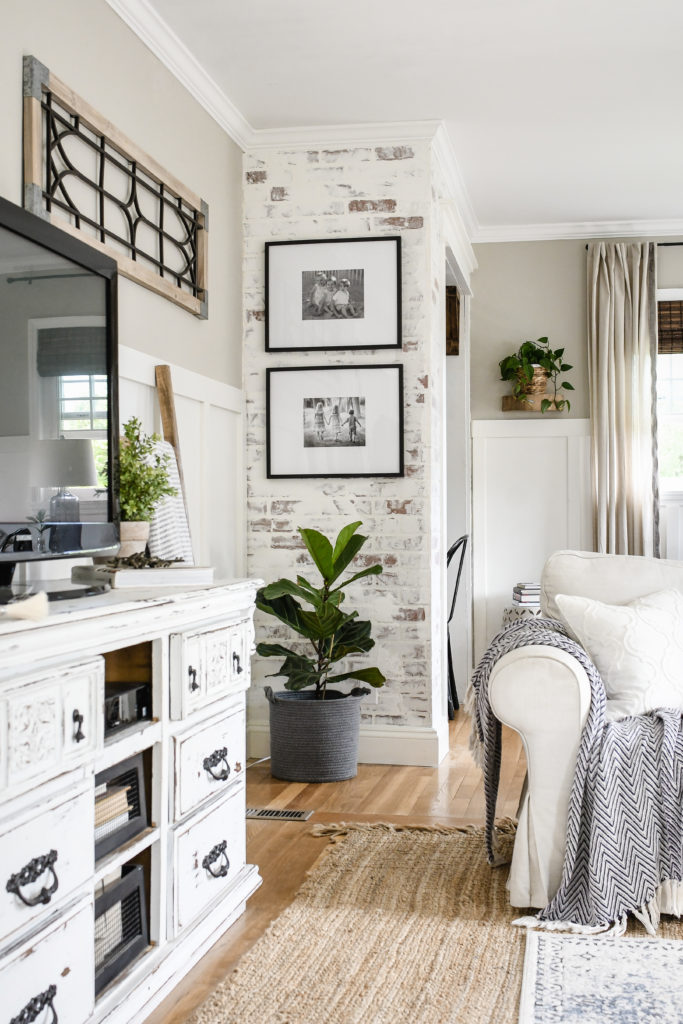
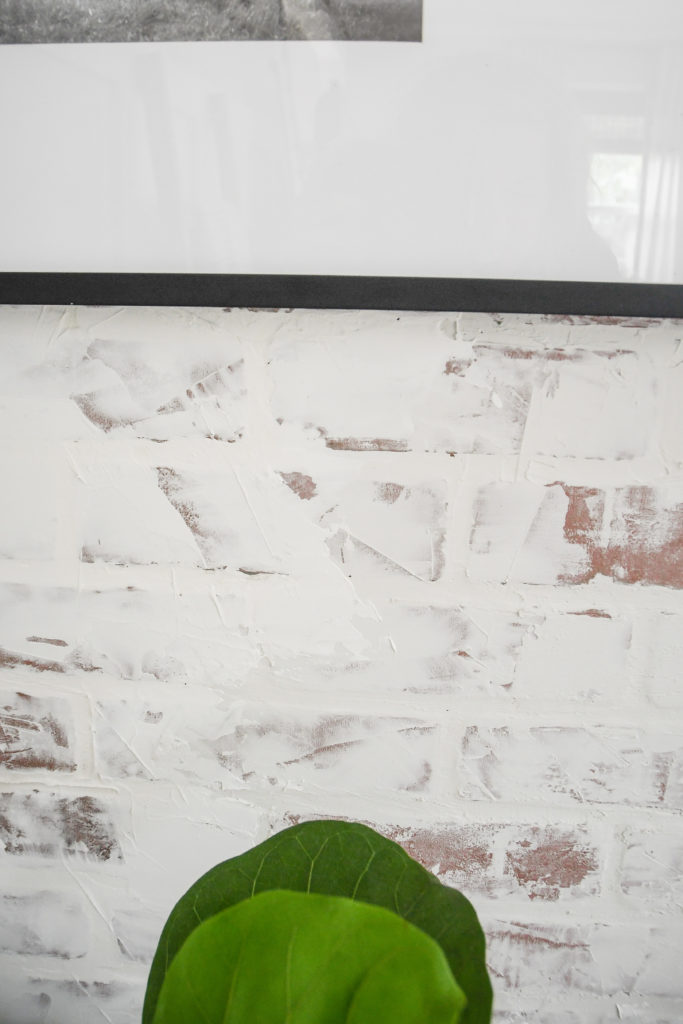
Then it was time for the fun part! I bought a big tub of joint compound and smeared (or as Chip Gaines would say, shmeared) it all over with a putty knife. I left some alone so the brick would show through, and went back and wiped bits and pieces away with a couple paper towels to show more. I went heavy on some parts – ok, so basically I had zero plan! But the good thing is, you can scrape it off (or sand) even after it dries, and you can always add more if you want. So it’s really so foolproof! And here we are!
![]()
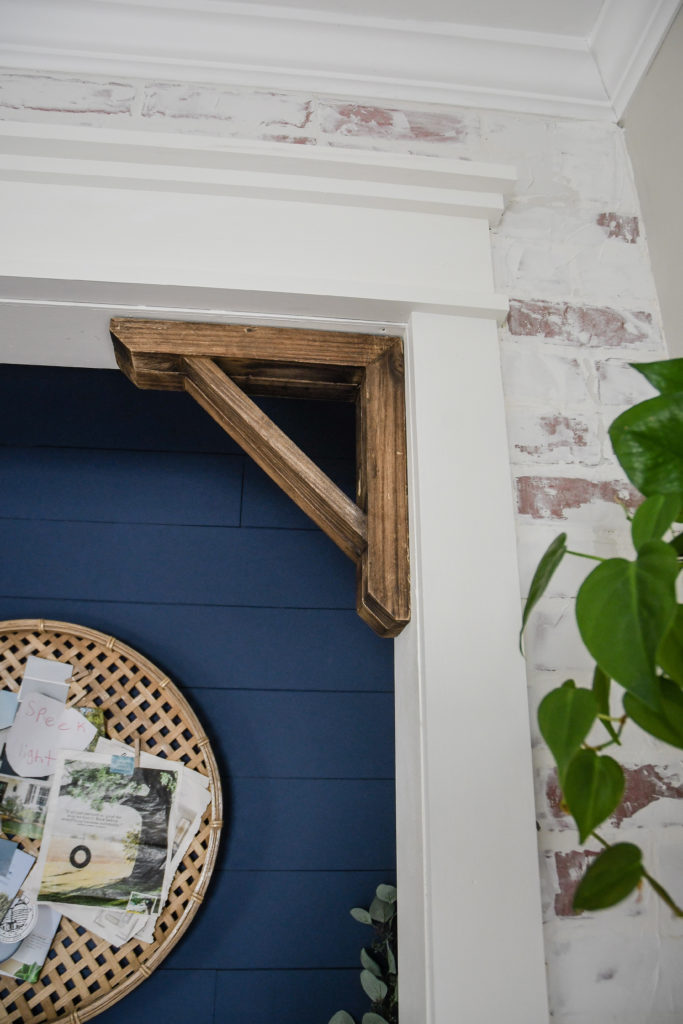
I love how the putty knife makes lines and adds texture. I mean, if you aren’t lucky enough to have brick beneath your walls, this is the next best thing, right?!
![]()
Well this was fun! I enjoyed coming out of “retirement” to share this project with you;) I hope you enjoyed it and let me know if you find the perfect spot to try it in your home – I’d love to hear!

 Hi there! I’m Liz, a former teacher-turned-stay-at-home mom to three kids, with a passion to create a warm and inviting home on a budget. This blog all started when I’d put the babies down for a nap, and squeeze in a project during those precious couple of hours! My hope is that you visit this page and feel inspired to do a little “naptime decorating” of your own. Thank you so much for stopping by!
It’s so funny that you just posted this because I thinking of you yesterday while reading my favorite blogs and thought how much I miss your posts. I love your brick shmears!!! I’m not sure that I would have the courage to try something like this on my own but you certainly did an incredible job. 🙂 Thanks for sharing.
I was just on your Instagram page a couple of days ago to check on how you’ve been doing. I definitely miss your weekly posts. Love the smear, it really finishes that corner and makes it look like it’s always been there. Hope you’re doing well and loved hearing from you!😎
It does look lovely. When I saw it with the red brick it looked like a big fat chimney- lol. But with the schmear I love it! Nice to hear from you again for sure.
So glad you’ve come back! Have really missed your posts and your brick wall looks fab too by the way!
VERY pretty and inspiring!
I’m so glad you’re back! This brick shmear is beautiful. I like that we live near each other & when you tell where you bought certain items, I can go there & find the same thing. I hope you’re back for good – I’ve missed your clothing blogs too. Thank you for sharing your latest project.
So glad to hear from you. 🙂 I have been popping over to the blog about once a month to see if you had posted anything. This project is awesome and it looks great. Thanks for sharing the details.