Hello! Thank you all for the prayers for my little girl – they’re working and she’s continuing to heal nicely! Praise the Lord indeed.
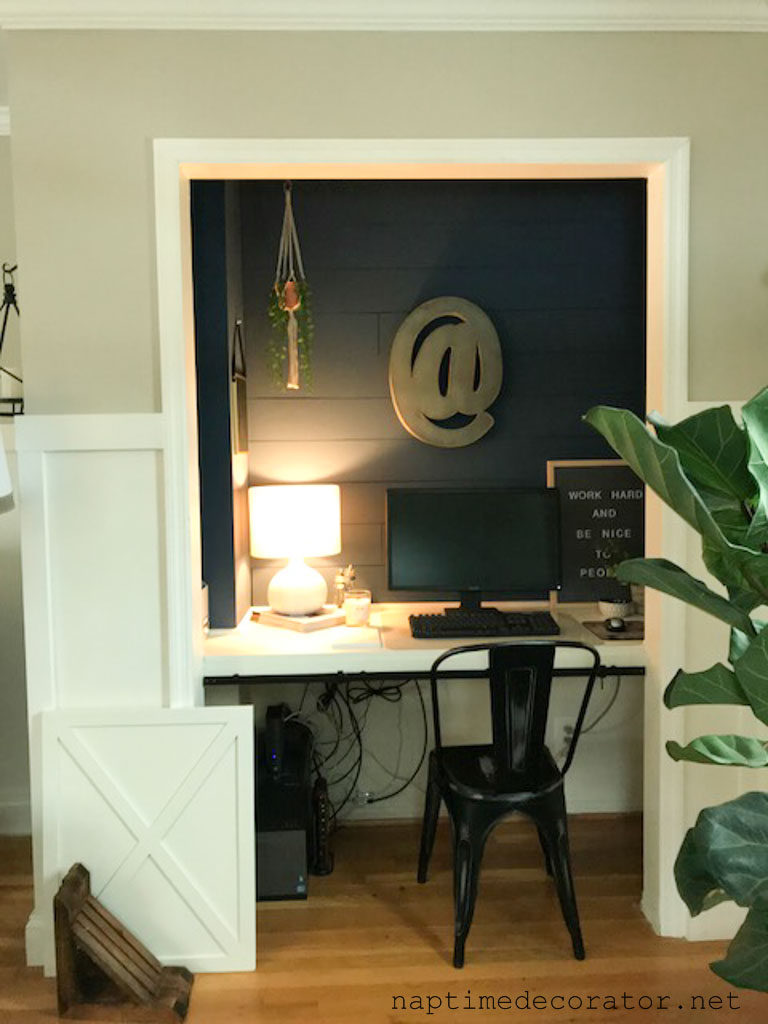
I am feeling like life might be getting back to normal a bit now and wanted to share with you the details on the DIY desk we (and by we I mean Mr. ND;) built for the Cloffice. Bless his heart, I tell him my vision and he somehow brings it to fruition. Not always without a few choice words in the process, but…haha! He really doesn’t give himself nearly enough credit. I mean, this is what I told him:
“I’m picturing a desk that fits in the entire space, and then a mini sliding barn door to hide all the unsightly stuff.”
And he made this:

Literally EXACTLY what I had in my mind.
But not without a little drama. Let’s rewind…
So this was a former closet when we still had a wall up in our family room, and had a home office. Once the wall came down, giving us a larger family room space, we no longer had an office. BUT, we had a closet. Who needs a closet in the family room? Not us. Sooooo we made it our office! And a reader so aptly coined it “the cloffice” and it’s stuck with me ever since;)
It looked like this for a while…
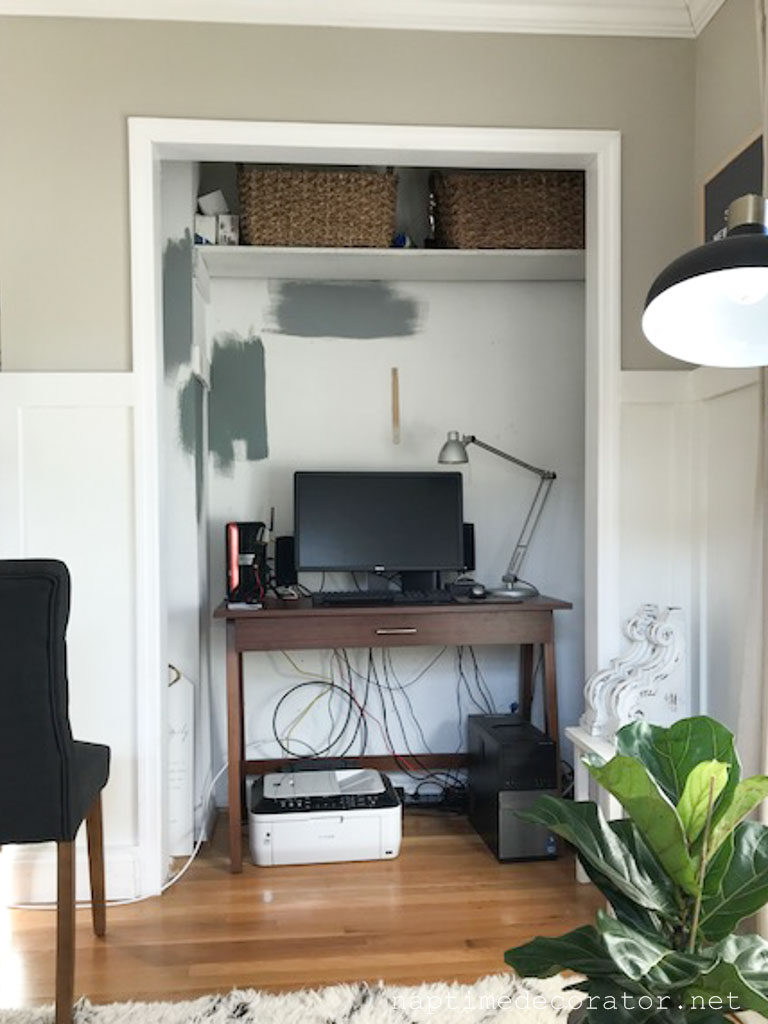
And finally we got the inspiration to tackle this hot mess. But not after we lived with it like this for oh, pushing two years. <face palm>
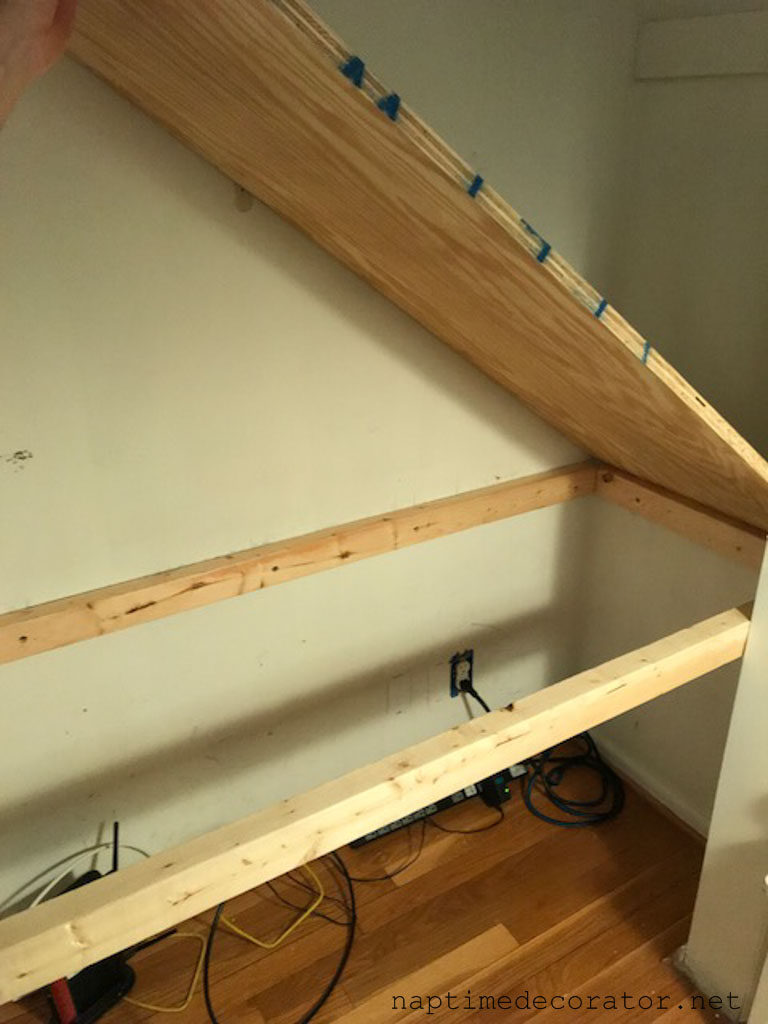
We hit up Home Depot and I’m not kidding when I say we walked around trying to decide what to buy. No plan. This drives my Type A husband absolutely batty. I attack pretty much every project with a “fly by the seat of my pants” attitude, and he needs a plan, a budget, all that not-so-fun stuff;) But we actually had a lot of fun trying to figure this out that day. We ended up grabbing some 1x2s and a 1 inch piece of plywood.
The 1x2s were drilled into the studs as the base. The plywood was cut to fit and glued and screwed on top. (he countersunk the screws so they wouldn’t show)…
So it was looking good and we were feeling happy that we were finally starting this project. The next day, when hubs returned back to work, I decided to tackle the shiplap. (Not really shiplap – it’s a plank wall to look like shiplap – see this post for a tutorial).
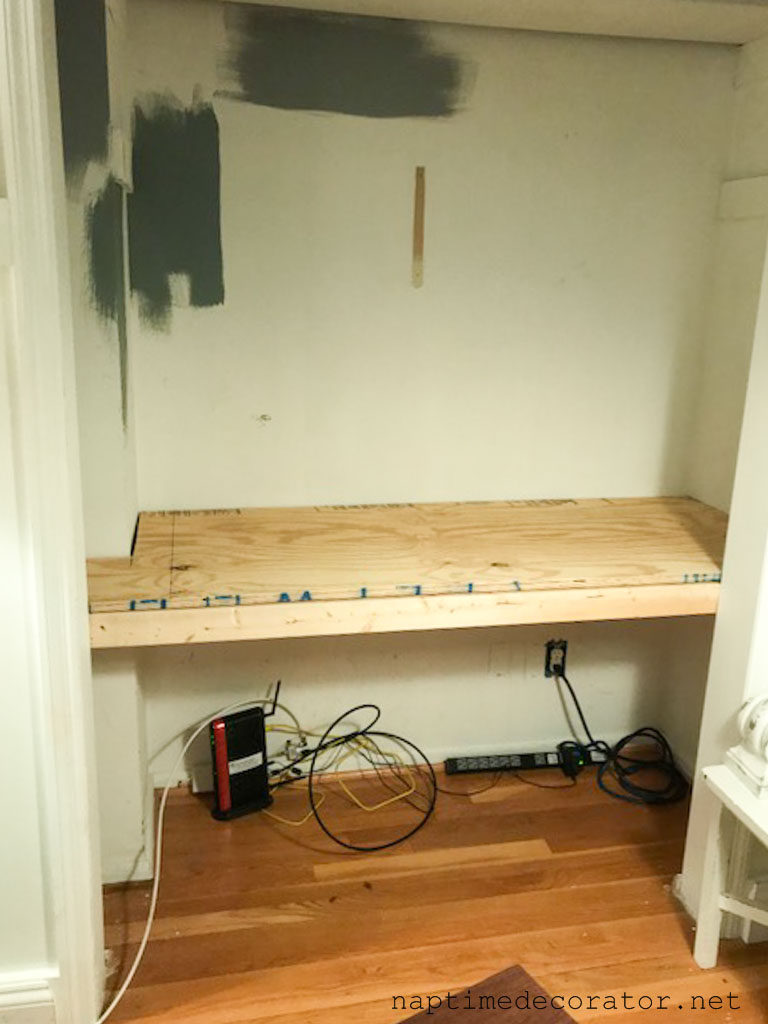
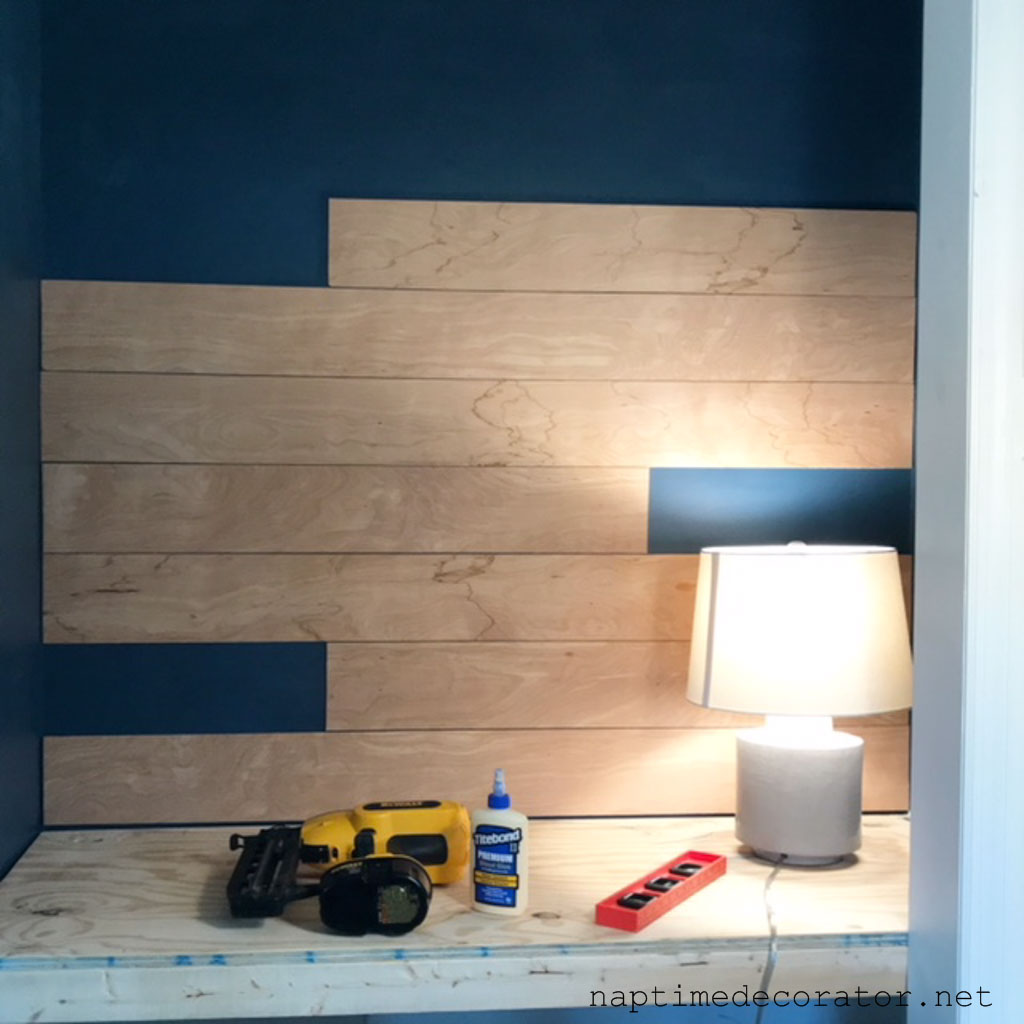
As you can see, I painted first because you WILL SEE between the planks. Even though it’s a teeny tiny crack, trust me on this.
So I’m rocking and rolling and I swear I hear a slight TINK! as I shot my nail gun into the wall on one of the planks. I freaked out, because I always check for electricity with my studfinder when I do these walls, but wasn’t thinking about any pipe issues?! That night, we cut into the wall and sure enough, the nail had GRAZED the copper pipe. We got crazy lucky, and even had our plumber come over the next day to verify that we were in the clear. All good.

But THEN!
The next morning my husband wakes up with this awful realization that where that pipe was that the nail gun hit, if you follow that directly straight down, it would be where he also DRILLED into that same spot on the wall for the desk base!! Oh GEEZ. We had to find out, so he cut out a spot there and you wouldn’t even believe how directly in the CENTER of that pipe was where the drill went in. What we thought was drilling into a stud, was really a pipe.
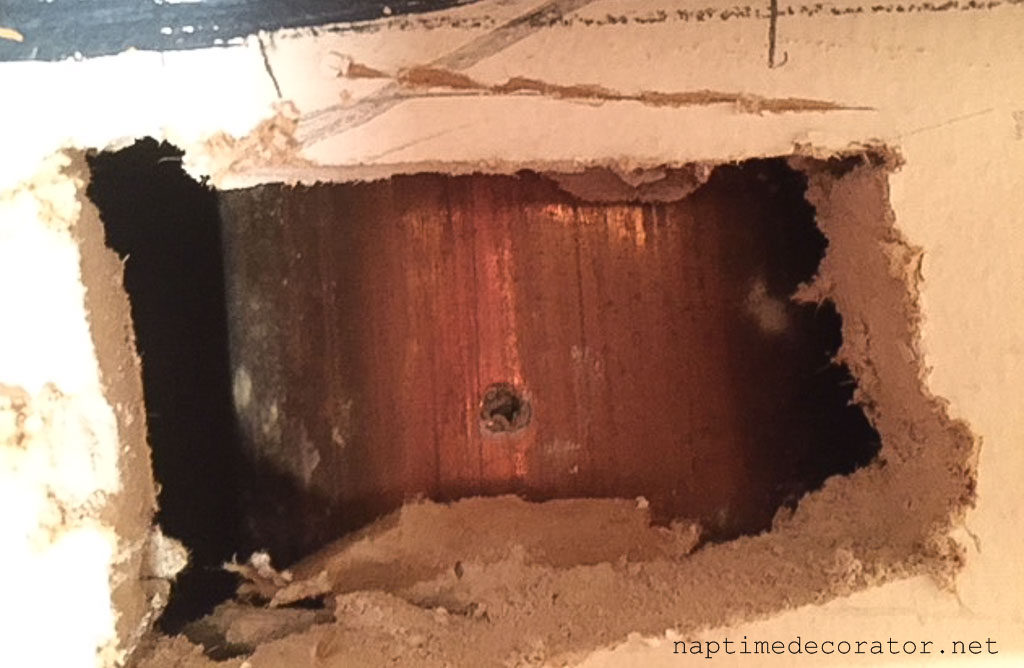
There was no issue yet, but down the road we’d be dealing with a big ol’ mess. Our plumber told us to use some really strong epoxy stuff that was like $7 and hardens like a rock around the pipe. We were back in business. See, DRAMA. But – we had no idea that when dealing with a closet, it’s a whole new thang. So many pipes and ducts and stuff right there. If you try this at home, CHECK CHECK CHECK first to make sure you aren’t going to drill into anything. My PSA for the day. I’m just so thankful I heard that tink sound when putting up the plank wall, resulting in my husband thinking about the desk. Whew! Dodged that bullet big time. See, so basically we have shiplap to thank for it all. Reason #482 I love the stuff;)
Back to the desk details…
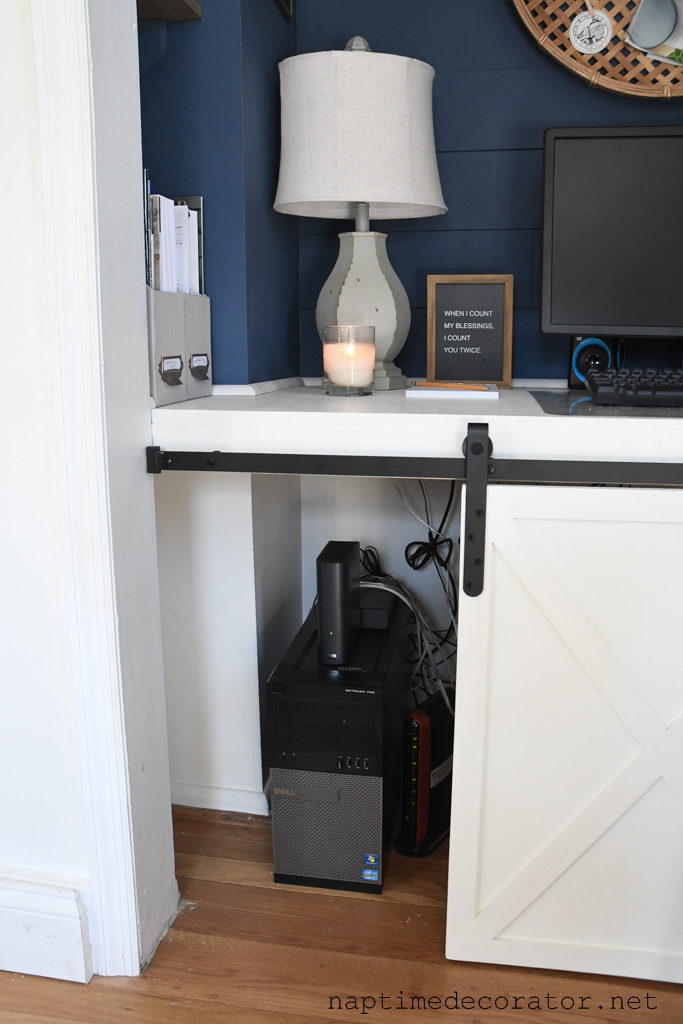
If you look in the corner there, you’ll see my husband also cut out holes for cords. He did one in each corner, and one in the middle, so the monitor and speaker cords go straight down. This makes me so happy. I hate cords!
I caulked where the plywood meets the 1×2 base, then primed and painted in Alabaster.
Now time to figure out the mini barn door to hide all the business underneath…
We found a 4 foot barn door hardware kit on Amazon – (the one we ordered is currently unavailable but this one looks just like it – affiliate link):
Got that up, then used a half inch piece of plywood to DIY a custom door. We measured how big we wanted it so it would be wide enough to hide the stuff, but still able to fit a chair comfortably.
![]()
To create the X, we used some quarter inch trim cut to size, caulked the corners and used wood glue (clamped overnight):
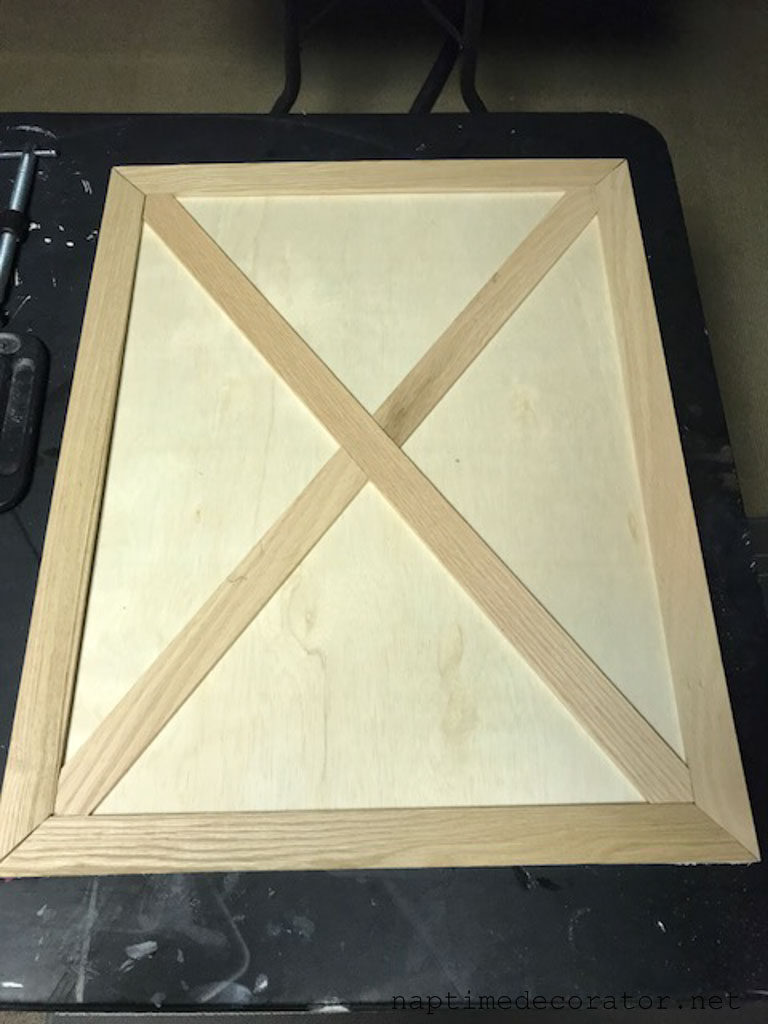
I painted it with the same Alabaster to match the desk. My husband attached it to the hardware and voila!
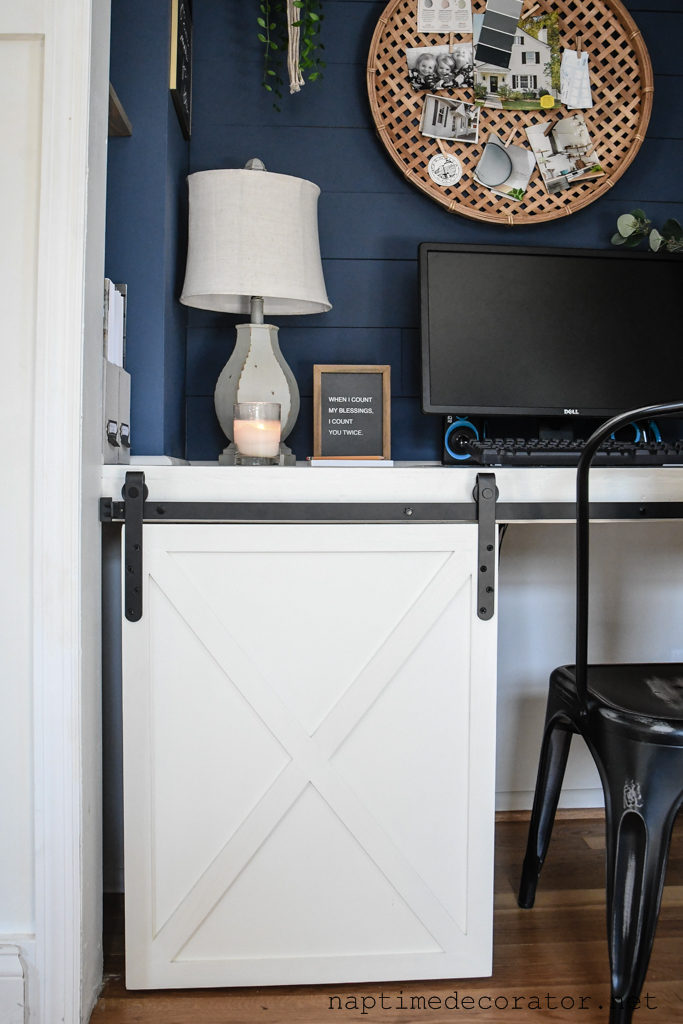
Oh! one more thing to add to the desktop – we used some quarter round all around to give it a more polished look around the edges. They weren’t perfect, but this makes it appear that way;)

You can see in that pic above, the hole behind the lamp for the cord, and on the right side, the cord from the speaker going down another hole. You can also see we ordered a plastic protector for the desk under the keyboard. We figured with a family of five, including three kids, it wouldn’t be a bad idea to protect the white paint from looking grubby and staying clean, you know? Here’s the one we ordered (affiliate link):
But ummmmm, look at the one I just found – wish I’d have seen this before we bought the clear one! 😉
(aff link)
Just give me alllll the shiplap forever and ever amen!
With the exception of the copper pipe drama, this went as smooth as it could’ve for two people who had never done anything like this before! It feels extremely sturdy, and I can’t tell you how wonderful it is to have this office a part of the family room. My husband has a few side jobs, which include photography and a sports blog, so often times at night he is in here editing photos or typing up an article, and it’s nice that he can still be a part of the family time when we’re all in this room.
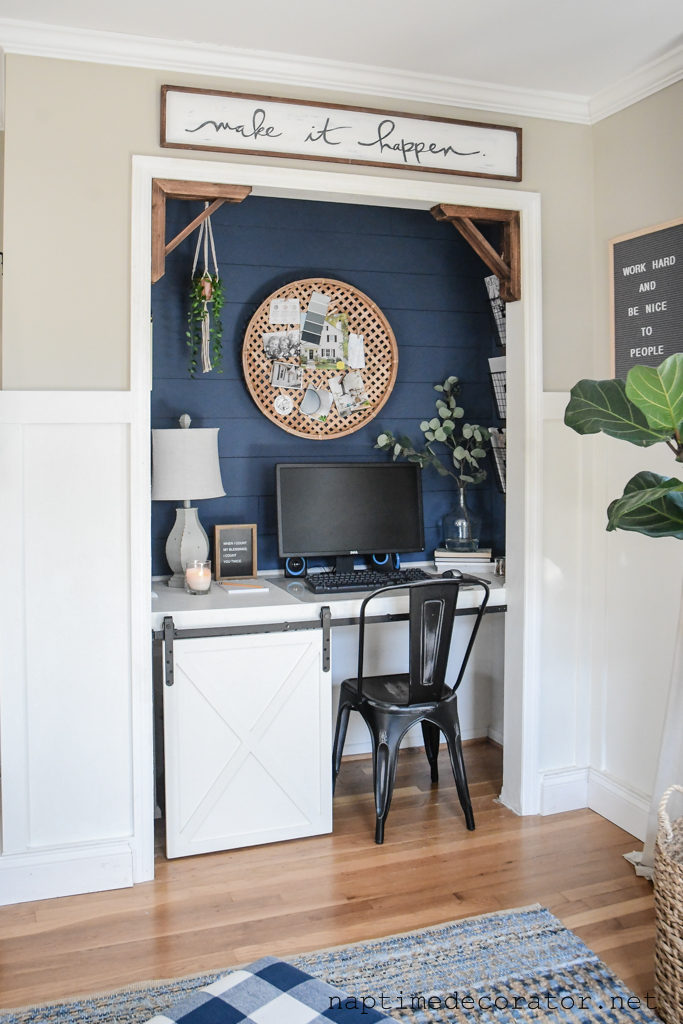
We’re both very proud of this project and it’s always fun when we complete something like this – to look back at it and realize we did this together, not having a clue how it would all turn out, but hoping for the best. Even if there is a little drama along the way;) It’ been a really sweet and useful addition to our family room.
Totally worth the two years we waited to get this done;)
(I tried to include all the details, but if you have any questions please feel free to leave a comment below and I’ll get back to you!) 🙂

 Hi there! I’m Liz, a former teacher-turned-stay-at-home mom to three kids, with a passion to create a warm and inviting home on a budget. This blog all started when I’d put the babies down for a nap, and squeeze in a project during those precious couple of hours! My hope is that you visit this page and feel inspired to do a little “naptime decorating” of your own. Thank you so much for stopping by!
So happy to hear your daughter is doing better. It is so scary when our children don’t feel well. Continued blessings!
Robin
Thank you so much, Robin! It is very scary for sure. So happy she’s getting back to her old self!:)
Oh my goodness, so glad all is well now! Lots of prayers were sent your way! We’ll keep ‘em coming !
😘
Thanks, Anne!!
I just found you. I love this! I wish I had a closet to do this set up. I’m trying to find a corner for the built-in bench in your family room.
Thank you so much, Lisa! Welcome! So happy to have you here:)
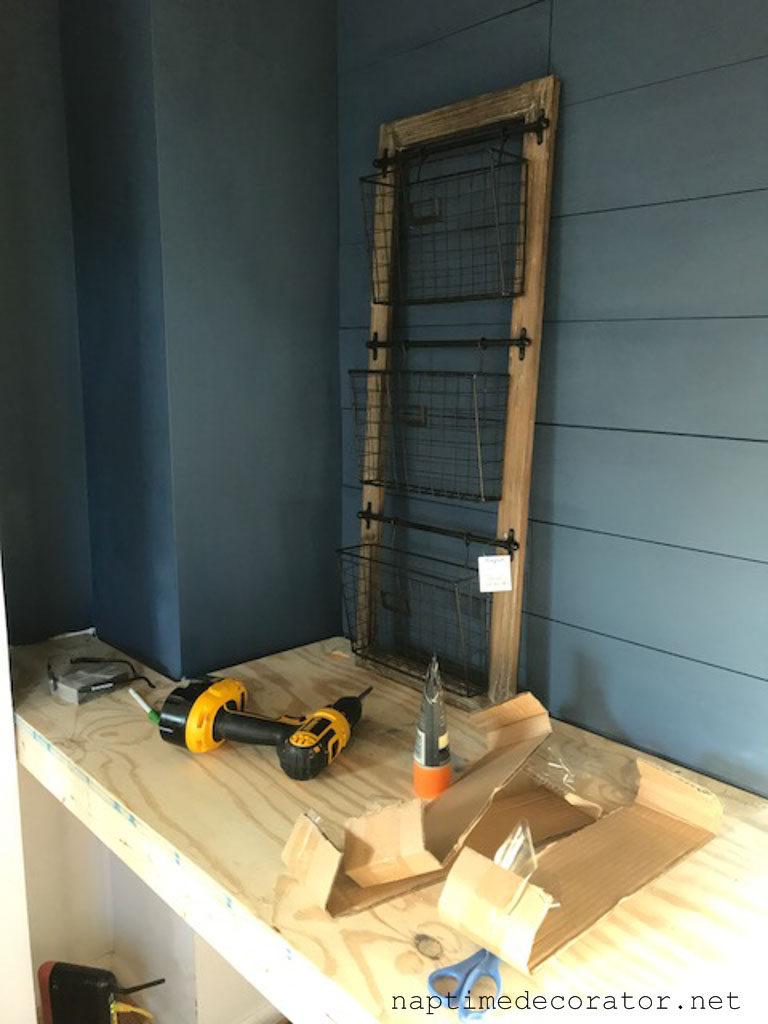
I am new to your blog and love all your posts and decorating. Can you tell me where you purchased the cute 3 basket wood piece you have on the wall?
Thank you! It’s from Marshalls.