Let me start off by saying a huge thank you for all the lovely comments left on my Naptime Decorator Facebook page and Instagram regarding the Basement Makeover! You all are SO sweet, and I’m so glad you love it as much as I do!
If you missed it, you can click here and check it out.
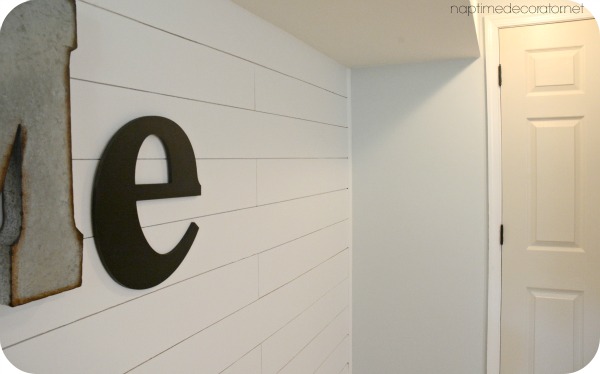
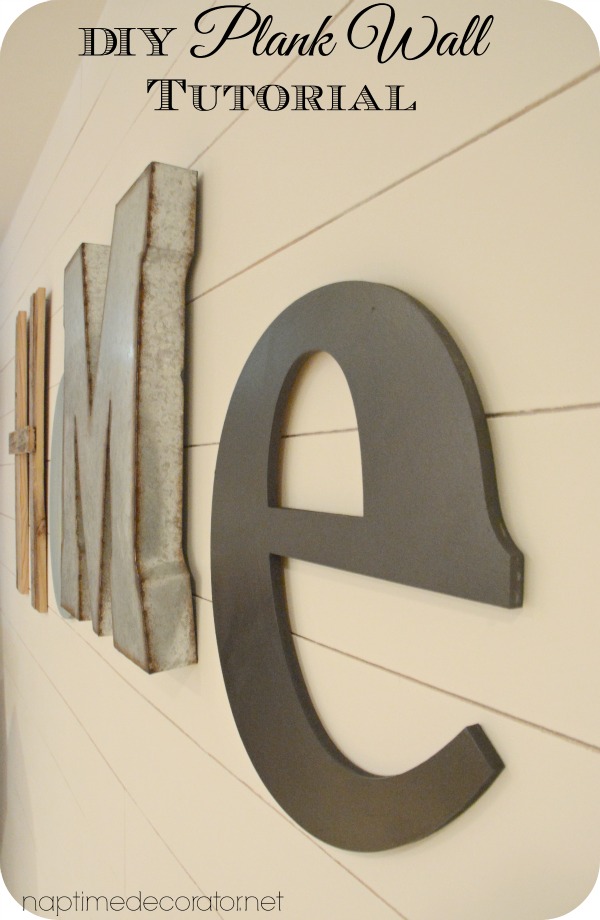
As promised, I’m going to start diving into the posts on each aspect of the room – starting with the plank wall. I can’t even tell you how much I love this wall. We’re going to put one in our bedroom next and I can hardly wait. And for not knowing what the heck we were doing, we (or should I say my husband) rocked it. (If I do say so myself;). It was so funny, in the middle of this project, he says to me, “You know, we really should have our own HGTV show…called ‘Wingin’ It.’ Because that’s really how we seem to attack all these ideas in your head.” Hear that HGTV? If you want two people who have decorating ideas and start them without really knowing what they’re doing, GIVE US A CALL! We’re your people. Just sayin’…
So it all started with this chalkboard/kid art wall:
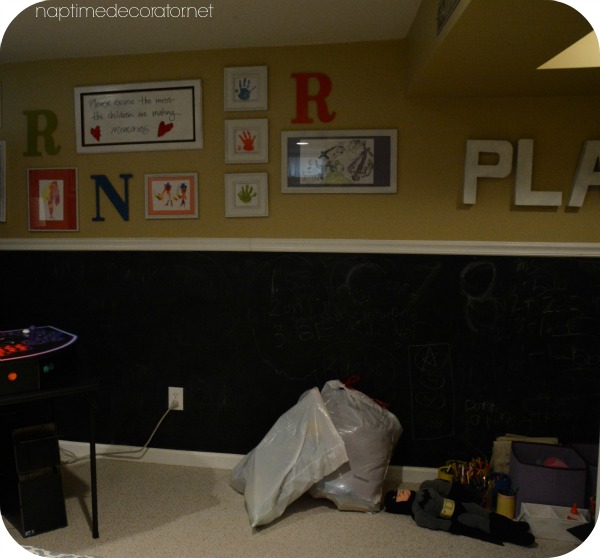
Which, ironically enough, is one of THE very first projects we ever tackled. Didn’t even have a nail gun back then – we used a good ol’ hammer and nails to attach the molding…which we cut using a box saw! Wow, we’ve come a long way.
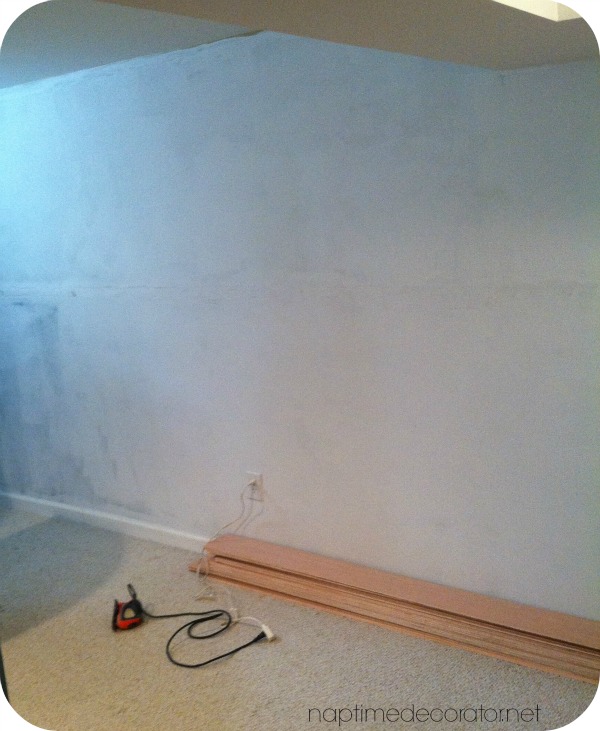
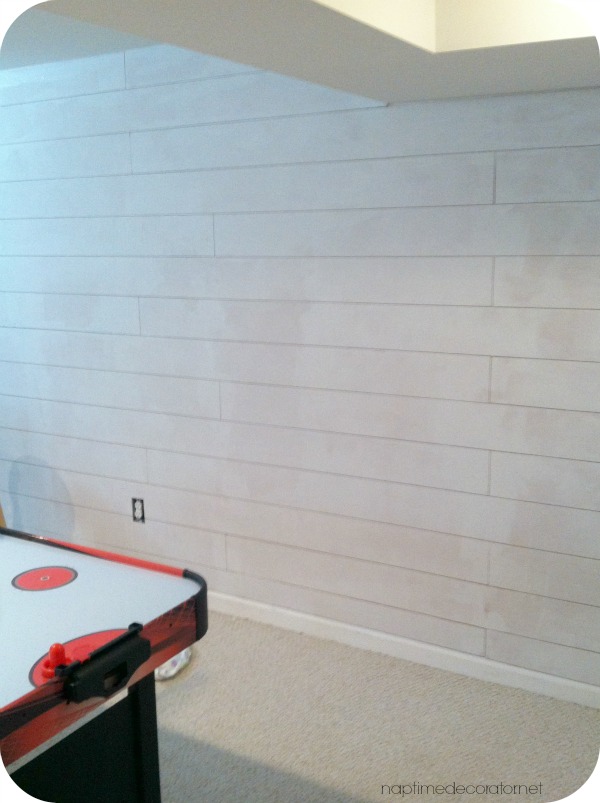
And that wall now looks like this:

Just a teensy bit brighter, huh?
First, we ripped off that molding. The wall was a mess behind where the molding was, so it’s a good thing I had this plank wall in mind! Covered it right up. Don’t know why I don’t have a pic of this stage, but basically, I spackled it up sanded it down, and primed the wall. You wouldn’t think color would show through those tiny crevices, but it does. So I’m very glad I listened to my husband and didn’t skip that step.
I apologize for these horrific phone photos I’m going to make you endure. When we’re in the middle of stuff, it’s just too easy to snap a pic with that thing rather than get the big boy camera out. One of these days I’ll learn…
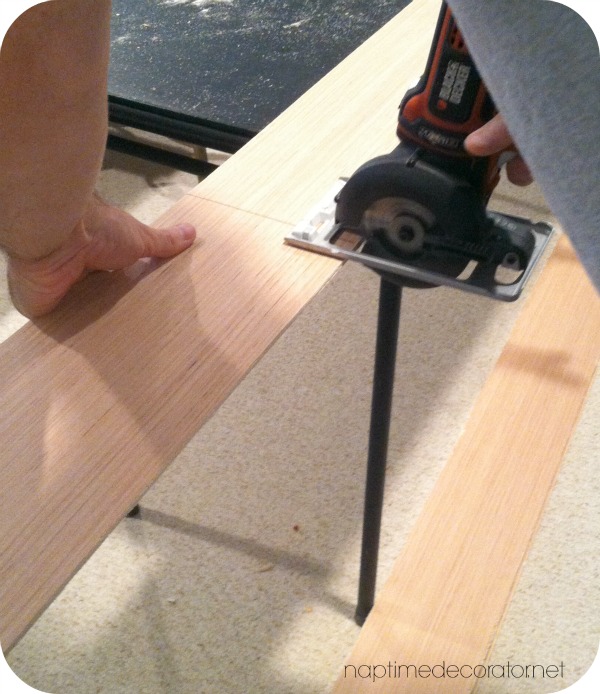
First, let me tell you about the wood we ended up using. My husband went to Lowe’s and had them cut three 4×8 sheets of thin plywood (5.0mm thickness):
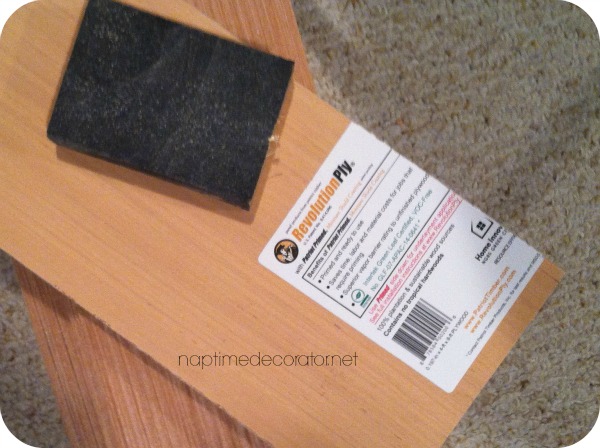
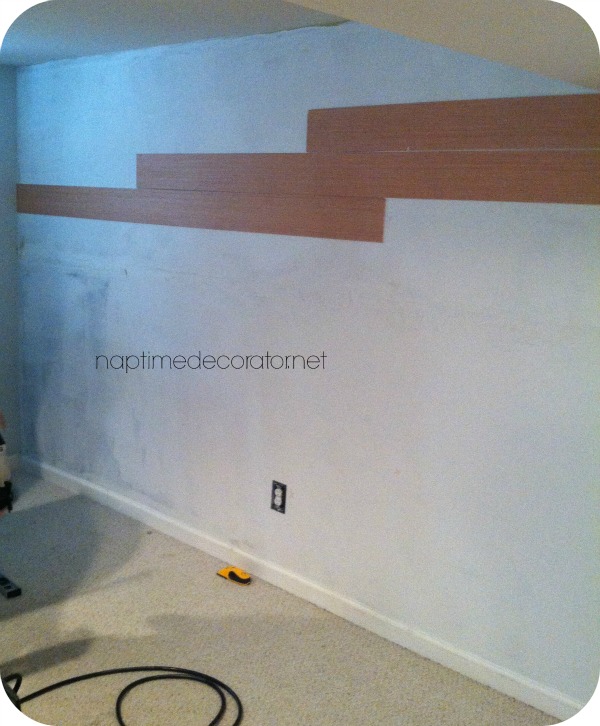
We ended up buying an additional sheet – only needed a tiny bit more after the 3 sheets we bought initially, but oh well. It’ll get used! They’re about $11 a sheet, so this really isn’t an expensive way to add major character to a room. I used that sand block to smooth out the edges of each piece, and we discussed where to begin. This was the hardest part, I think. Again, neither one of us had a clue what we were doing, so we didn’t want to screw up the entire wall by starting on the wrong foot. We ended up starting by the bump out (duct) in the ceiling so we wouldn’t have to have an awkward cut out piece around it. Many houses have uneven walls, so I suggest if you do start at the top, keep leveling like crazy. If you go flush against the top of the wall where it meets the ceiling, and it’s not level, your whole wall will be slanted. Trust the level. It is your best friend in this project.
So once we knew where to start, we added a little wood glue to the back of the strip, and used a nail gun (and small finishing nails) to get that puppy up there! Whew! We were in business…
Now…what kind of pattern, if any? The wall is long, so one piece was not going to cut it. And I didn’t want all of the end pieces lined up together, you know? So we went with this staggered pattern:
And kept on going.
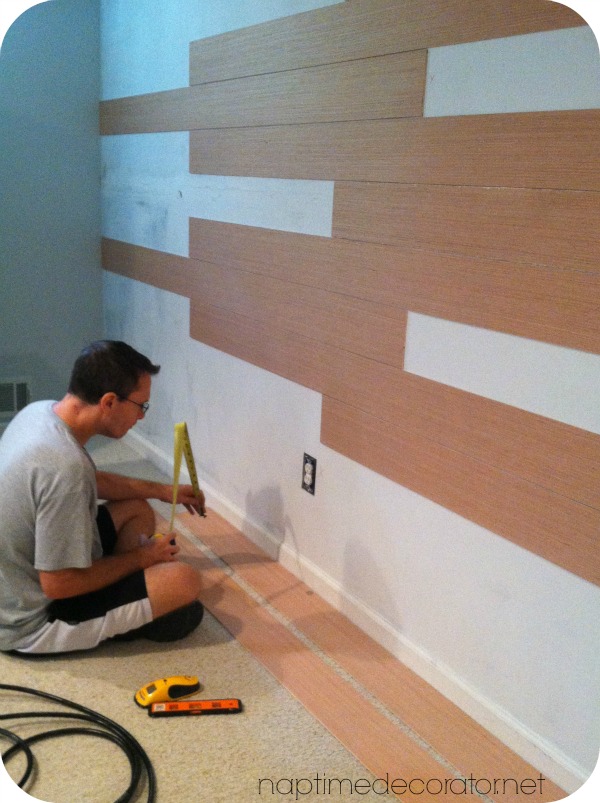
We used two nickels to slide in each piece as we went along, to ensure they were all pretty evenly spaced. And leveled EVERY time. Like a zillion times. I had this fear that we were going to nail all these pieces up and step back and see that they were all leaning up! Or down. Or whatever. Once we had the main pattern up, we just had to fill in the gaps. And see that handy contraption on the floor next to the level? That’s our studfinder, which also lets you know where the electrical wiring is so you can avoid shooting into it. Speaking of electrical, the outlet was a little tricky. We had to unscrew it a little to pop it out just a tad – so it was flush with the planks. This wood is super thin, so we didn’t have to do it much. (You’ll want to turn off the electrical, again, safety first!). A portable circular saw was the perfect tool to cut a little around the outlet.
And we were rocking and rolling!
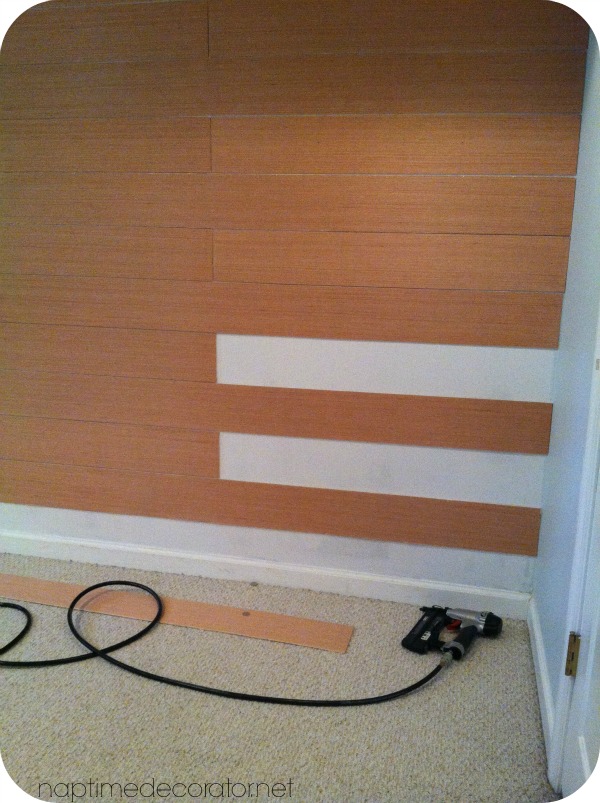
This is where we ran out of wood! UGH! Good thing we live close to home improvement stores;)
You’ll notice the last piece is a little smaller – we knew the pieces weren’t going to be a perfect fit, and the top and bottom would need to be slightly slimmer. So I believe we ended up using 4 inch pieces there, as opposed to 6 inch.
Then it was time to fill in all the nail gun holes with some wood filler.
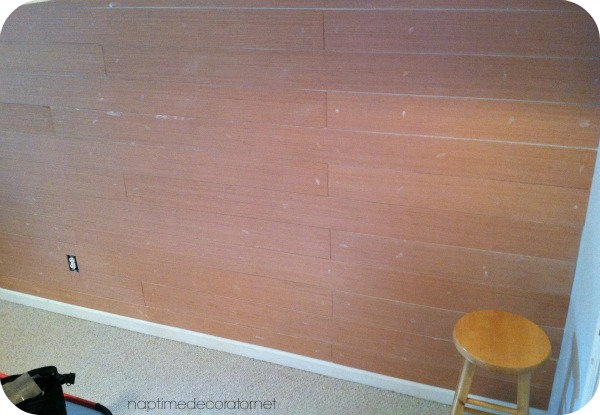
Then sand all that down, wipe the dust off, and prime! Actually – I almost forgot. I did caulk where the ceiling meets the wall to make it look flush. Just finishes it off nicely, rather than seeing the gap.
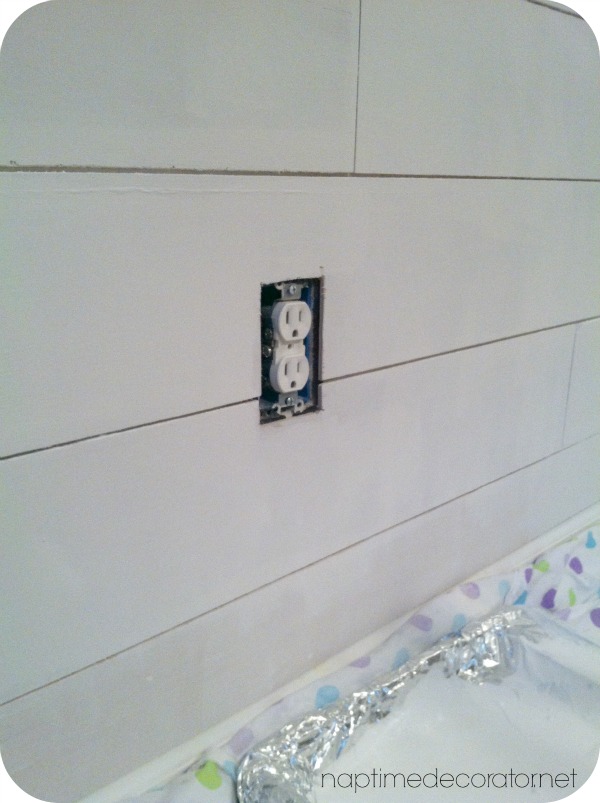
(A closeup shot of the outlet, so you can see how we cut the wood around it).
All that was left was to paint! I used Behr White – it’s actually called that. And it was perfect. Not too bright, but still nice and white.
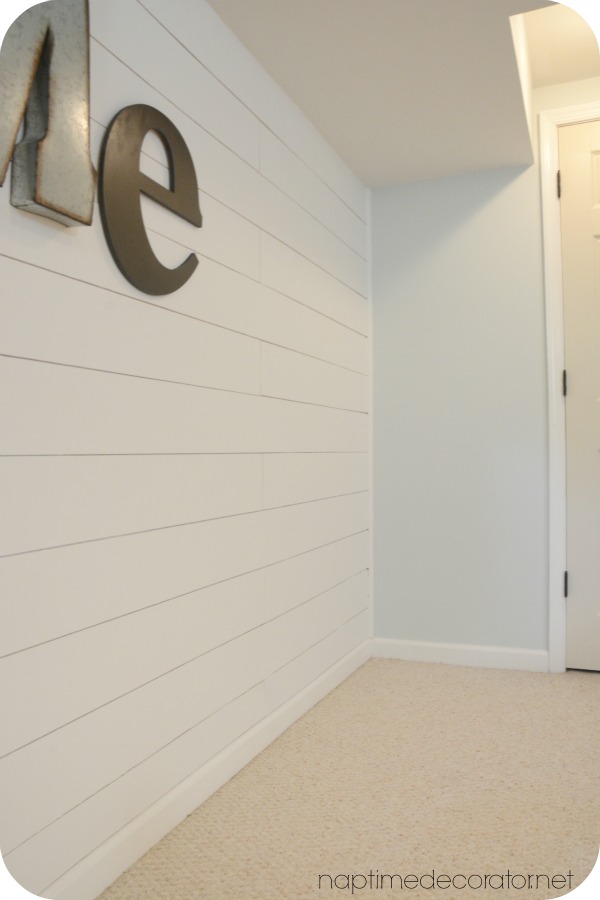
You can see in this photo, we added quarter round to the two sides to give it a finished look. Again, this was one of those things we weren’t sure what to do, but sounded right and ended up looking great. Didn’t even need to do any fancy cutting, just a straight cut and it fit nice and snug with a couple shots of the nail gun.
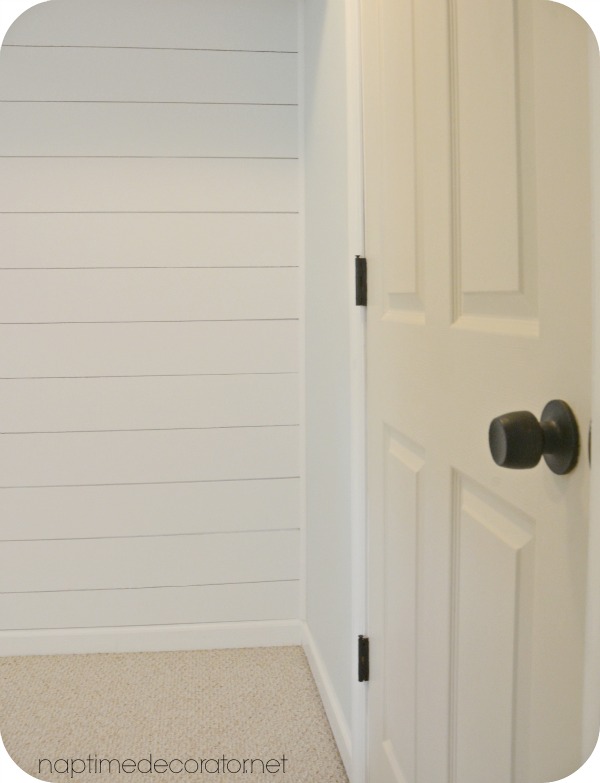

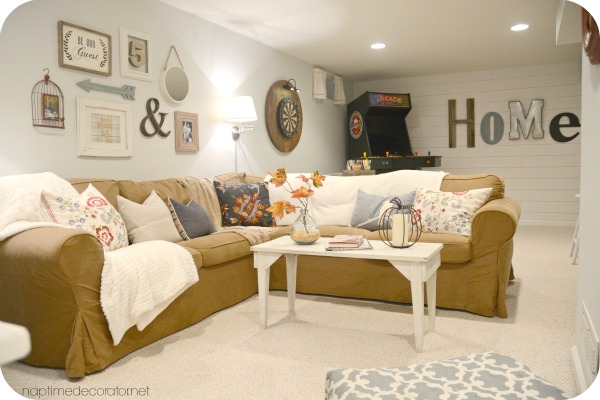
I feel like that wall was made to be a plank wall. And really, once we got moving on this project, it only took a weekend. Half the day putting it up, then sanding and caulking, then priming and painting the next. And we had everything but the wood, so it was less than $50.
To sum up, we used:
-4×8 sheets of plywood at 5.0mm thickness (cut into 6 inch strips)
-nail gun
-small finishing nails
-portable circular saw
-wood glue
-level
-two nickels
-wood filler
-sanding block
-caulk
-primer
-paint
-electrical studfinder
I give my husband huge props for bringing my vision into reality. Even if we do always wing it…;) There was even very minimal curse words flying about with this one – how ’bout that?! He told me after it was done, that it’s probably his favorite idea of mine…I think it might be mine too.
Can’t wait to start our next plank wall upstairs! Keep ya posted!

 Hi there! I’m Liz, a former teacher-turned-stay-at-home mom to three kids, with a passion to create a warm and inviting home on a budget. This blog all started when I’d put the babies down for a nap, and squeeze in a project during those precious couple of hours! My hope is that you visit this page and feel inspired to do a little “naptime decorating” of your own. Thank you so much for stopping by!
I’m in love!!!!! I’ve wanted to do this, too. Can’t believe I never thought of using plywood! You guys did a great job and I can’t wait to see it in your room, too!
Thanks, Lyssa! 🙂
its absolutely beautiful. what a fun and bright space
Thank you so much!
So gorgeous ! Wishing I had a basement ! Hmmm maybe my sons room
You inspired me to paint my kitchen table and chairs what I had already I was kind of tired of so that goes into storage and I scoured everywhere for the perfect set to fit in with the new kitchen plan I have in my head for the future. Found it last week for a bargooon ! I’m going to use chalk paint for the chairs and base then refinish the top with that special walnut you used on the island which was an amazing transformation by the way !
Did Lowes rip your pieces down to 6 inches for you? I asked them about doing it where I live and no home improvement store will rip down to less than 12 inches.
Yes, they do it for us at Lowes and Home Depot here.
When they ripped the plywood for you, what size were your planks 6” x 8’ OR 6” x 4’ ?
6 x 8