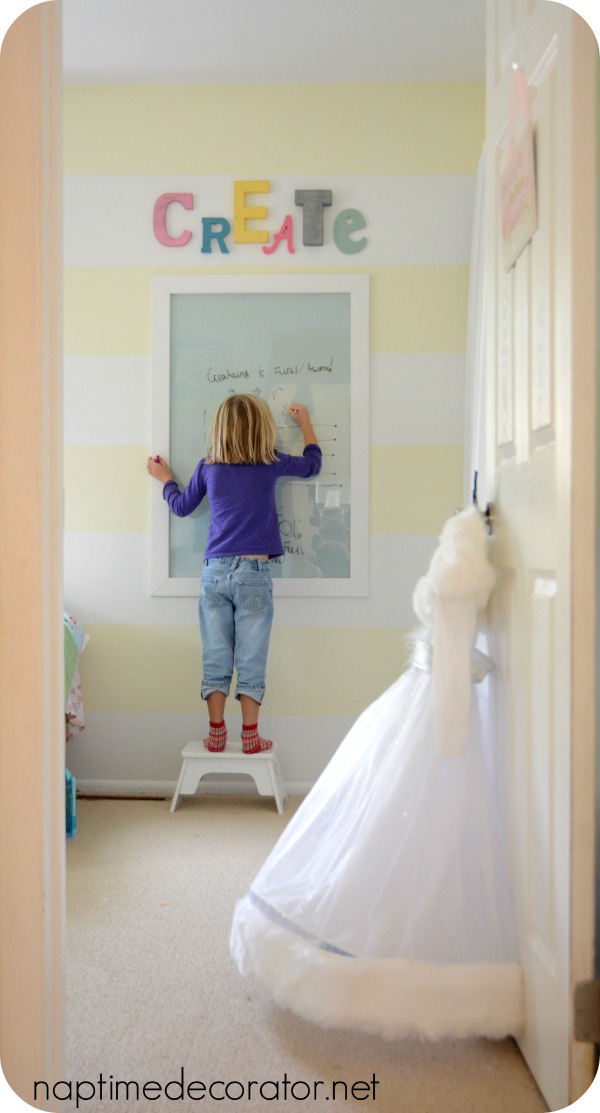
You might remember my younger daughter’s room makeover included this DIY dry erase board:
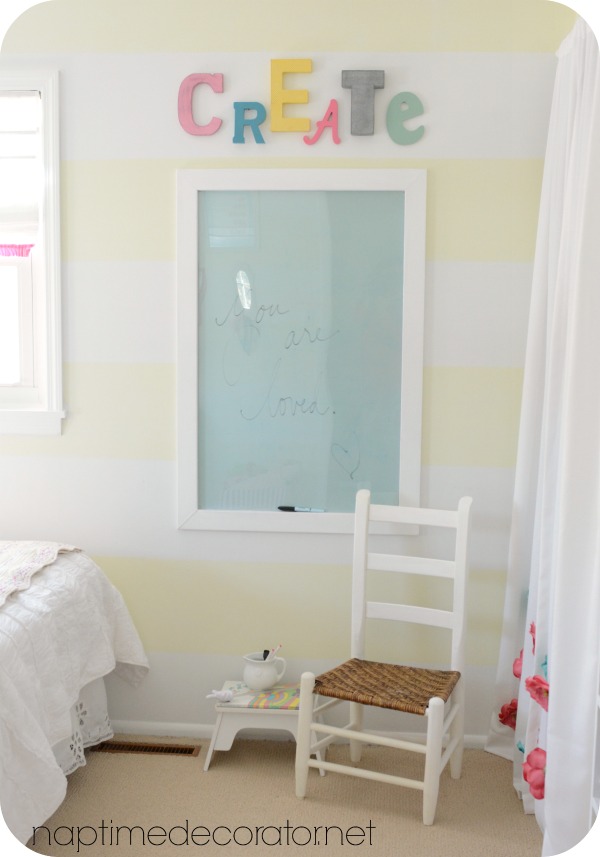
Every once in a while I have a crazy idea that actually pans out and I’m really proud of…this was one of them. All three of my kids play CONSTANTLY on this thing, so I knew I had to create a similar space in my older girl’s new room. (For the record, my son is already telling me he would like one in his room makeover too;)
I picked up one of those plastic poster frames again, from Michaels…
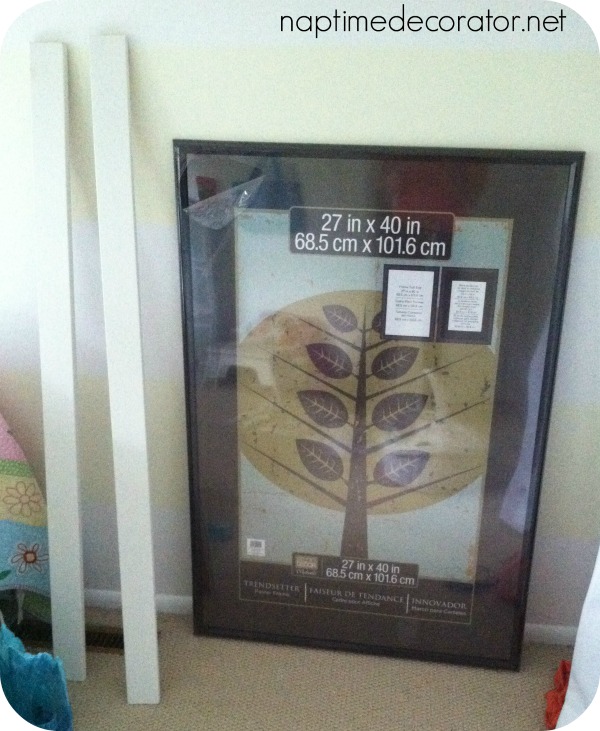
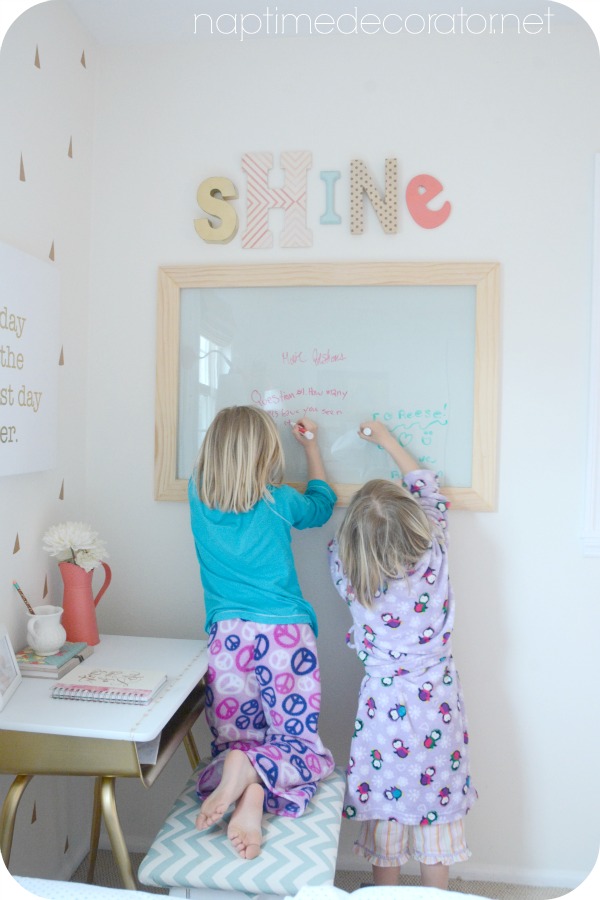
This photo is from my other’s daughter’s post. I got a slightly smaller one this time – it’s a 24×36, and I only use the plastic insert piece. I painted a rectangle on her wall using Sherwin Williams Rainwashed (leftover from my master bathroom makeover!) of the same size of the plastic insert. Give or take – there’s going to be molding all around it that’s a couple inches wide, so exactness isn’t really important.
I used painter’s tape to secure the plastic on top of the Rainwashed rectangle (once it was dry of course).
Sorry, there are no photos of all these steps – but over on my previous post when I did this the first time around, there are pics if you want to see!
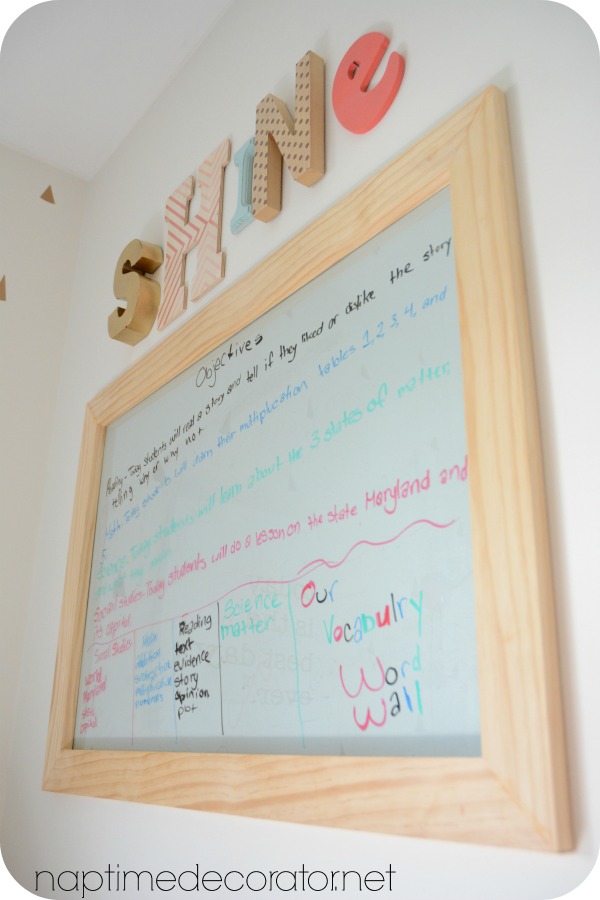
I decided to go horizontal instead of vertical with the rectangle this time, and instead of white trim, I bought pine and stained it with a natural stain. It’s an extremely light stain – barely noticeable – and I just thought it would look nice and soft with her color scheme. Plus, with her white/cream walls, the white trim would barely show up. At least now we have some contrast. I thought these subtle differences might make it feel like I wasn’t doing THE exact same project for her room. My husband mitered the corners for me, bless his heart. Then, he secured the trim on there with his nail gun – just placed the trim over the painter’s tape border, so that’s hidden. I filled in the little nail gun holes with a little wood filler.
We were done!
But…
I love the word Create above my daughter’s board…
I had a tough time thinking of another word, until it hit me!
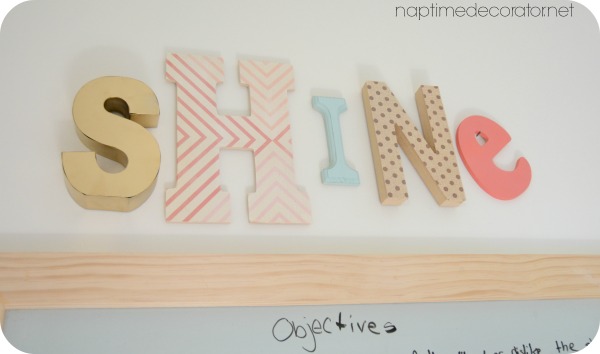
SHINE!
Yes! So perfect for her.
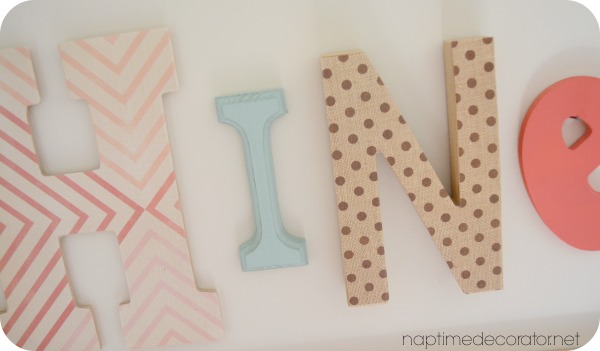
I picked up a bunch of letters in different fonts, sizes, materials, etc – all from Michael’s…
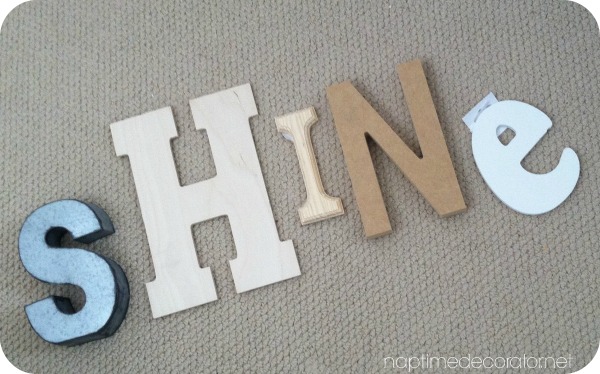
The S was spray painted gold. The H and N were covered in Mod Podge and scrapbook paper:
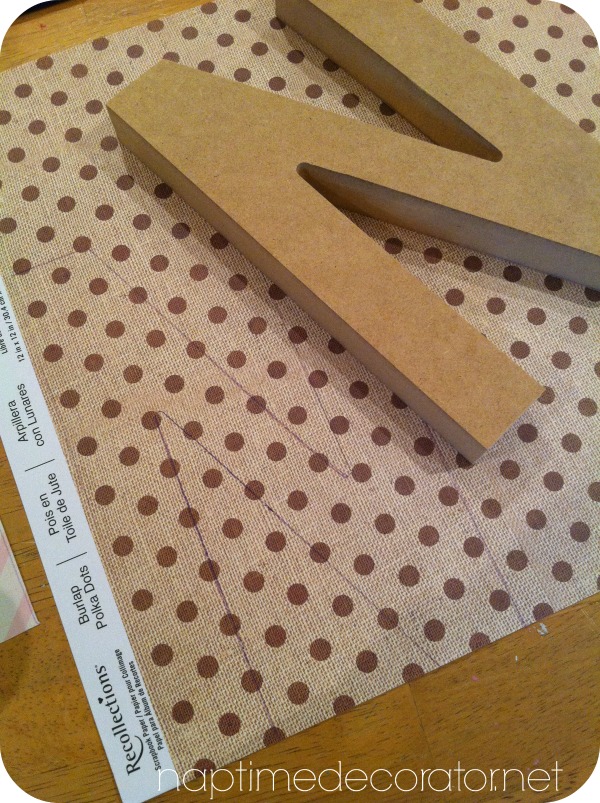
Just trace, cut, brush Mod Podge on the letter, and stick the cut out paper letter on there. Add a layer of Mod Podge on top too.
The I was spray painted with Valspar La Fonda Mirage, and the E was spray painted with Krylon Sunrise.
I hung up the ones I could with nails, and the ones I couldn’t (the flat wooden letters) with those nifty little Command Strips.
THEN we were done!
For real this time;)
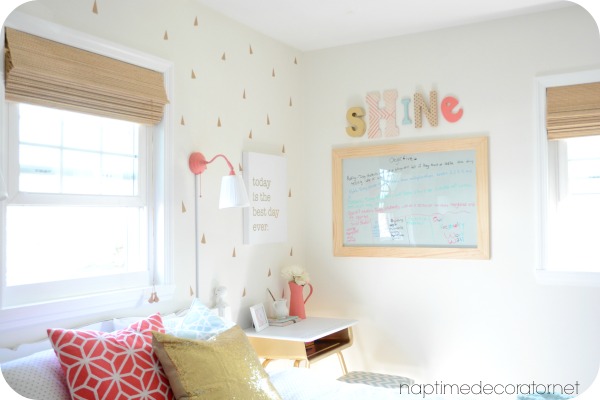
A little different than her sister’s:
But still just as fun:)

 Hi there! I’m Liz, a former teacher-turned-stay-at-home mom to three kids, with a passion to create a warm and inviting home on a budget. This blog all started when I’d put the babies down for a nap, and squeeze in a project during those precious couple of hours! My hope is that you visit this page and feel inspired to do a little “naptime decorating” of your own. Thank you so much for stopping by!
Your girls are so adorable! btw l love the gold desk – super cute and different!
Thanks, Lynn!