One of the benefits of writing a DIY blog is that family members often think of you when they’re getting rid of furniture. Basically, you get lots of free stuff, since they know you love breathing new life into pieces they once loved, but have either outgrown or fallen out-of-love with.
Like this vanity my sister-in-law recently passed onto us. Her daughter had it in her room, but has grown up and they were going to get rid of it. Since I have two girls and live for furniture makeovers, she sent it my way;)
Immediately the wheels started turning…
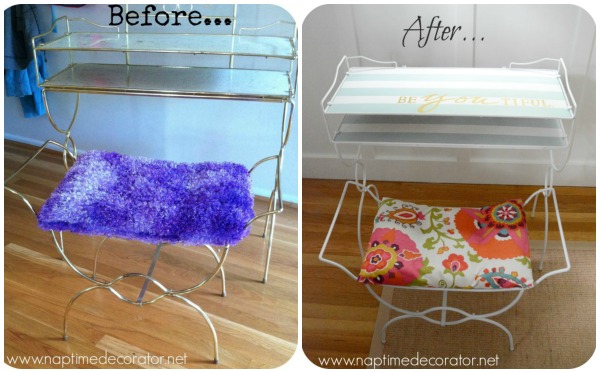
I had EVERYTHING I would need to turn this piece into a lovely new vanity for my big girl’s room. ON HAND! That’s right. This same vanity went from this:
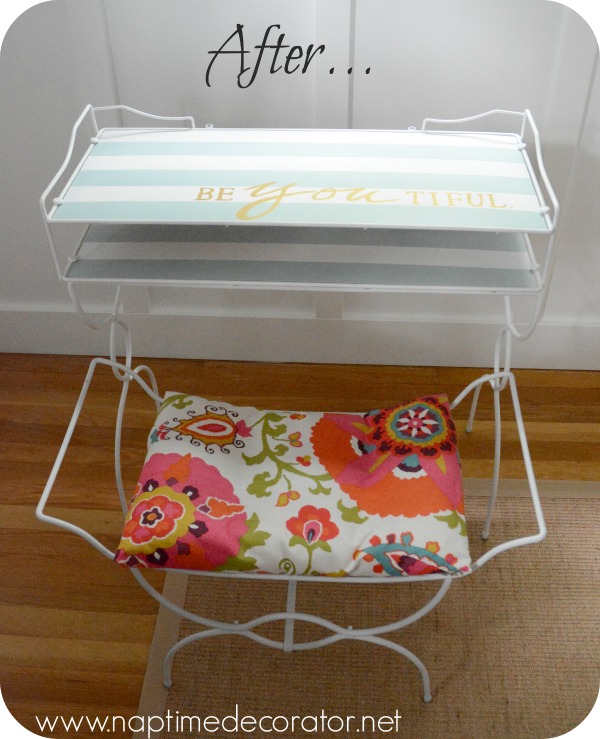
to this:
for ABSOLUTELY NOTHING! How sweet is that?!
It was a multi-step makeover. First, let’s start with the bench.
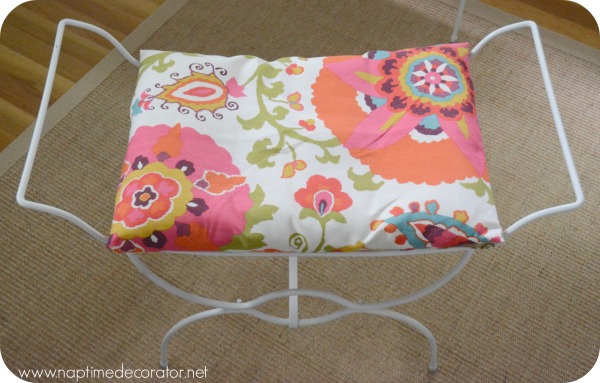
I simply ripped off the purple shag fabric, and there was a yellow pillow underneath. I had a piece of fabric leftover that would match my girl’s room perfectly, so I took it outside, laid it face down on my porch, and used some fast tack upholstery spray to wrap it like a present.
That stuff ain’t goin’ nowhere. So that’s done.
Moving on…
The vanity top needed work, as you can see in this pic:
Turns out, they pop right out! So I took just the brass base and bench base outside and used Valspar Paint and Primer in One (Satin White). Gave them a few coats, then used a protective clear spray paint to really make sure it holds up to the wear and tear that is an 8 year old girl. Sorry, didn’t get pics of this stage for some reason? Bad blogger…
I also painted the two surface pieces that popped out with white spray paint. Wasn’t sure what I’d be doing to them, I was thinking stencil of some sort, but hadn’t decided, so I figured white was a safe starting point.
Then it hit me.
My daughter’s room (in the midst of a makeover) is going to be coral (remember her dresser?), very soft blue/green, and accents of gold. So I had an idea…
I grabbed a sample of Sherwin William’s Watery that I had left over from a previous project. Some painter’s tape. And a measuring tape. Here we go, I’m thinking...I hope this turns out as cute as it is in my head!
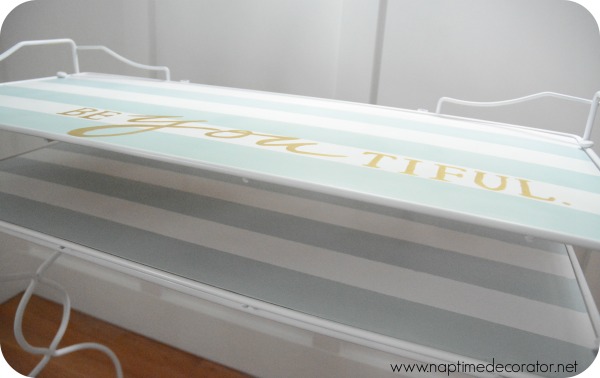
I measured two inch strips, and only painted the Watery sections, since the rest was already spray painted white.
After two coats, I removed the painter’s tape.
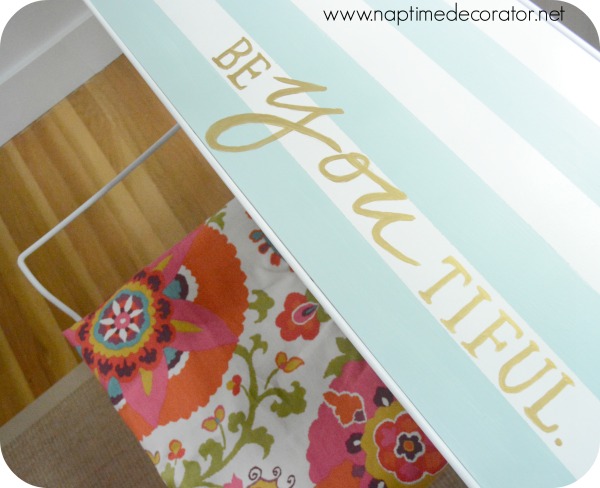
Once it was dry, I grabbed my 1.5inch letter stencils and some gold metallic craft paint. Pays to have a ginormous stash of crap supplies in times like this;)
I knew just the right word to write on here:
Be-YOU-tiful.
Right?!
It is a vanity after all. And I always want my daughter to be true to herself, and know that she is beautiful.
Perfect.
I used the stencils for the first and last part of the word, and freehanded the YOU part.
Had to go over it a few times, that gold metallic craft paint isn’t the thickest of paints.
Once that was done, I took it outside and sprayed it with clear protective spray paint also.
Stuck it back in the vanity base, and…ta-DA!
Super observant readers might notice there’s a mirror attached to the before vanity. I decided to remove that and use a pretty gold mirror that’s larger instead. Once her room is complete, I’ll hang it and you can see it in all it’s glory:)
So one more before and after, just for fun…
Just can’t beat a freebie makeover!






 Hi there! I’m Liz, a former teacher-turned-stay-at-home mom to three kids, with a passion to create a warm and inviting home on a budget. This blog all started when I’d put the babies down for a nap, and squeeze in a project during those precious couple of hours! My hope is that you visit this page and feel inspired to do a little “naptime decorating” of your own. Thank you so much for stopping by!
The transformation is incredible. I probably would have rejected this vanity in its sad “before” condition. You did an amazing job! Your lucky daughter…
Thank you, Heather!
This is once again another fantastic upcycled project! Way to go!
Thanks so much, Kate!!:)