Before I say anything else – I need to say a huge Thank You. I should have started off my last post with it and I was remiss. For all your love, kindness, and support regarding my Scary Month post – for sharing your stories with me, for telling me that my words helped lift you up and were what you needed to hear as you face some tough times – I am blown away. Sometimes – especially lately – the whole socially connected world can seem so harsh…but it can be so very good, too, and we proved that. So thank you, I love you, and we are in this together.
Ok, now that I’ve gotten that off my chest:)…
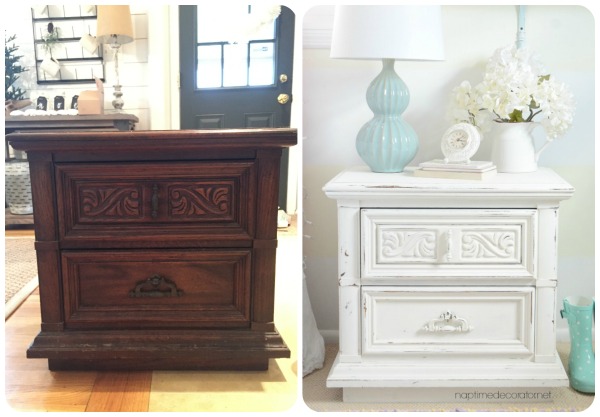
Remember my last post, on that $5 table makeover?
You might recall I mentioned buying two tables from that same person on the yard sale site? So basically I bought two end tables for less than people spend on lunch at the mall – well, I don’t really know that for a fact, I’m just assuming. I haven’t been in an actual mall in years. YEARS. Wow, what’s that about by the way?
Ok, getting off topic…
The one I just did for my daughter’s room inspired me so much, I couldn’t wait to get my hands back on the other one (I’ll explain what I mean by ‘back’ in a sec). I didn’t really have a spot for it, but I had a vision in my mind and I thought it might be fun to do it anyway, even if I wouldn’t be the one keeping it. (I did it Friday and the next day it ended up at my sister-in-law’s house for her guest bedroom! Yay!)
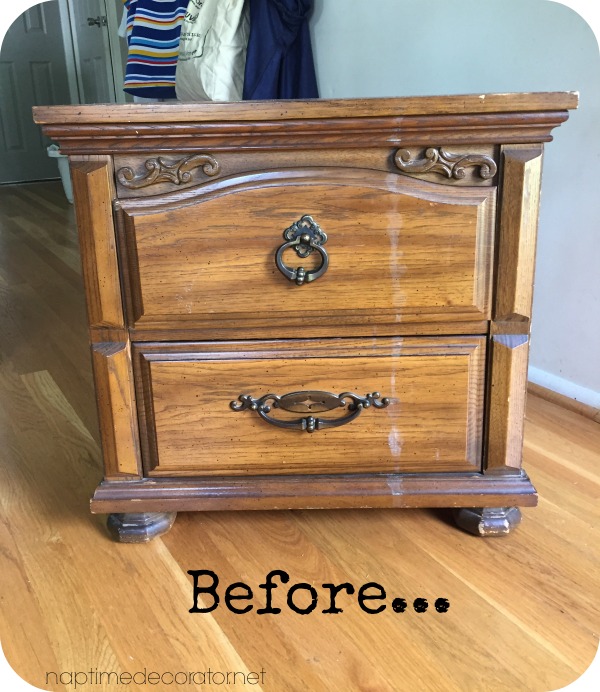
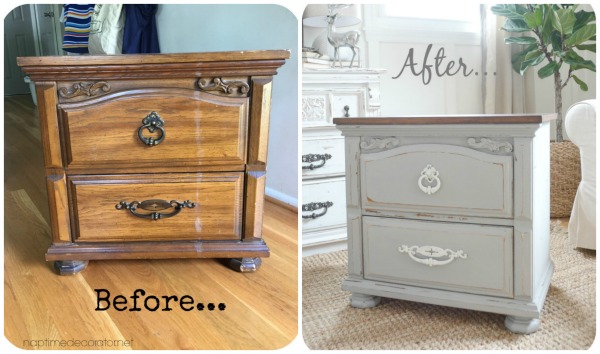
Here’s what it looked like before:
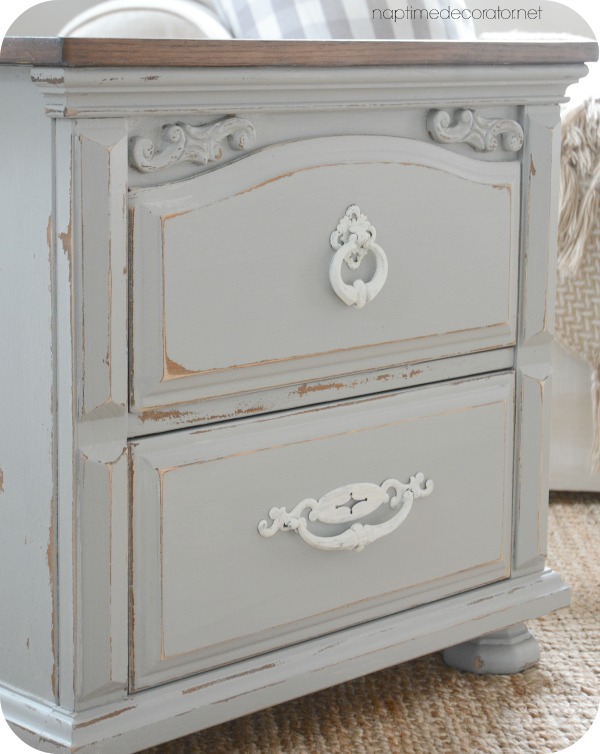
And the after…
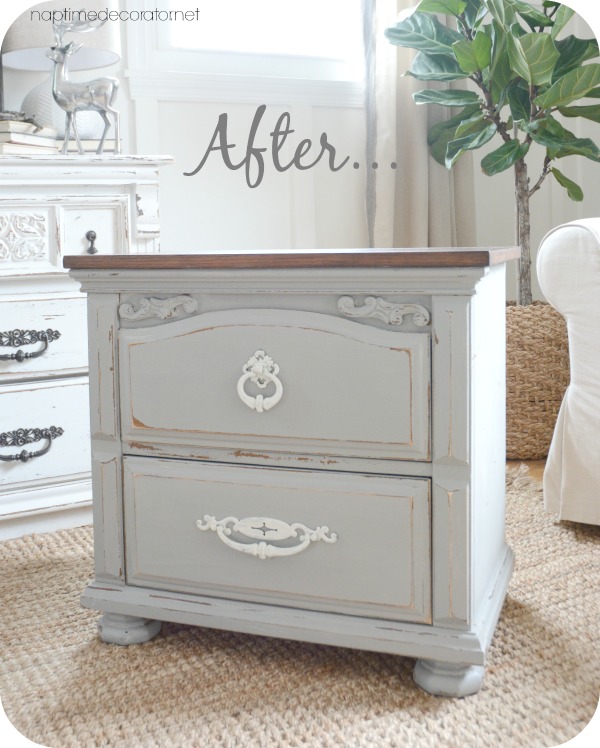
GAH! I love this little beauty. I tried so hard to make her work in here somewhere, but there was just no spot. But now she’s at my sis-in-law’s, so I’ll get to check in from time to time. And yes, I just personified a table. This should not surprise you. I mean, just look at HER!
First up, I did the top. You can see in this photo below that it was in pretty rough shape:
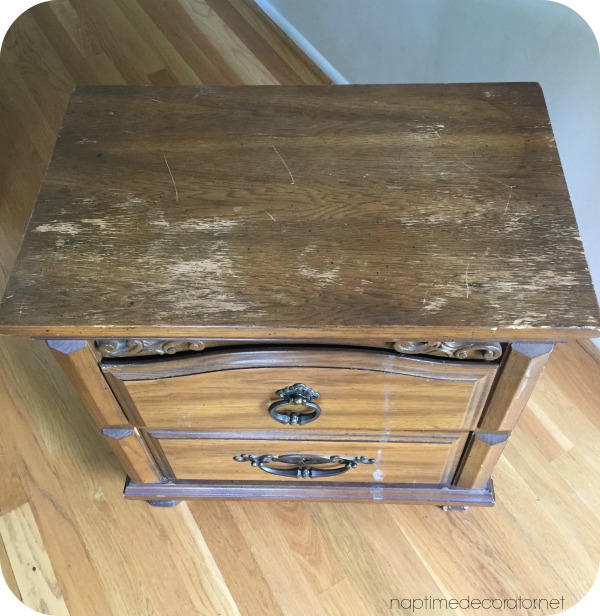
And since I had some java gel stain leftover from my banister makeover this summer, I just slapped a very light coat of that right on top with a cheap foam brush! Worked like a charm. I love love love that gel stain stuff. I did this part over the summer and it has been sitting in my laundry room ever since. I’m SO motivated sometimes, let me tell you. I get RIGHT ON THE THINGS. ALWAYS.
HA! I could barely get through that sentence. (P.S. Remember that post when I talked about my unfinished shiplap dining room wall and three different baseboards we have goin’ on over here? Yeah, so things are all still the exact same. I ooze motivation, let me just tell you.)
Fast forward many months, and I finally dragged that thing out of storage. I sanded down the dried candle wax and any other rough patches with a piece of sandpaper, and wiped off any dust. Then I got all Crazy Mad Scientist Lady and mixed a couple greys I had on hand – about half Sherwin Williams Light French Grey, and half SW Grizzle Grey. I threw in a spoonful of Plaster of Paris for a nice flat, easy application, and went to town. Took two coats, then after it dried, I grabbed my trusty orbital hand sander and roughed it up a little.
OH! Forgot about the handles – I took them off first, and since it was ridiculously freezing outside I did not spray paint them. Instead, I used some white paint and a brush. Not the easiest method, but since everything about this piece screamed chippy loveliness, I figured why not? If they get chippy, it’ll only add to the loveliness. Once they dried, I screwed them back on and we were good to go.
Look at the cute curves on this baby!

I mean, I sound like a broken record, but how amazing is paint?!!
It just never gets old:)
Have a great week, friends! XO

 Hi there! I’m Liz, a former teacher-turned-stay-at-home mom to three kids, with a passion to create a warm and inviting home on a budget. This blog all started when I’d put the babies down for a nap, and squeeze in a project during those precious couple of hours! My hope is that you visit this page and feel inspired to do a little “naptime decorating” of your own. Thank you so much for stopping by!
Leave a Reply