Hi there!!
I’m so excited to be back at this computer typing a new blog post for you! We’re starting to get into the groove of the new school year (though it’s been a bit of a rollercoaster!), and after a summer of not doing much to this house or on here, I’m feeling super energized and ready to dive back in! When I say I missed you, I really mean it. This blog wouldn’t be here without you, and I can’t tell you how much I appreciate that you are reading this right now. When I’ve got a project to share, I just can’t even WAIT to get to snapping pics and editing, so I can give you some (hopefully!) helpful information – and I am busting at the seams typing this one up!! Because maybe you’ve got a weird wall like I have (oh, and need more storage, are low on space, and a budget – all things I can relate to;), and if that sounds familiar, I think you’ll dig today’s post.
I’m about to get real here, people.
I have this weird little bitty wall that separates my kitchen and dining room. There was once a wall there, and all that’s left of the separation is a little trim. It is also the wall that contains the light switch to the kitchen, the phone jack, two outlets, and the thermostat. Oh, and each side is about 24 inches wide (ish). Try decorating around THAT, right?! Which is why I doubt you’ve ever seen – in six years of blogging – this little bitty wall in all it’s glory:
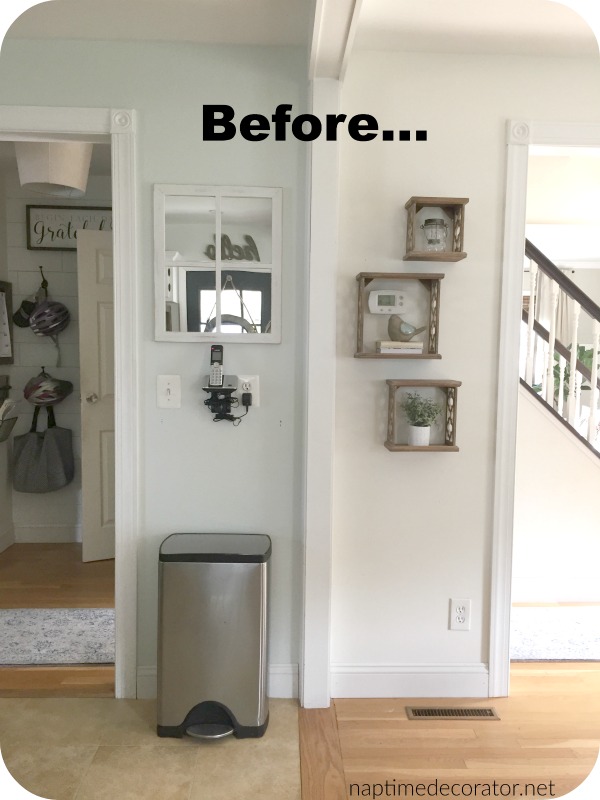
Oh right, and the trashcan. Forgot about that – really adds a nice touch too.
And I forgot to add, that I couldn’t put anything deep there either, because people would walk right into it as this wall kinda floats in the middle of our hallway. Fun fact: The other side is this Gallery Wall:
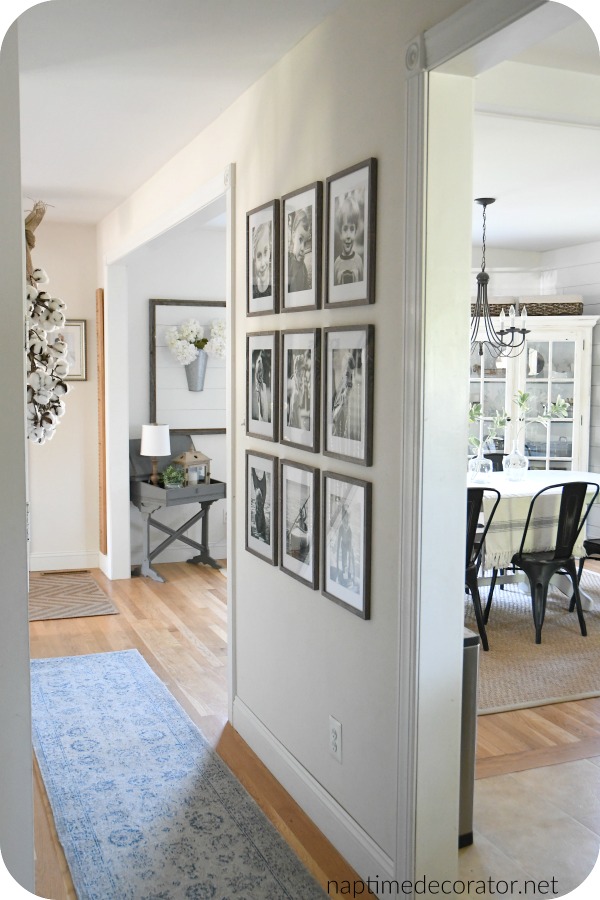
See that sweet little trashcan peeking out? 😉
So I finally decided I couldn’t look at that floating phone and all around hot mess anymore. I had an idea a few years back when I was at IKEA – they have these metal Hyllis shelves that are less than 11 inches deep, and 23.5 inches wide. Remember what I said about the width of the wall being 24 inches? How’s that for perfect?! Oh, and I left out the best part – the price! You ready for this? $14.99!! WHAT???
But for some strange reason I wasn’t fully sold back then and didn’t throw them in my cart. My guess is I already overdid it and decided not to pile on $30 more bucks;) Happens a lot.
These shelves popped in my head again a couple weeks ago though…after searching for years for an answer that wasn’t going to break the bank, I was ready to give these a shot. I picked them up, brought them home, and put them together…
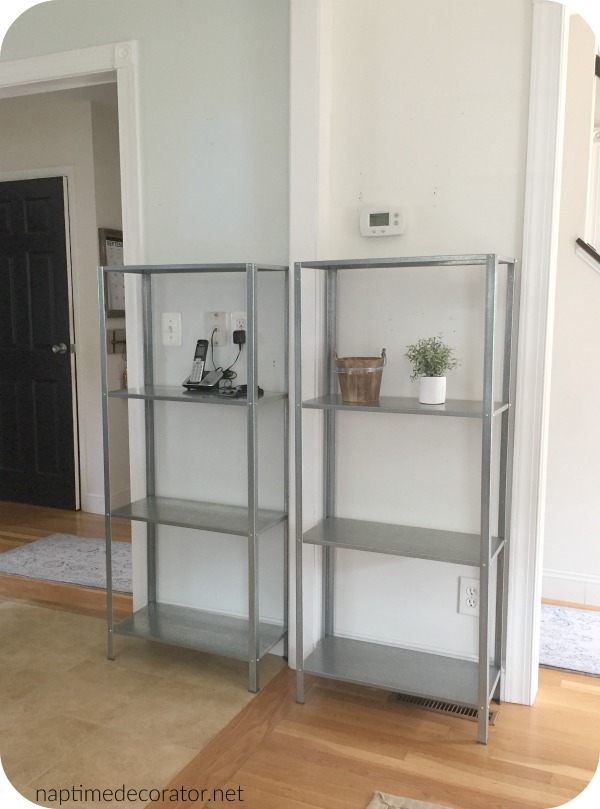
My husband was scratching his head when he came home (and to be perfectly honest, a tiny part of me was as well). Was I going to be able to transform these puppies into something cute and functional?
Welp, thanks to good ol’ spray paint, the answer my friends, is…
YES!
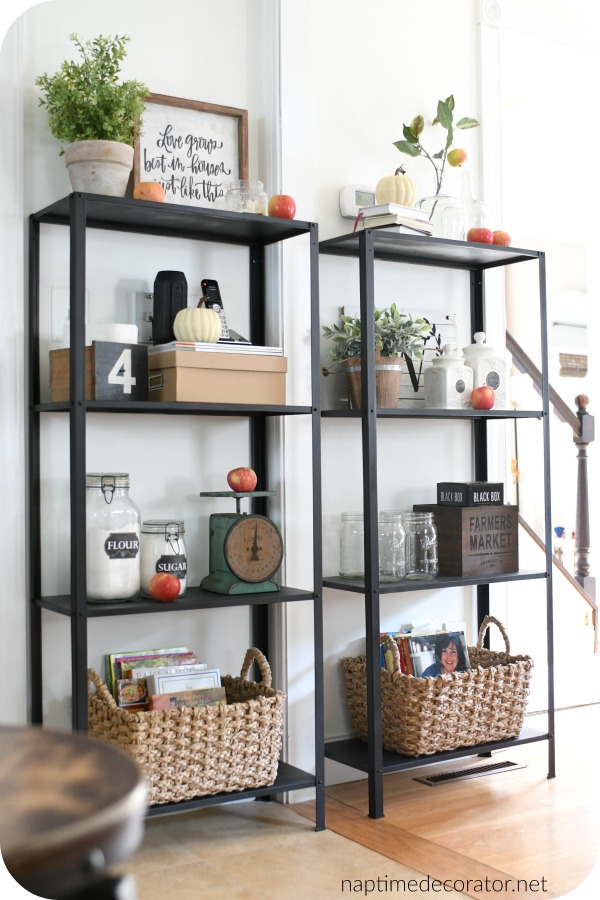
I took them outside, and used about two cans of Rustoleum Matte Black each. I also went over each one with a clear matte protective spray paint to prevent chips, scratches, etc.
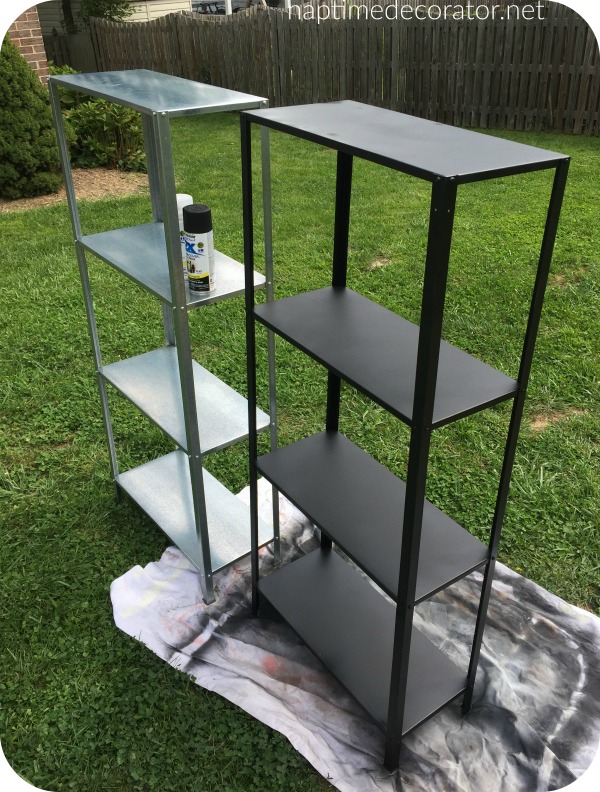
I didn’t do any sanding or anything other than spraying.
I also decided to paint my kitchen SW Alabaster to match the dining room. I thought it would look nicer if they were uniform. Though with the sun blasting in the dining room they look like different shades here, right?! Same color, cross my heart.

These are lightweight and a bit wobbly, so we secured them to the wall (the shelves come with holes to do so and directions recommended it).
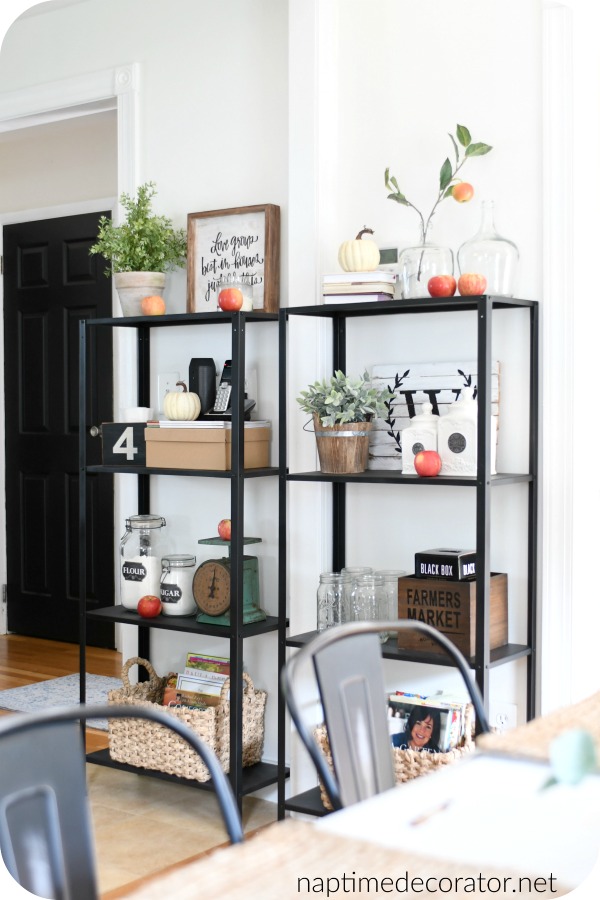
Then it was time to decorate! (The fun part:) )
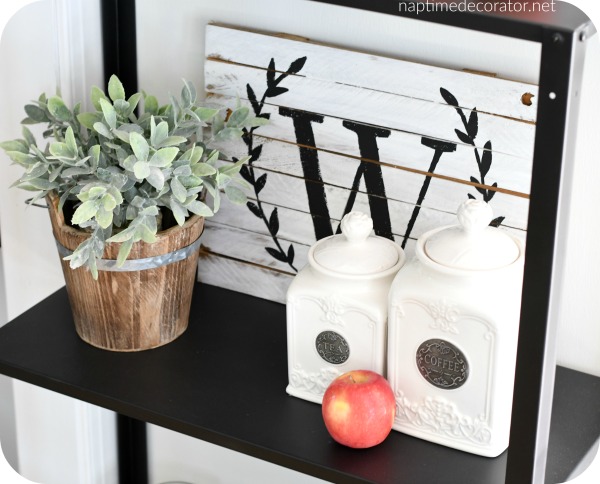
I made the W pallet – stay tuned for a blog post on that!
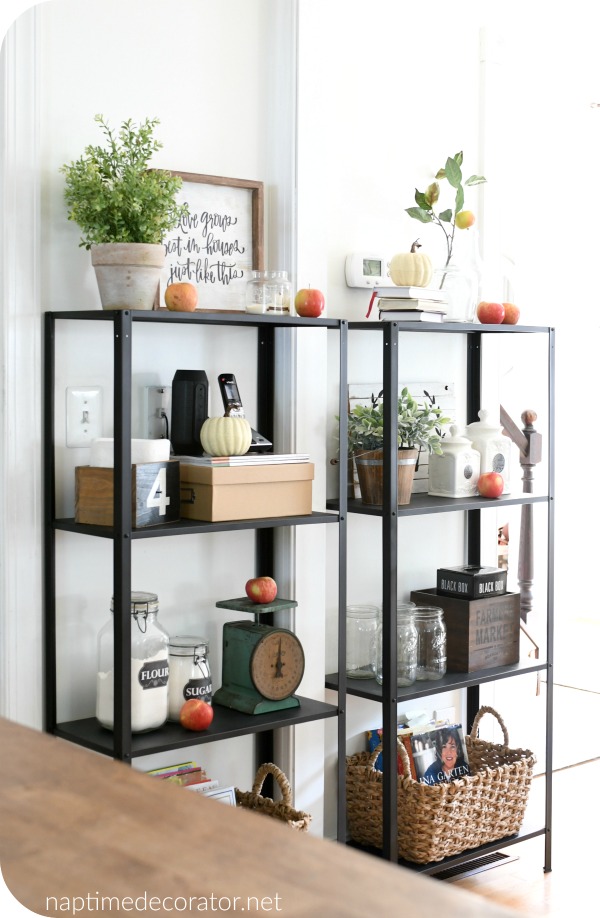
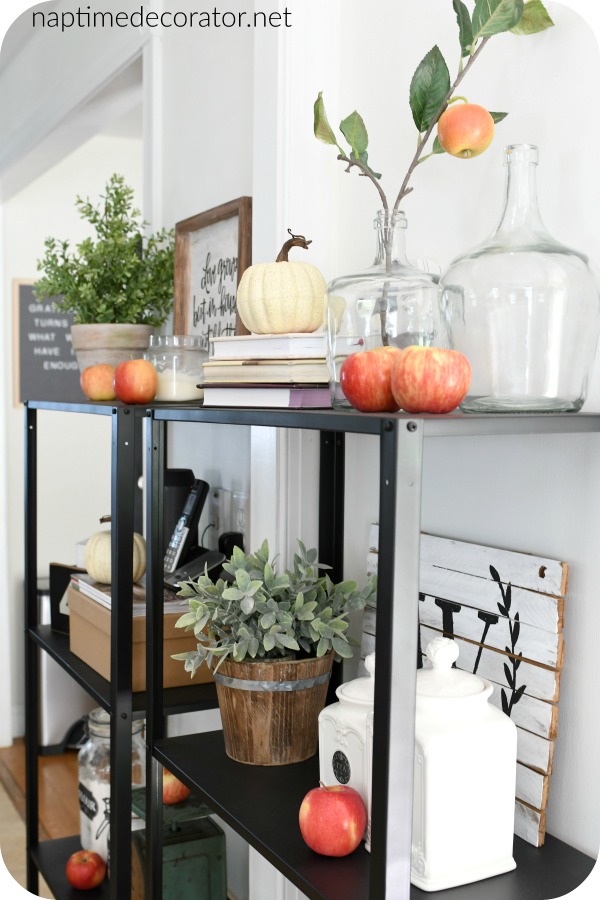
I am kinda obsessed with matte black right now. But maybe that’s not your thing. Maybe white? Cream? A bold color? Maybe adding wood shelves! I was even thinking about gold for my daughter’s room. So many possibilities for $15!!
(Oh, and yes, that would be a box of wine in the wooden box there. Is it wrong that when I spotted it at Michaels, I immediately thought it looked like the perfect size to house my wine?!)
My favorite part of all is how the thermostat and phone aren’t on full display anymore. There’s so much function going on here in this little wall, it’s bananas. My cookbooks are all in one place, our speaker (next to the phone) is perfect there, my morning devotionals are easy to just pull out…all good things.
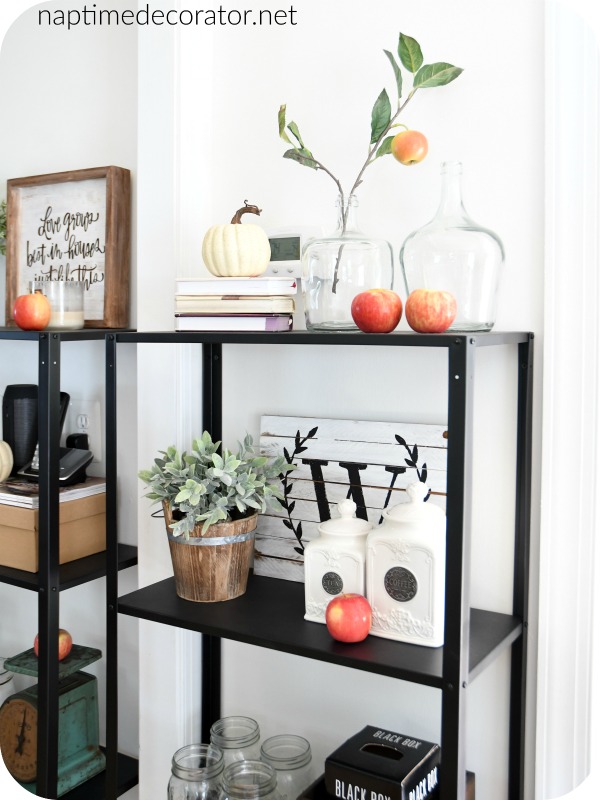
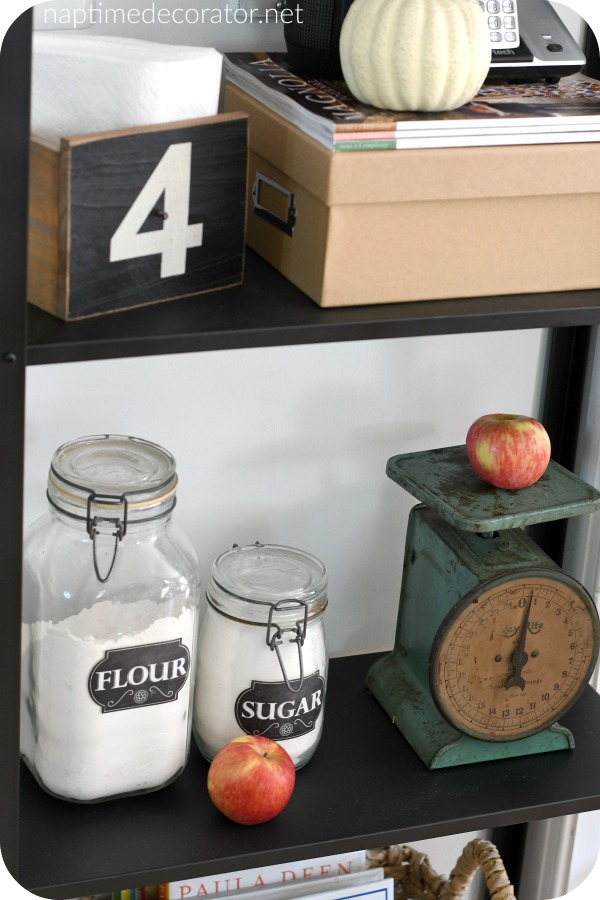
I decided to throw apples here, there, and everywhere (if you follow my Instagram stories, you might’ve seen that – more on that hopefully this week in a dining room post!). I’m loving the touch of Fall and nature they bring. It’s still in the 80s and doesn’t appear to be dropping anytime soon here, so I’m having a hard time fully embracing the wonder of Fall. Apples are a nice little way to dip in.
Oh, and in case you’re wondering, there’s the trashcan in the left corner there – at the end of the hallway. I’m working on that;) I’m thinking one of those things that look like furniture and disguise the can – know what I mean? I think that would be ideal. Not that there’s anything wrong with a trashcan in view, but at the end of the main floor hallway isn’t vibing with me…stay tuned on that!
This has me really thinking about another project I’ve wanted to do for years in here: painting the kitchen floor. I’m thisclose to talking myself into that! Stay tuned!
XO,
Liz

 Hi there! I’m Liz, a former teacher-turned-stay-at-home mom to three kids, with a passion to create a warm and inviting home on a budget. This blog all started when I’d put the babies down for a nap, and squeeze in a project during those precious couple of hours! My hope is that you visit this page and feel inspired to do a little “naptime decorating” of your own. Thank you so much for stopping by!
Love it. Love it all!
Thanks so much, Heather!
Lovely and functional. And think of all the decorating fun you’ll have styling them!
Oh my goodness, right?! I’m sure I’ll be forever switching these items out;) Thanks so much!
I love the shelves!!! That is an awesome way to add extra storage near the kitchen which is ALWAYS needed:) The paint you used really took something utilitarian and turned it into an upscale set of shelves. Love it Liz! Great way to hide the eyesores! I have the same dang wall in my house! ha. Great ideas!
Thanks, girl!! Yes, the storage is a definite plus! 😉
Great idea 🙂 I’ll use that
So glad you can use it! Good luck!
Love having you back and seriously love this.
You’re so sweet, Emma, thank you!
LOVE how you transformed the shelves! I also have a floating phone in my kitchen, and haven’t figured out how to make it look better. The IKEA shelves might just work here too.
Awesome!! Hope it works out for you!
Love how these look. Are they pretty sturdy.
Looks wonderful! You have the best ideas 🙂
I saw some reviews that said you really can’t put anything heavy on the shelves. Is that true? Also, did you secure it to the wall?
We did secure it to the walls- definitely have to, otherwise they’re very wobbly. We don’t have anything heavy on them.