As you might know, I’ve FINALLY started working on my son’s room. He’ll be 6 in a couple months, and been living with his baby giraffe nursery for a *little* too long;) It’s time.
I haven’t found a cute bed or headboard yet – and you know I like to wait until I find just the right one at yard sales, like I did for my daughters. Sometimes you just can’t rush these things – if I had, I would never had found this brass gem (that I sprayed pink) for $20:
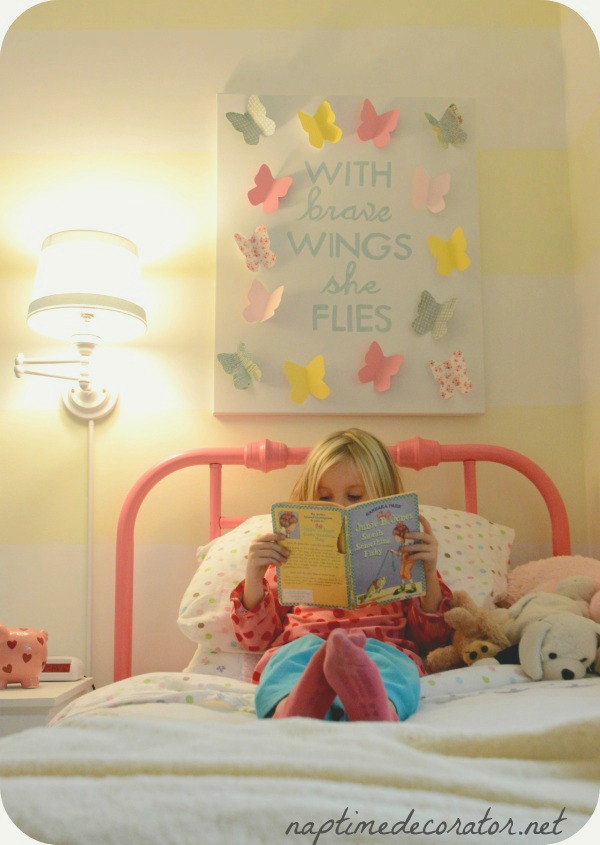
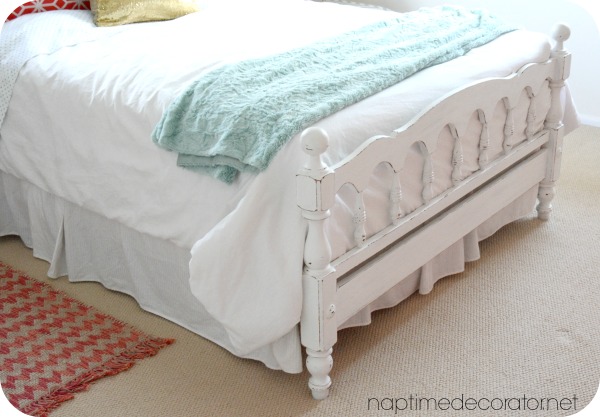
Or this maple headboard AND footboard (that I painted white and distressed) for a whopping $10:
I know the right one is out there for my boy’s room – I just haven’t found it yet.
In the meantime, I want something cute that will act as a headboard, but not break the bank.
Hmmm….
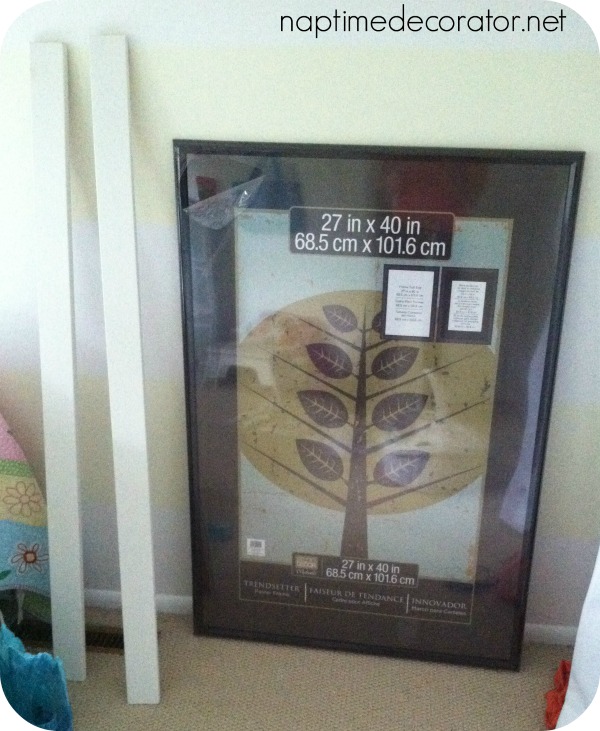
You might remember when I did my daughter’s DIY Dry Erase Board, that I mentioned saving the remains of the frame for a future project? I used just the plastic part of this poster frame, so the hard backing and plastic black frame were up for grabs. I couldn’t see tossing it in the trash – I knew it had a future somewhere!
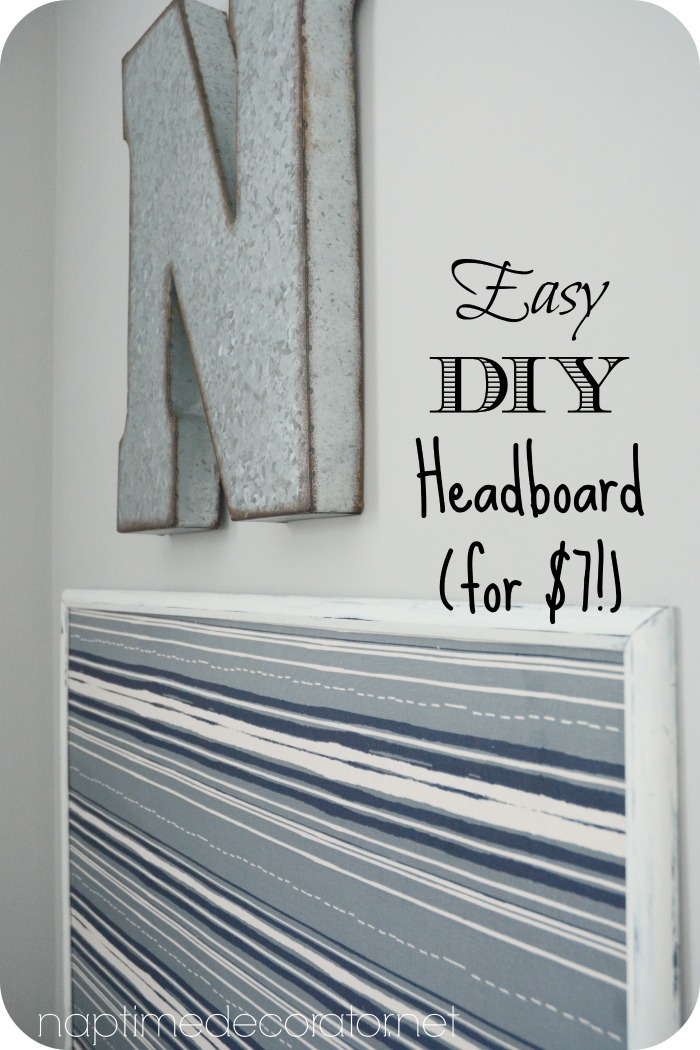
And the future is now. What was once almost trash, is now a headboard for my son…and the best part?
All I needed to get was a yard of fabric to make it happen!
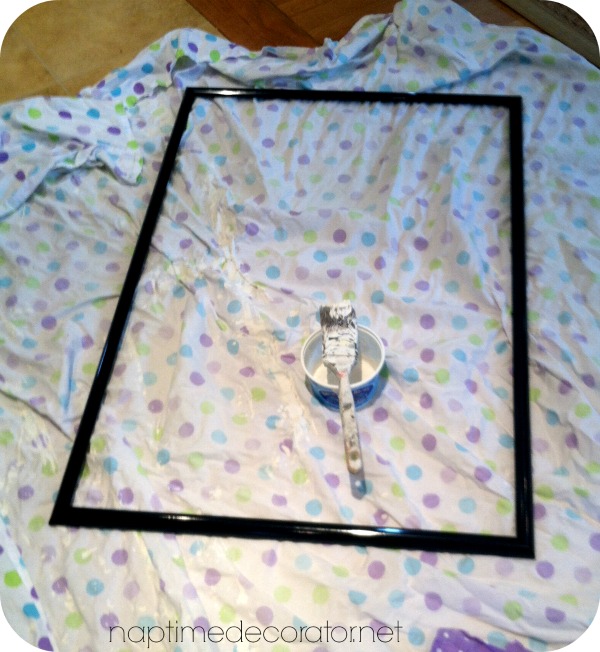
And it was easy to make! Here’s how it started:
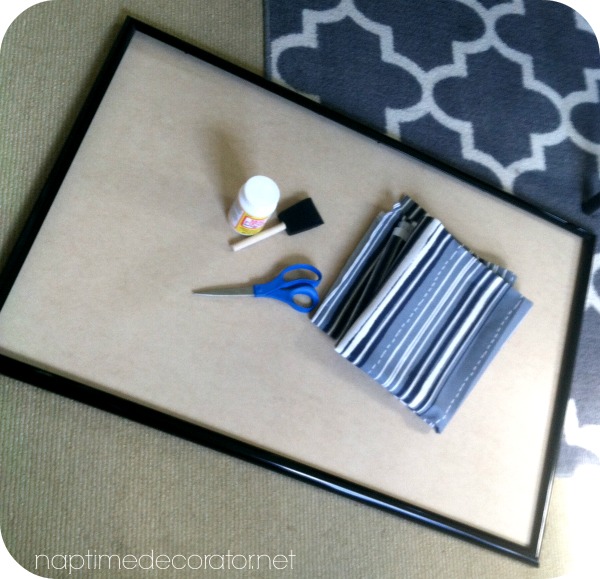
I used the frame, some Mod Podge, a foam brush, scissors, and a yard of fabric. This frame was leftover from my other daughter’s Dry Erase Board, which was slighter smaller than the first one I made for my younger daughter. I held both frames up to my son’s twin bed, and this one (24×36) was the PERFECT size for a twin bed.
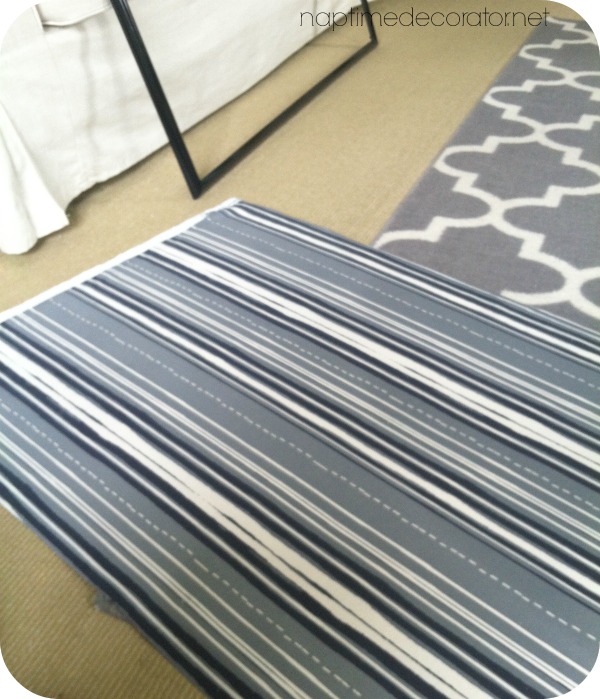
I found this fabric at JoAnn Fabrics – it had navy, grey, and imperfect horizontal lines that almost resembled a street to me – it was TOO perfect for my son’s room! I couldn’t wait to get started.
First, I ironed my fabric because it was just a little wrinkly. Then I laid the fabric out over the hard backing, and cut it just a bit, leaving a little bit around each edge. – maybe an inch(ish).
I was working fast (I do that when I get excited about a project!) and forgot to take a pic of the next step, but I brushed a layer of Mod Podge all over the backing of the frame and quickly laid the fabric down, smoothing out any air bubbles. I made sure to add another layer around all the edges, just to ensure it was nice and stuck on there.
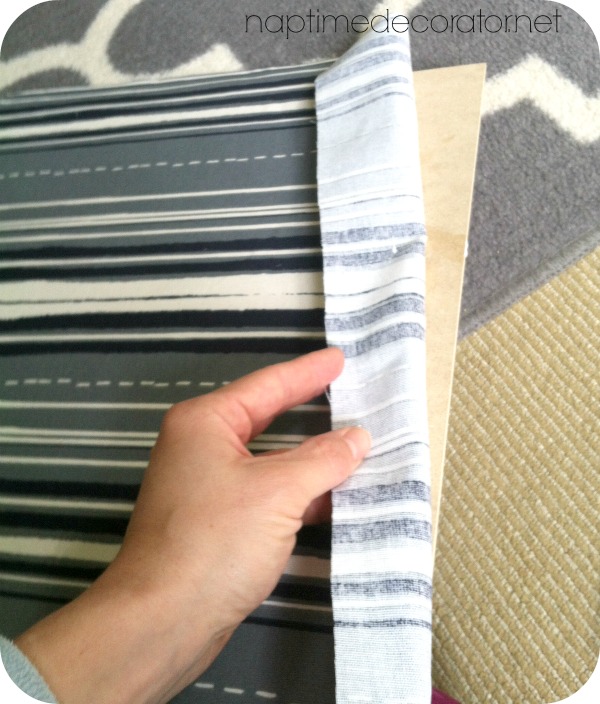
I flipped it over, pulled the edges taut and brushed some more:
I didn’t brush a layer over the top of the fabric like I usually do when working with Mod Podge – I wanted to keep that soft fabric feel. It’s still nice and *stuck* on there without any more on top.
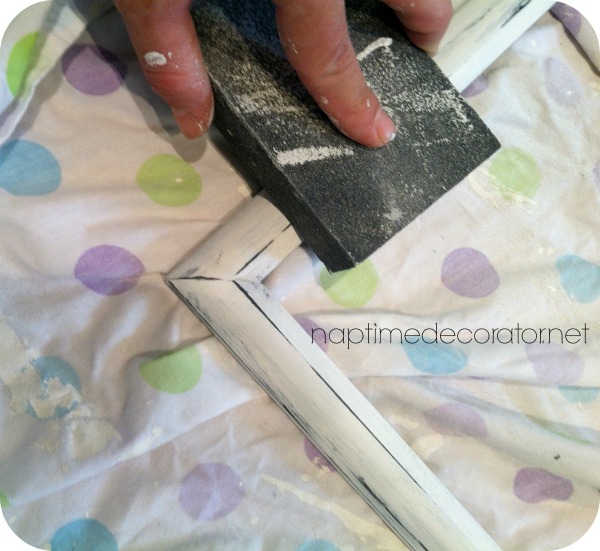
Then, it was time to work on the black plastic frame.
Since adding Plaster of Paris to paint makes it stick to pretty much any surface, I poured some leftover flat Alabaster (by Sherwin Williams) that I had from my daughter’s room makeover, and added a little Plaster of Paris to it.
A couple coats and it was done. I didn’t care about getting it perfect, because I knew I’d be sanding it anyway. Wanted it to look a little worn:
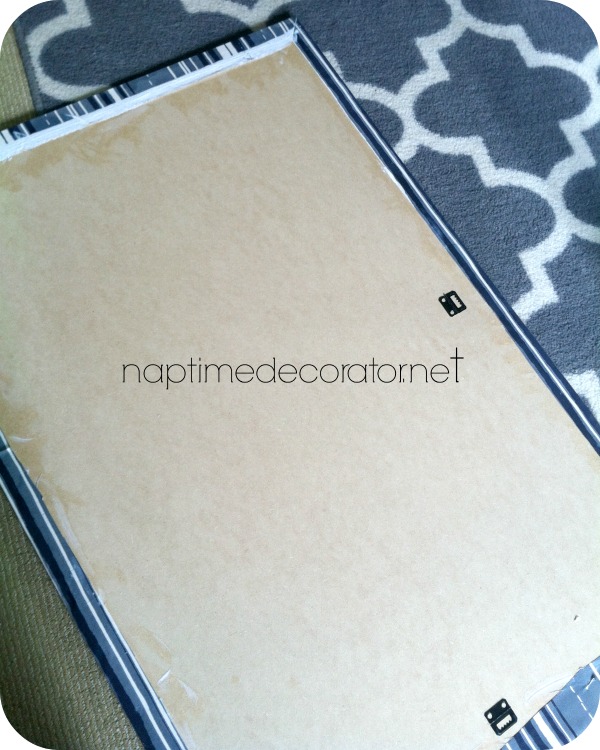
After it was good and dry, I popped the fabric covered backing into the frame, securing it with all those little tab thingys that the backs of frames have, and it was good and tight in there.
I ended up just hanging it with a nail and using the teeth on the back of it, and it’s working fabulously – but I think I’m going to pick up some Command Strips so I can stick them on all four corners and really get it stuck on the wall. I’m so surprised how well just the nail is keeping it in place though!
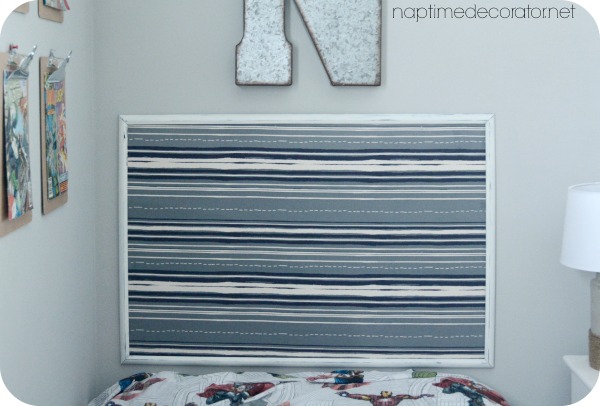
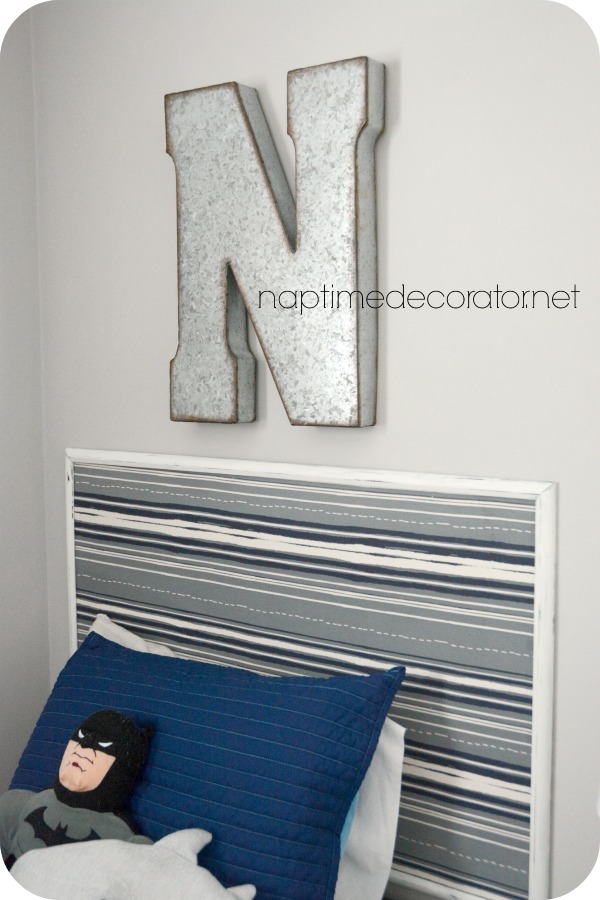
I picked up the metal N from Hobby Lobby (at 50% off!) and thought it’d be the perfect touch.
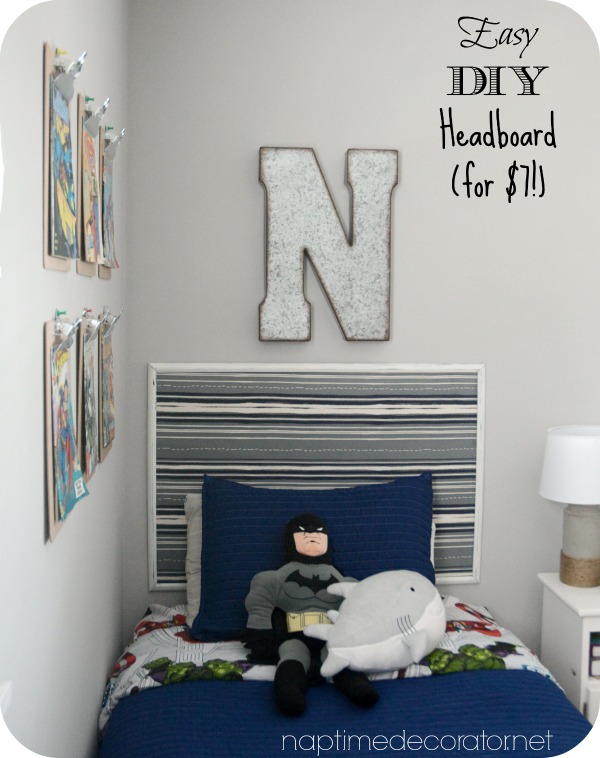
His bedding (from Target) is much more navy than it appears in these photos – not sure why it looks so bright?!
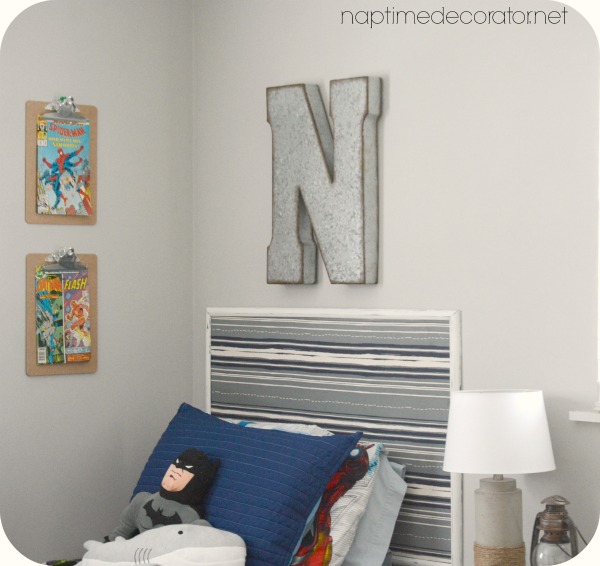
I think it turned out pretty cute! And you can’t beat the price tag:)
Things are movin’ along in here, stay tuned for more Boy Room Makeover posts next week – have a wonderful weekend, friends!

 Hi there! I’m Liz, a former teacher-turned-stay-at-home mom to three kids, with a passion to create a warm and inviting home on a budget. This blog all started when I’d put the babies down for a nap, and squeeze in a project during those precious couple of hours! My hope is that you visit this page and feel inspired to do a little “naptime decorating” of your own. Thank you so much for stopping by!
Totally genius! So simple but with big impact. 🙂
Can’t wait to see the rest!
Sherri
Thanks, Sherri!
So cute. Wish I could figure out a way to make a King-sized one ! 🙂
Wow! You are very talented. It’s look amazing 🙂