First off, I hope you had a wonderful Thanksgiving! Ours was chaotic, loud, and crazy. Which is just the way I like it;) Nothing better than a whole lotta family noise, is there?
And secondly, thank you SO SO much for all the family room makeover love! Since posting, I’ve taken away all the Fall and just about finished with the Christmas decor – will be posting that soon:) Getting our tree this weekend so I’m thinking I’ll wait till that’s up. In the meantime, let’s move to the dining room, shall we?
As you may have heard, or seen little glimpses on Instagram and Facebook, I’m doing a little makeover in the dining room (I know, AGAIN). This is by far my favorite look yet, and I am busting at the seems to show you! Almost done, just need to finish putting up the baseboards (one more room we can say buh-bye to the skinny 60’s trim in!), and finish up a few pieces of the plank wall. Then it’s posting time! Yippeeeee!
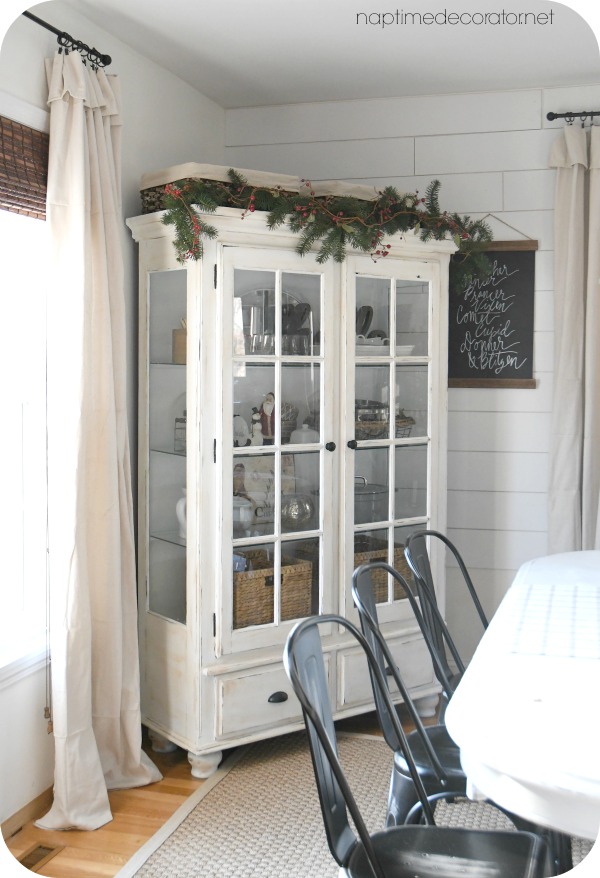
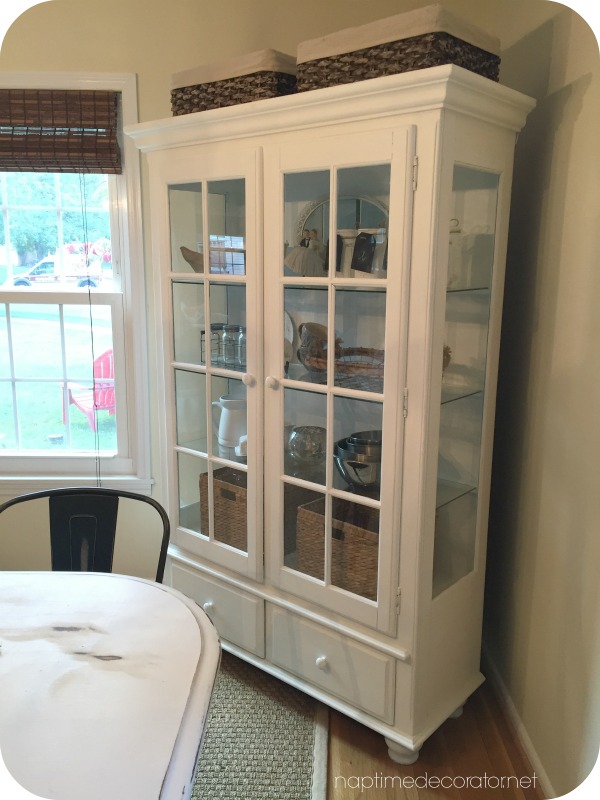
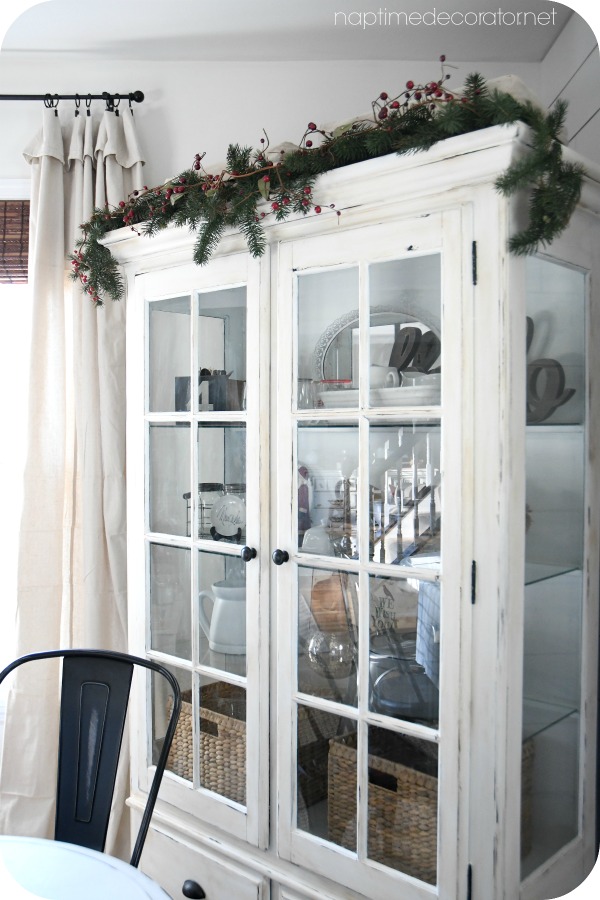
I still used the same china cabinet in there, and gave it a little vintagey flair. I wanted it to look a little worn and aged, so I played around with some Dark Wax I picked up at Michaels a while back. But before I start chatting away, let’s take a look at this piece over the years.
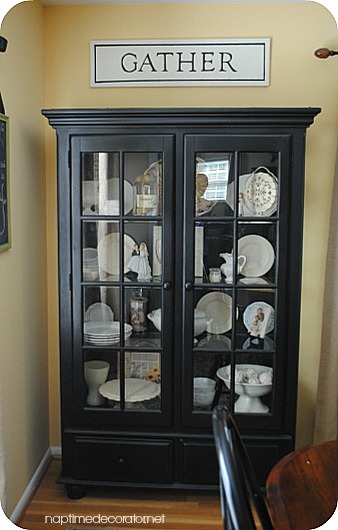
When we moved in ten years ago, we bought it at Value City Furniture, and this was what it looked like:
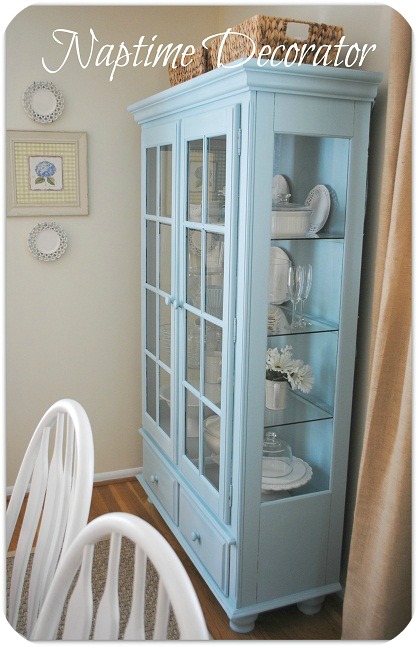
Then I went from my everything black, gold, and rust phase, to my everything white and BRIGHT phase, and painted it blue. Like, BLUE.
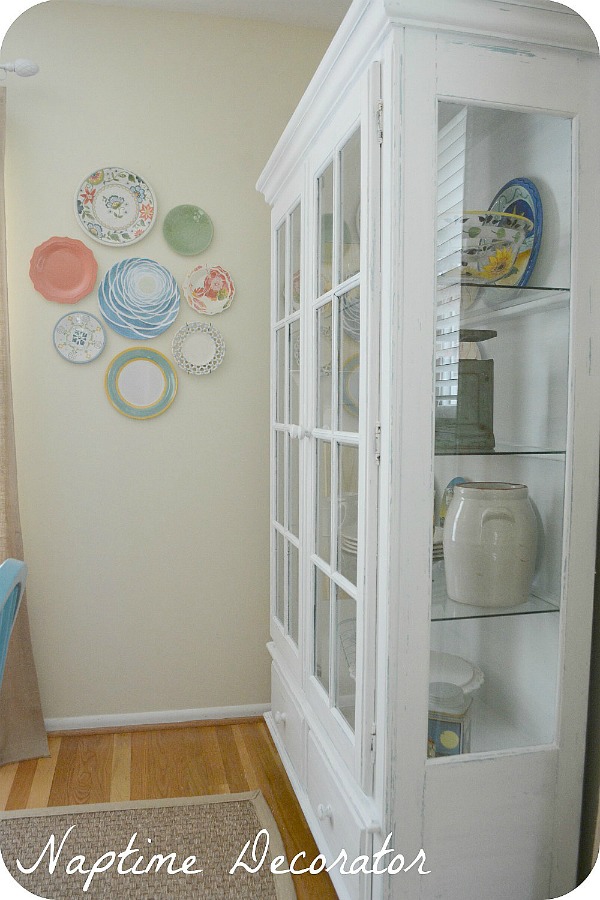
THEN…I painted over the blue with white. I distressed it just a bit, so the blue showed just a little.
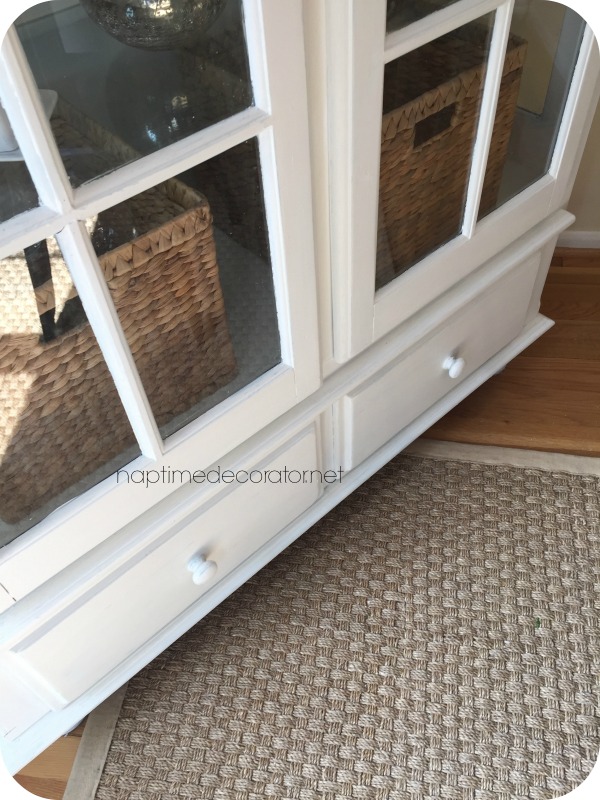
And NOW…
We’re going to pretend that you don’t see the old baseboards have been ripped out and not replaced…or the dropcloth curtains hemmed…or the plank wall unfinished. All in good time, my friends. 😉
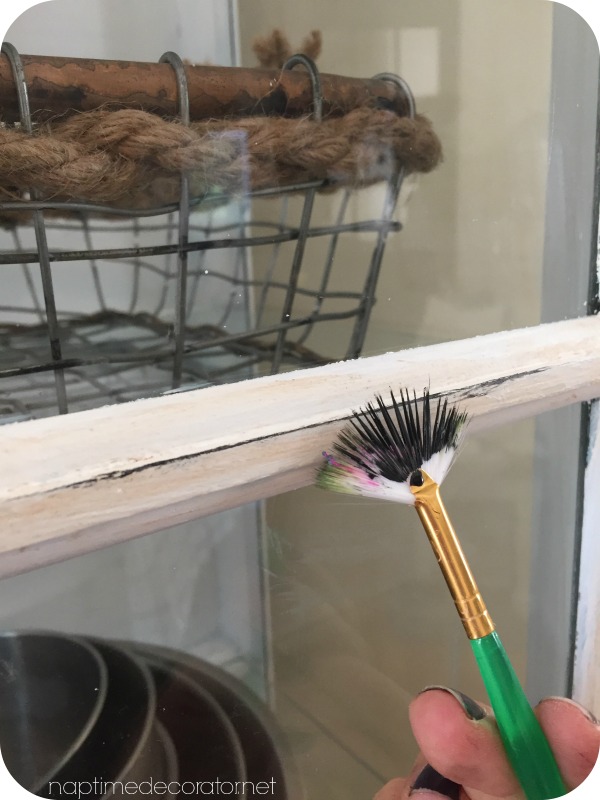
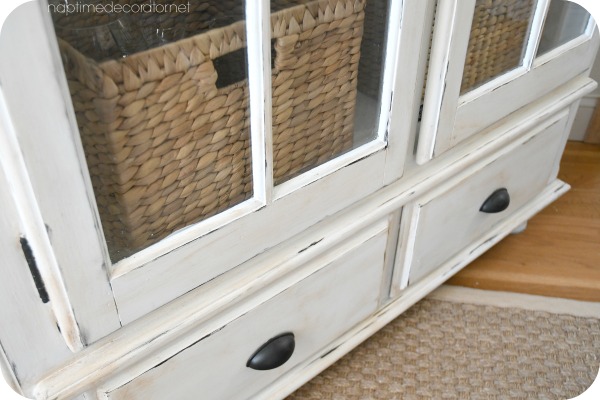
So this was a pretty easy switcheroo this time around. I went over it just a little with white paint again (SW Alabaster) – just to hide the blue. Then I took some clear wax, wiped it on, then the dark wax. And finally, just a little black paint with a little brush, to fan some black on there. I couldn’t sand, because then the blue would come through and I didn’t want that. So this gives the layered look of sanding, without actually doing it. Or at least I hope that’s how it appears!
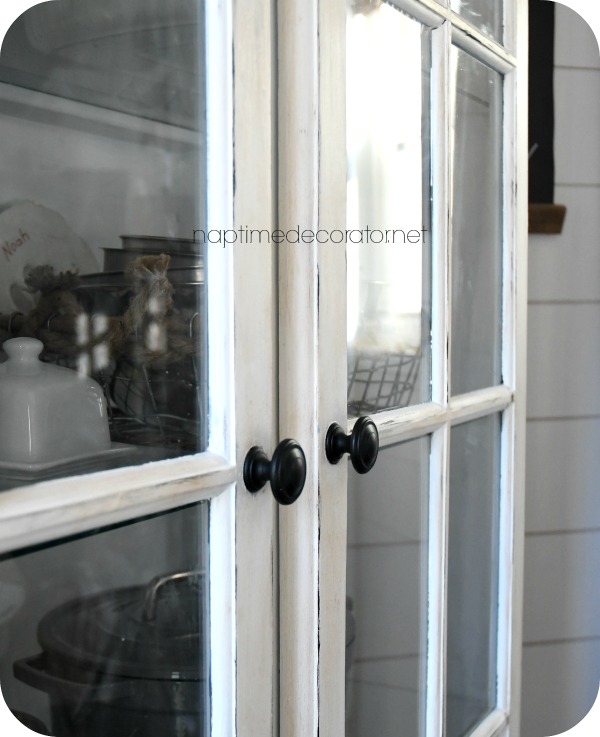
And finally – the biggest change of all, and what took me so long to do this, I’ll never know – but the hardware! Check out the difference:
Before:
After:
And before:
And after:
Hardware is a game changer, and I’m glad I finally realized that! Such an improvement from those painted wooden knobs. (Got the black knobs and pulls from Lowes, and just painted the hinges for inquiring minds).
And I’m not sure what’s happening above the china cabinet…I swear the greens looked so much better in person!? Gotta work on that…
ANYwho…
Stay tuned for more dining room fun! It won’t be long now… (famous last words for yours truly, am I right?) 😉

 Hi there! I’m Liz, a former teacher-turned-stay-at-home mom to three kids, with a passion to create a warm and inviting home on a budget. This blog all started when I’d put the babies down for a nap, and squeeze in a project during those precious couple of hours! My hope is that you visit this page and feel inspired to do a little “naptime decorating” of your own. Thank you so much for stopping by!
Love the final piece!! Great job bringing that timeless piece into 2016!!!
Thanks, Kim!
Looks fabulous!
Thank you!
What size drop cloths did you purchase for the windows?
6×9, and cut them to my liking – I wanted to have them puddle, and fold the top over. And cut about 18 inches off the width.
LOVE what you’ve done with your hutch thru the years!! Way to make it timeless. Noticed you have new dining room chairs…..where did you find them?
Thanks, Michelle! Got them at Wayfair!
Not to pull attention from your BEAUTIFUL hutch, but did you make those curtains?? I’m going to go search through your blog to find out now!
I did, but just did them last week, no blog post yet! 🙂 Thank you!!