Hey guys!
As you know, I’ve decided to make some changes in our kitchen recently.
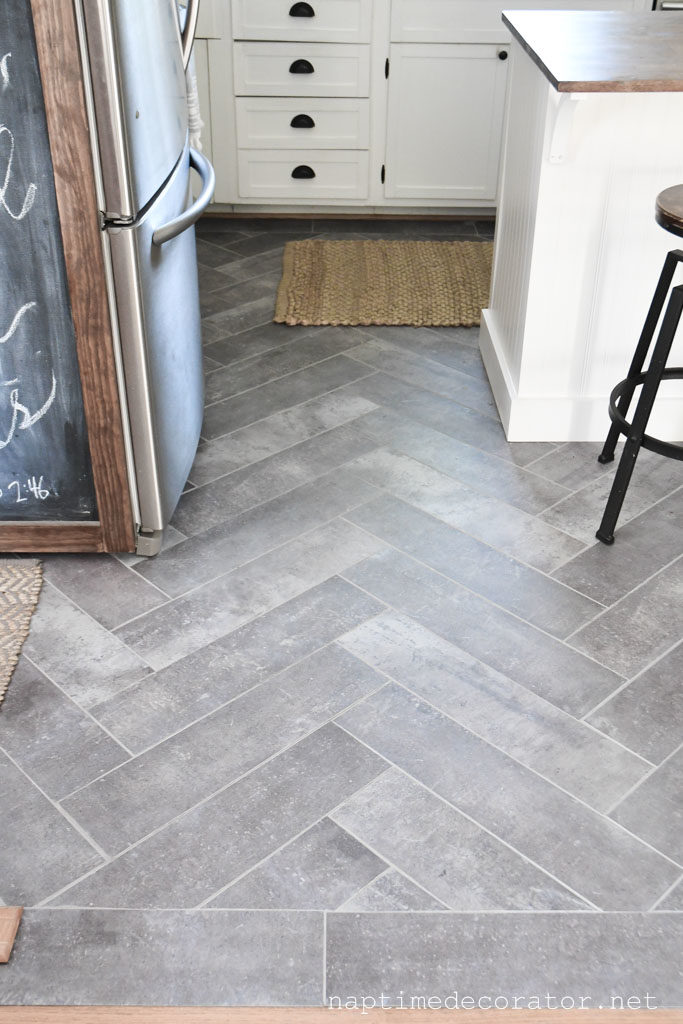
I painted the counters (post coming soon!), added a new peel-and-stick tile floor:
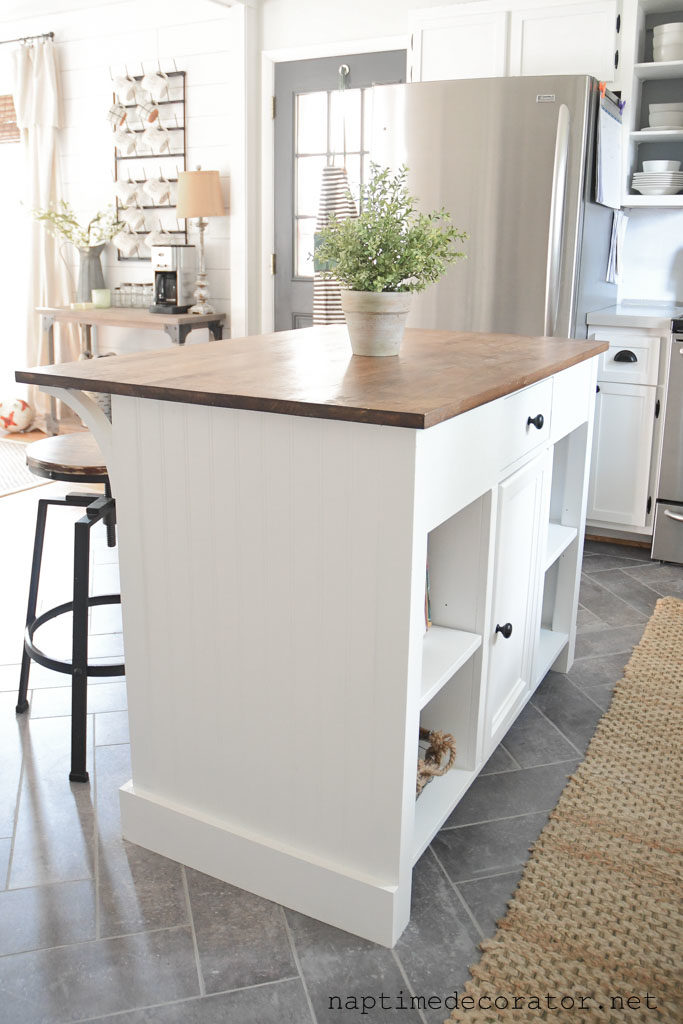
…put beadboard and trim around our island:
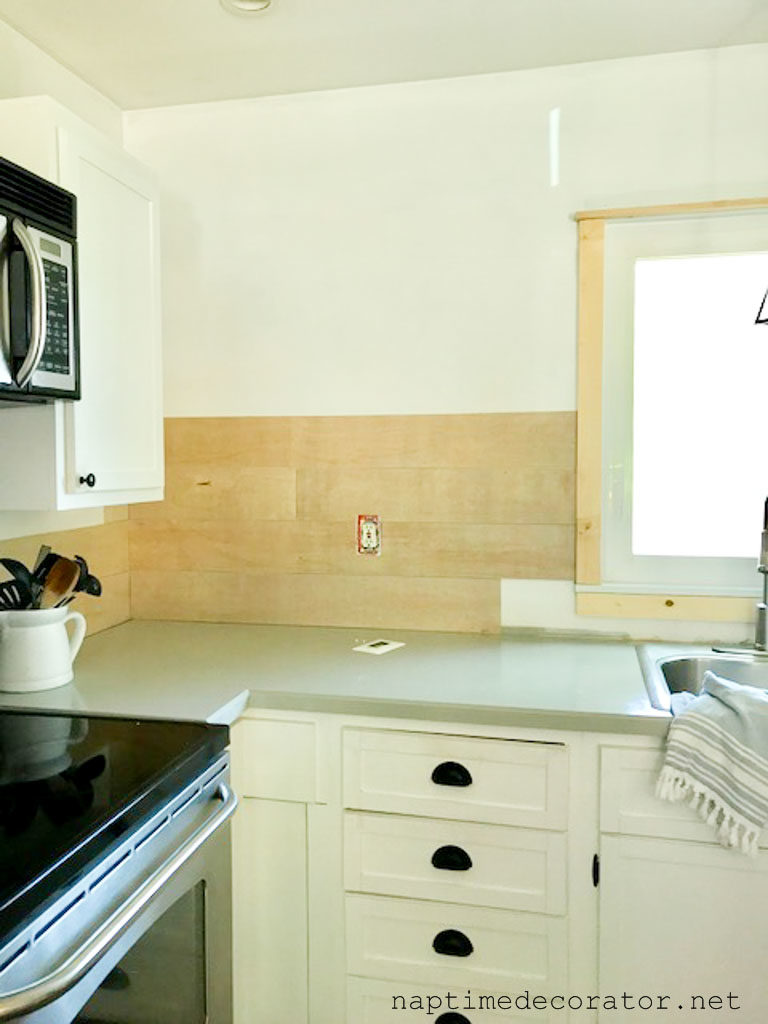
…ripped out our upper cabinets on one wall, added shiplap, and more to come. It’s really coming along and I am loving it so far!
I have decided to forgo shelving on the main wall with the window. I was going to do floating shelves, but after seeing the bare wall without the the cabinets, I grew to love the lack of anything going on. We have cabinets on the other side, and room in our island for more dishes, so we are fine without them. I plan on just leaning some large cutting boards against the wall, maybe add a hanging plant…it’s not a huge room by any means, so I think it’s going to work out fine without looking barren.
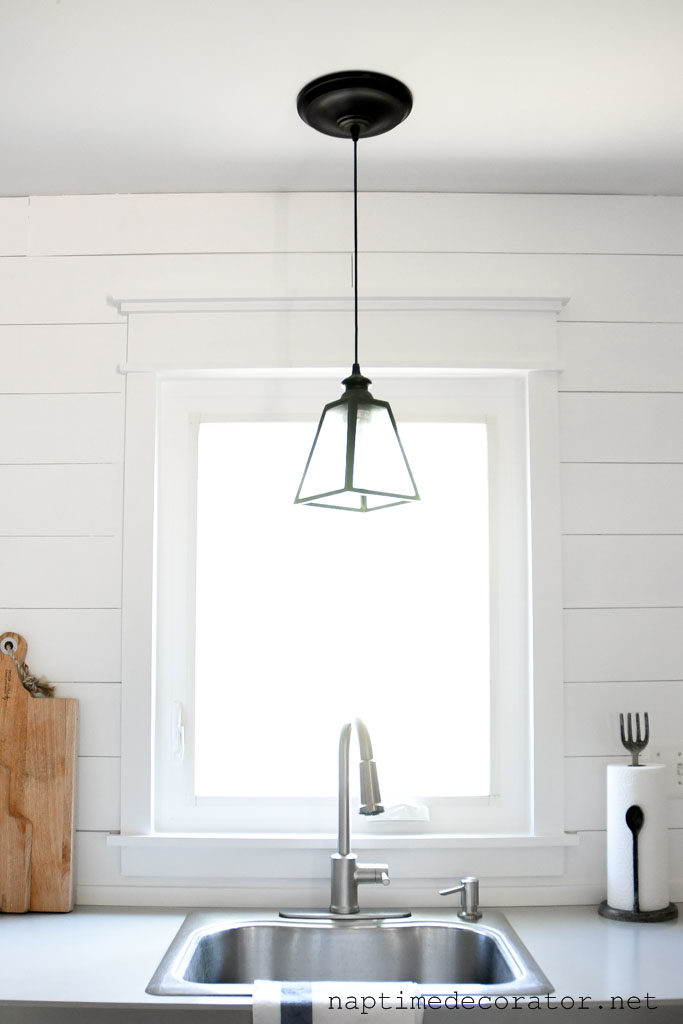
But since that wall is THE wall you see when you walk in, I wanted to beef up the window.
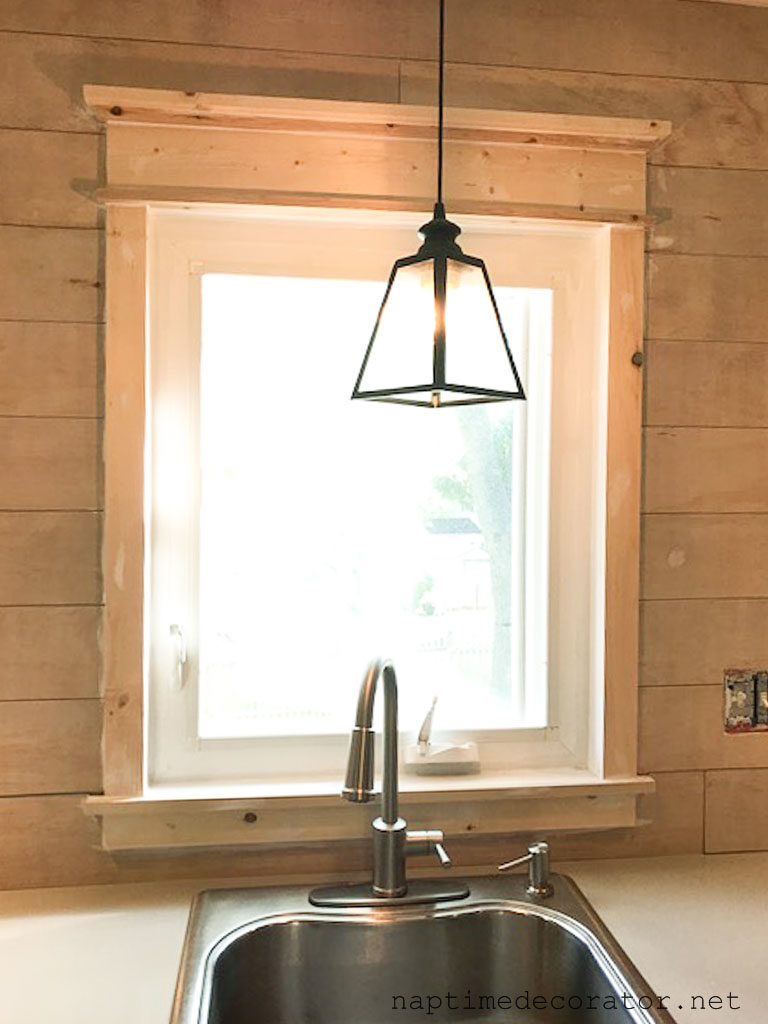
It looked like this, after the cabinets came down:
Definitely looked a little blah. So I ripped off the existing trim, and headed to Home Depot.
I picked up a few 1x3s, a 1×2, a 1×1, and a 1×5.
I measured the distance between the ledge and the top of the window, and cut my 1x3s to go on each side. I slapped a little wood glue on the backs, then used the nail gun to secure them into the wall. I added about a half inch to each side of those pieces for my top 1×2 piece of trim. I nailed that piece into the top of the 1x3s because it was so wide. Then I measured the distance of the ledge and cut another 1×3 for the bottom and nailed that into the wall.

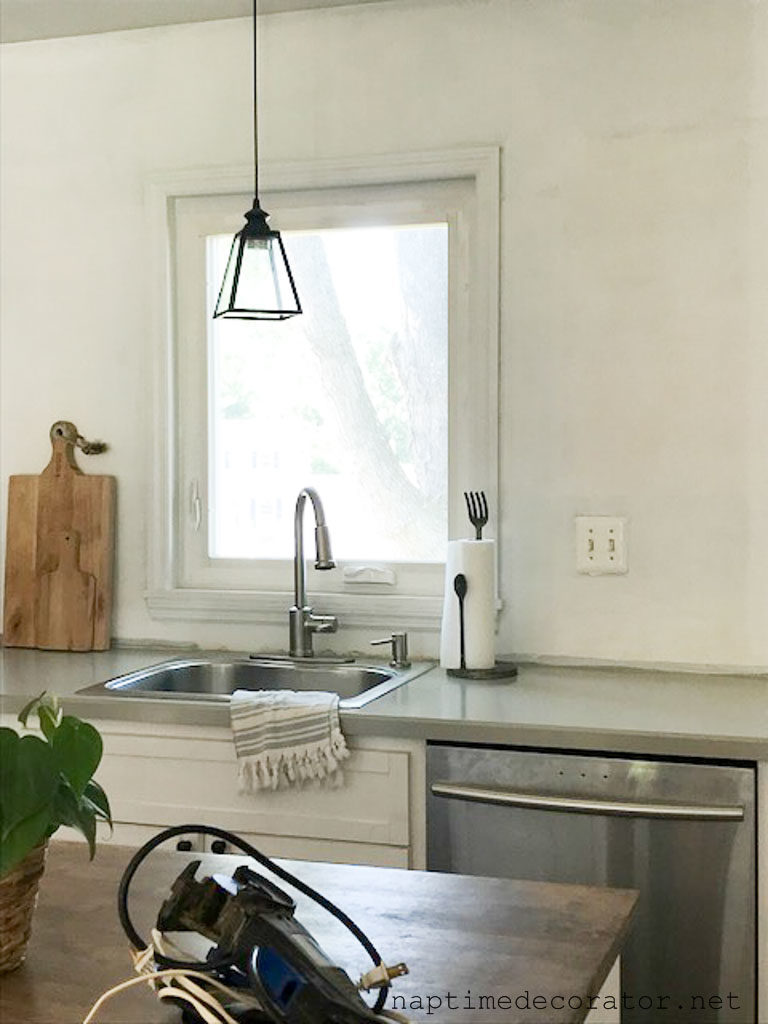
No idea why this is the only photo on my phone of the window trim at this stage – but at least you can get a glimpse of the faux shiplap (plank wall) and counters!
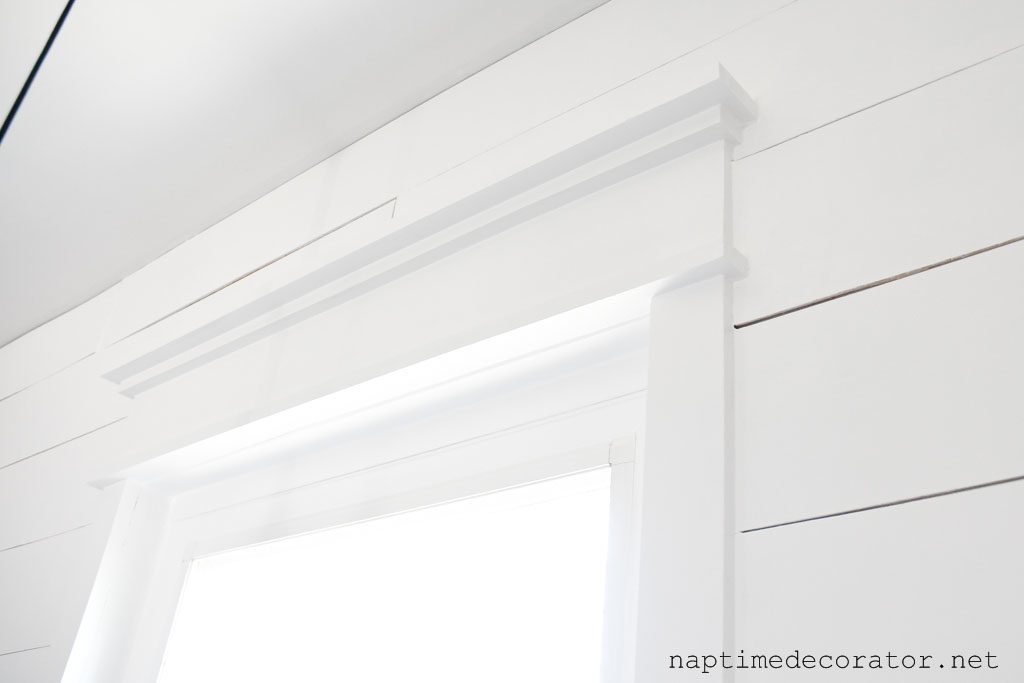
Then I cut a 1×5 the distance of the side trim and nailed that up:
Then another piece of 1×2 went on top of that. Now, it was getting so close to the ceiling that I couldn’t nail them up. I used wood glue and taped it in place overnight. Then I did the same with the very top piece of 1×3 – I cut that piece an inch longer than the initial 1×2 that went directly over the top of the window. I wanted it to the be the longest piece, really finish it off, you know?
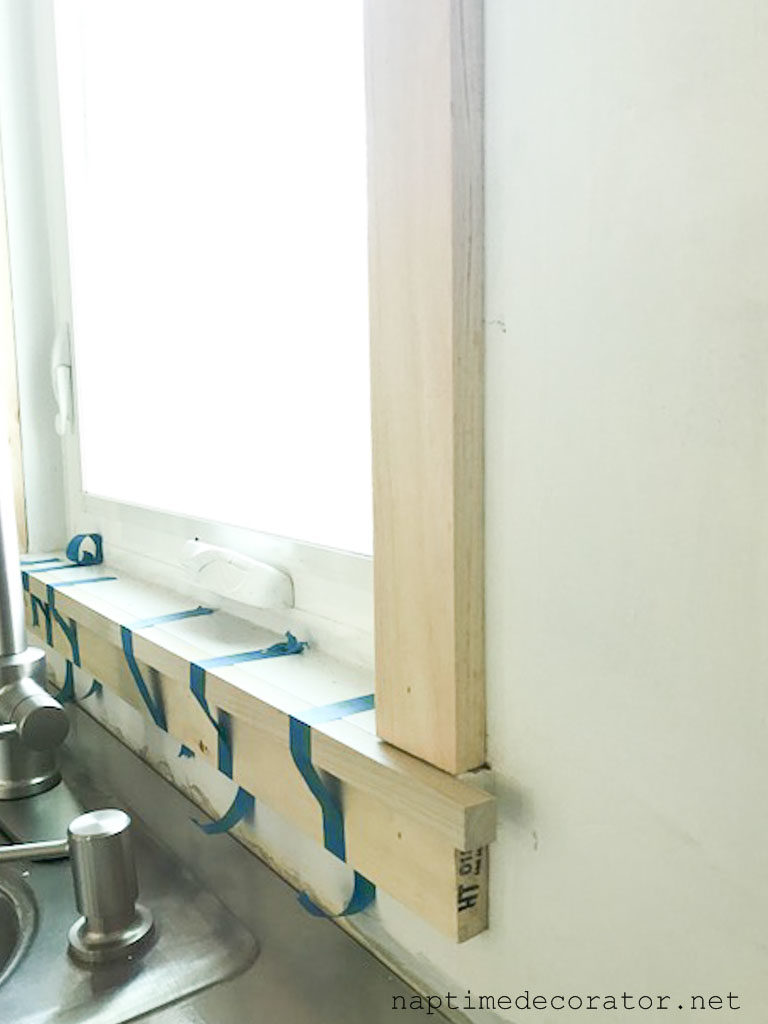
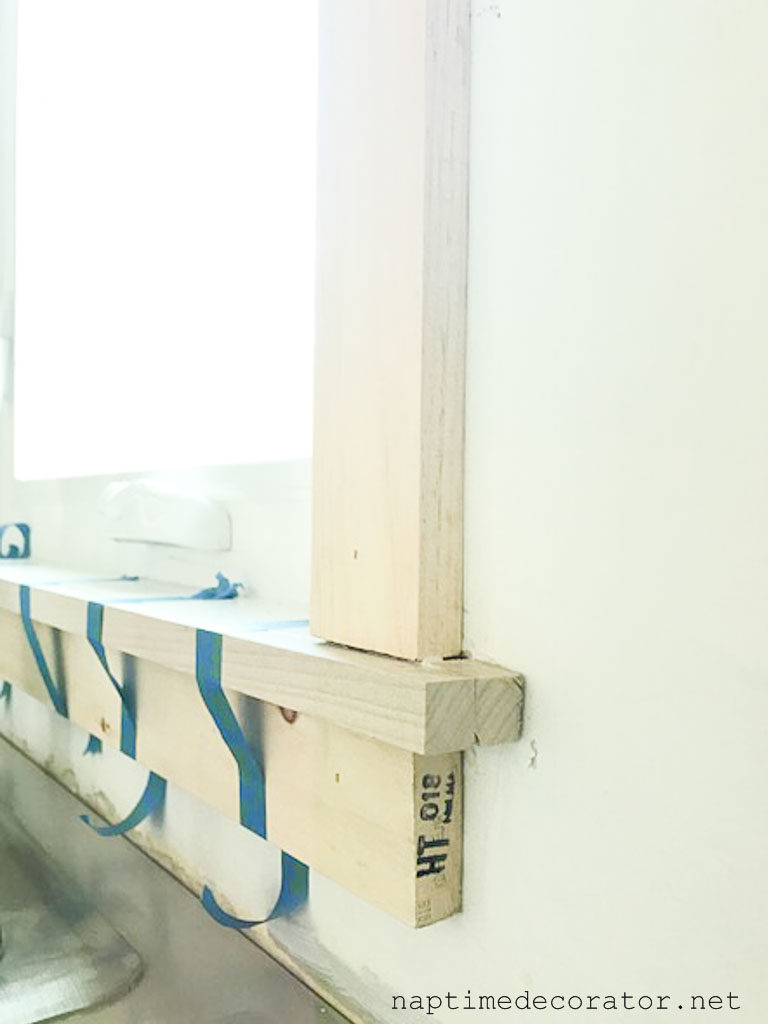
Now for the ledge. If you see, my window ledge stops where the trim stops. I wanted to extend a little, so I used a 1×1. I cut it about the length of the longest top piece (might be a smidge shorter), used wood glue and tape at first, then I shot it into the ledge. I wanted to make sure my plan was going to work;)
As you can see, there’s empty space behind the ledge. I cut a tiny piece of 1×1 with my little Dremel hand saw…
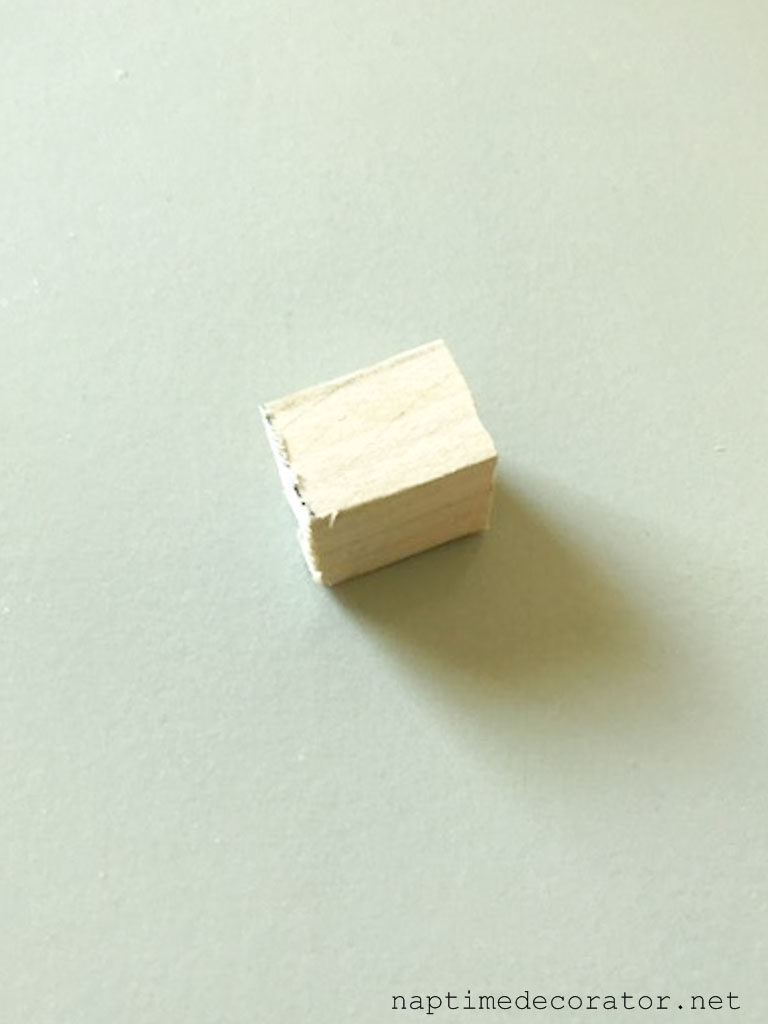
…sanded it, stuck some wood glue around it and fit like a glove! Success!
As you can see, my cuts aren’t perfect, but caulk is my best friend! Speaking of, that was the next step!
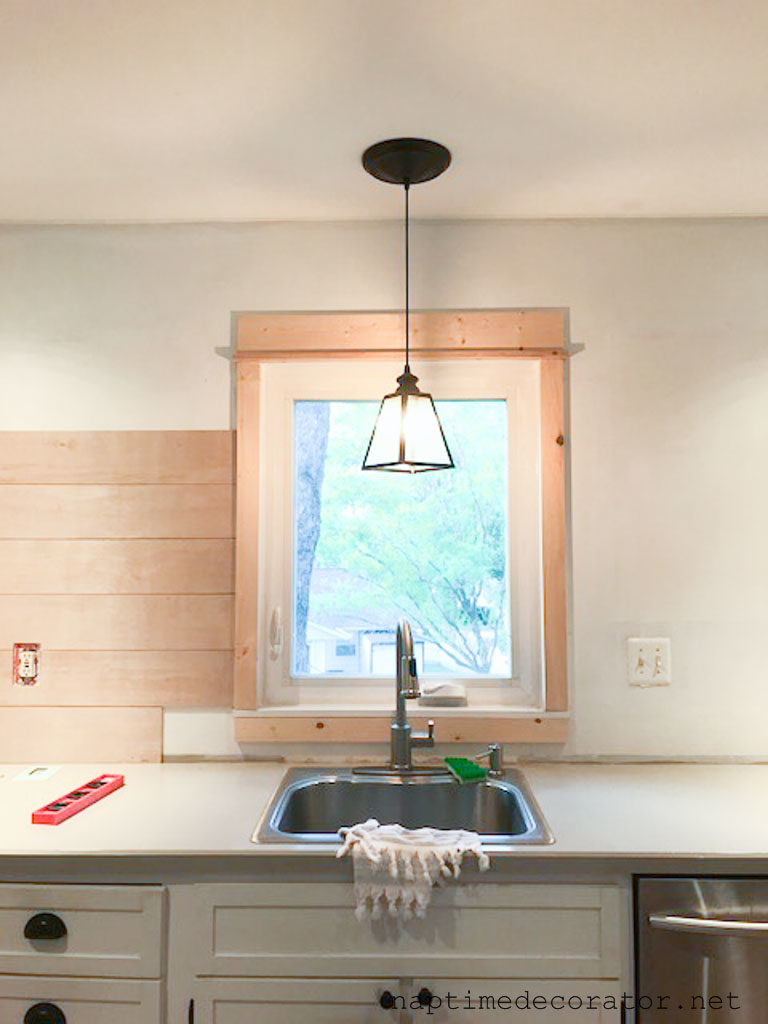
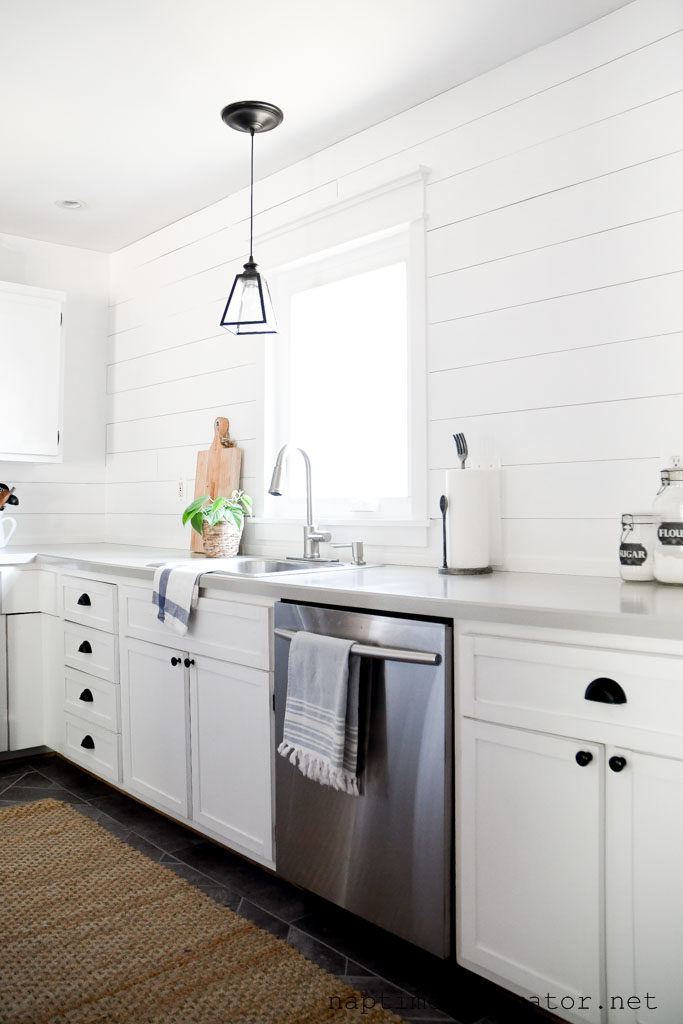
Sanded it the next morning, wiped off the dust, and here we are:
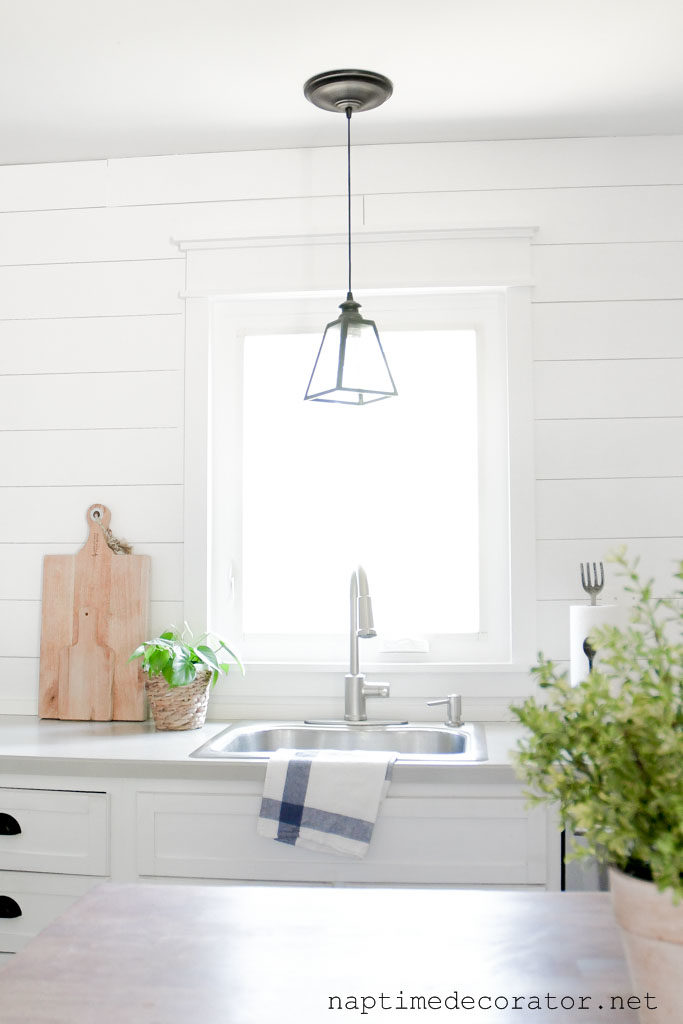
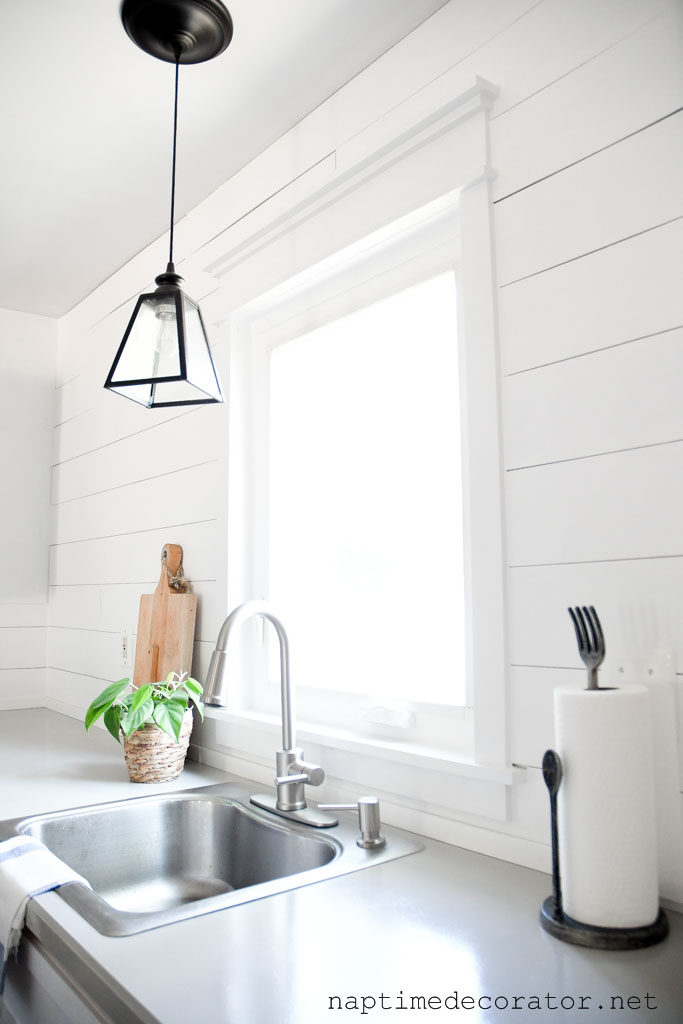

What a difference a little trim makes, right?
Next up: some floating wood shelves coming off that cabinet in the left of this pic below, and extending the cabinets to the ceiling…
Stayyyyyy tuned! 🙂

 Hi there! I’m Liz, a former teacher-turned-stay-at-home mom to three kids, with a passion to create a warm and inviting home on a budget. This blog all started when I’d put the babies down for a nap, and squeeze in a project during those precious couple of hours! My hope is that you visit this page and feel inspired to do a little “naptime decorating” of your own. Thank you so much for stopping by!
So great! I want all my windows done like this.
I want to do that to all my windows and the tops of my doorways…my husband just rolls his eyes!!