One of the perks of having a DIY blog is that when family members need to get rid of old furniture, they think of you. Often times, they just GIVE you these old pieces, with carte blanche to do whatever the heck you want. Case in point, this Big Bad Dresser my dad had in storage, just collecting dust.
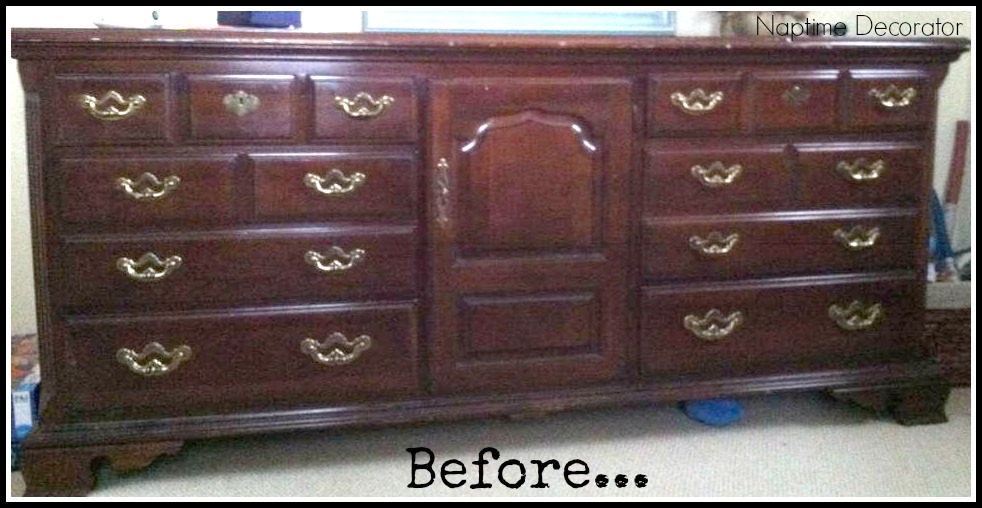
It was old, weighed a TON, and was allll kinds of scratched up all over.
But I knew this dresser had some potential…mostly because it was free and we needed another dresser for the kids’;).
So first, I had it in our son’s room because he didn’t have a dresser. And since the girls were sharing their room (at the time we inherited this piece- I’ll post an update about that soon!), there was no room in their room for this beast. Thing is HUGE in case you can’t tell.
But, long story short, the girls went back to their old rooms, leaving our oldest with the biggest room, all by herself. So her tall and thin dresser went to the middle child, and we moved this one into the oldest’s room. Just made sense. And yes, this means we still owe our son a dresser. Woops. But his room isn’t very big either, so this dresser just took up sooooo much space. He needs one like HALF this size.
Whew. Could you keep up with THAT?! If so, kudos.
You might remember this photo I posted on Facebook last week:
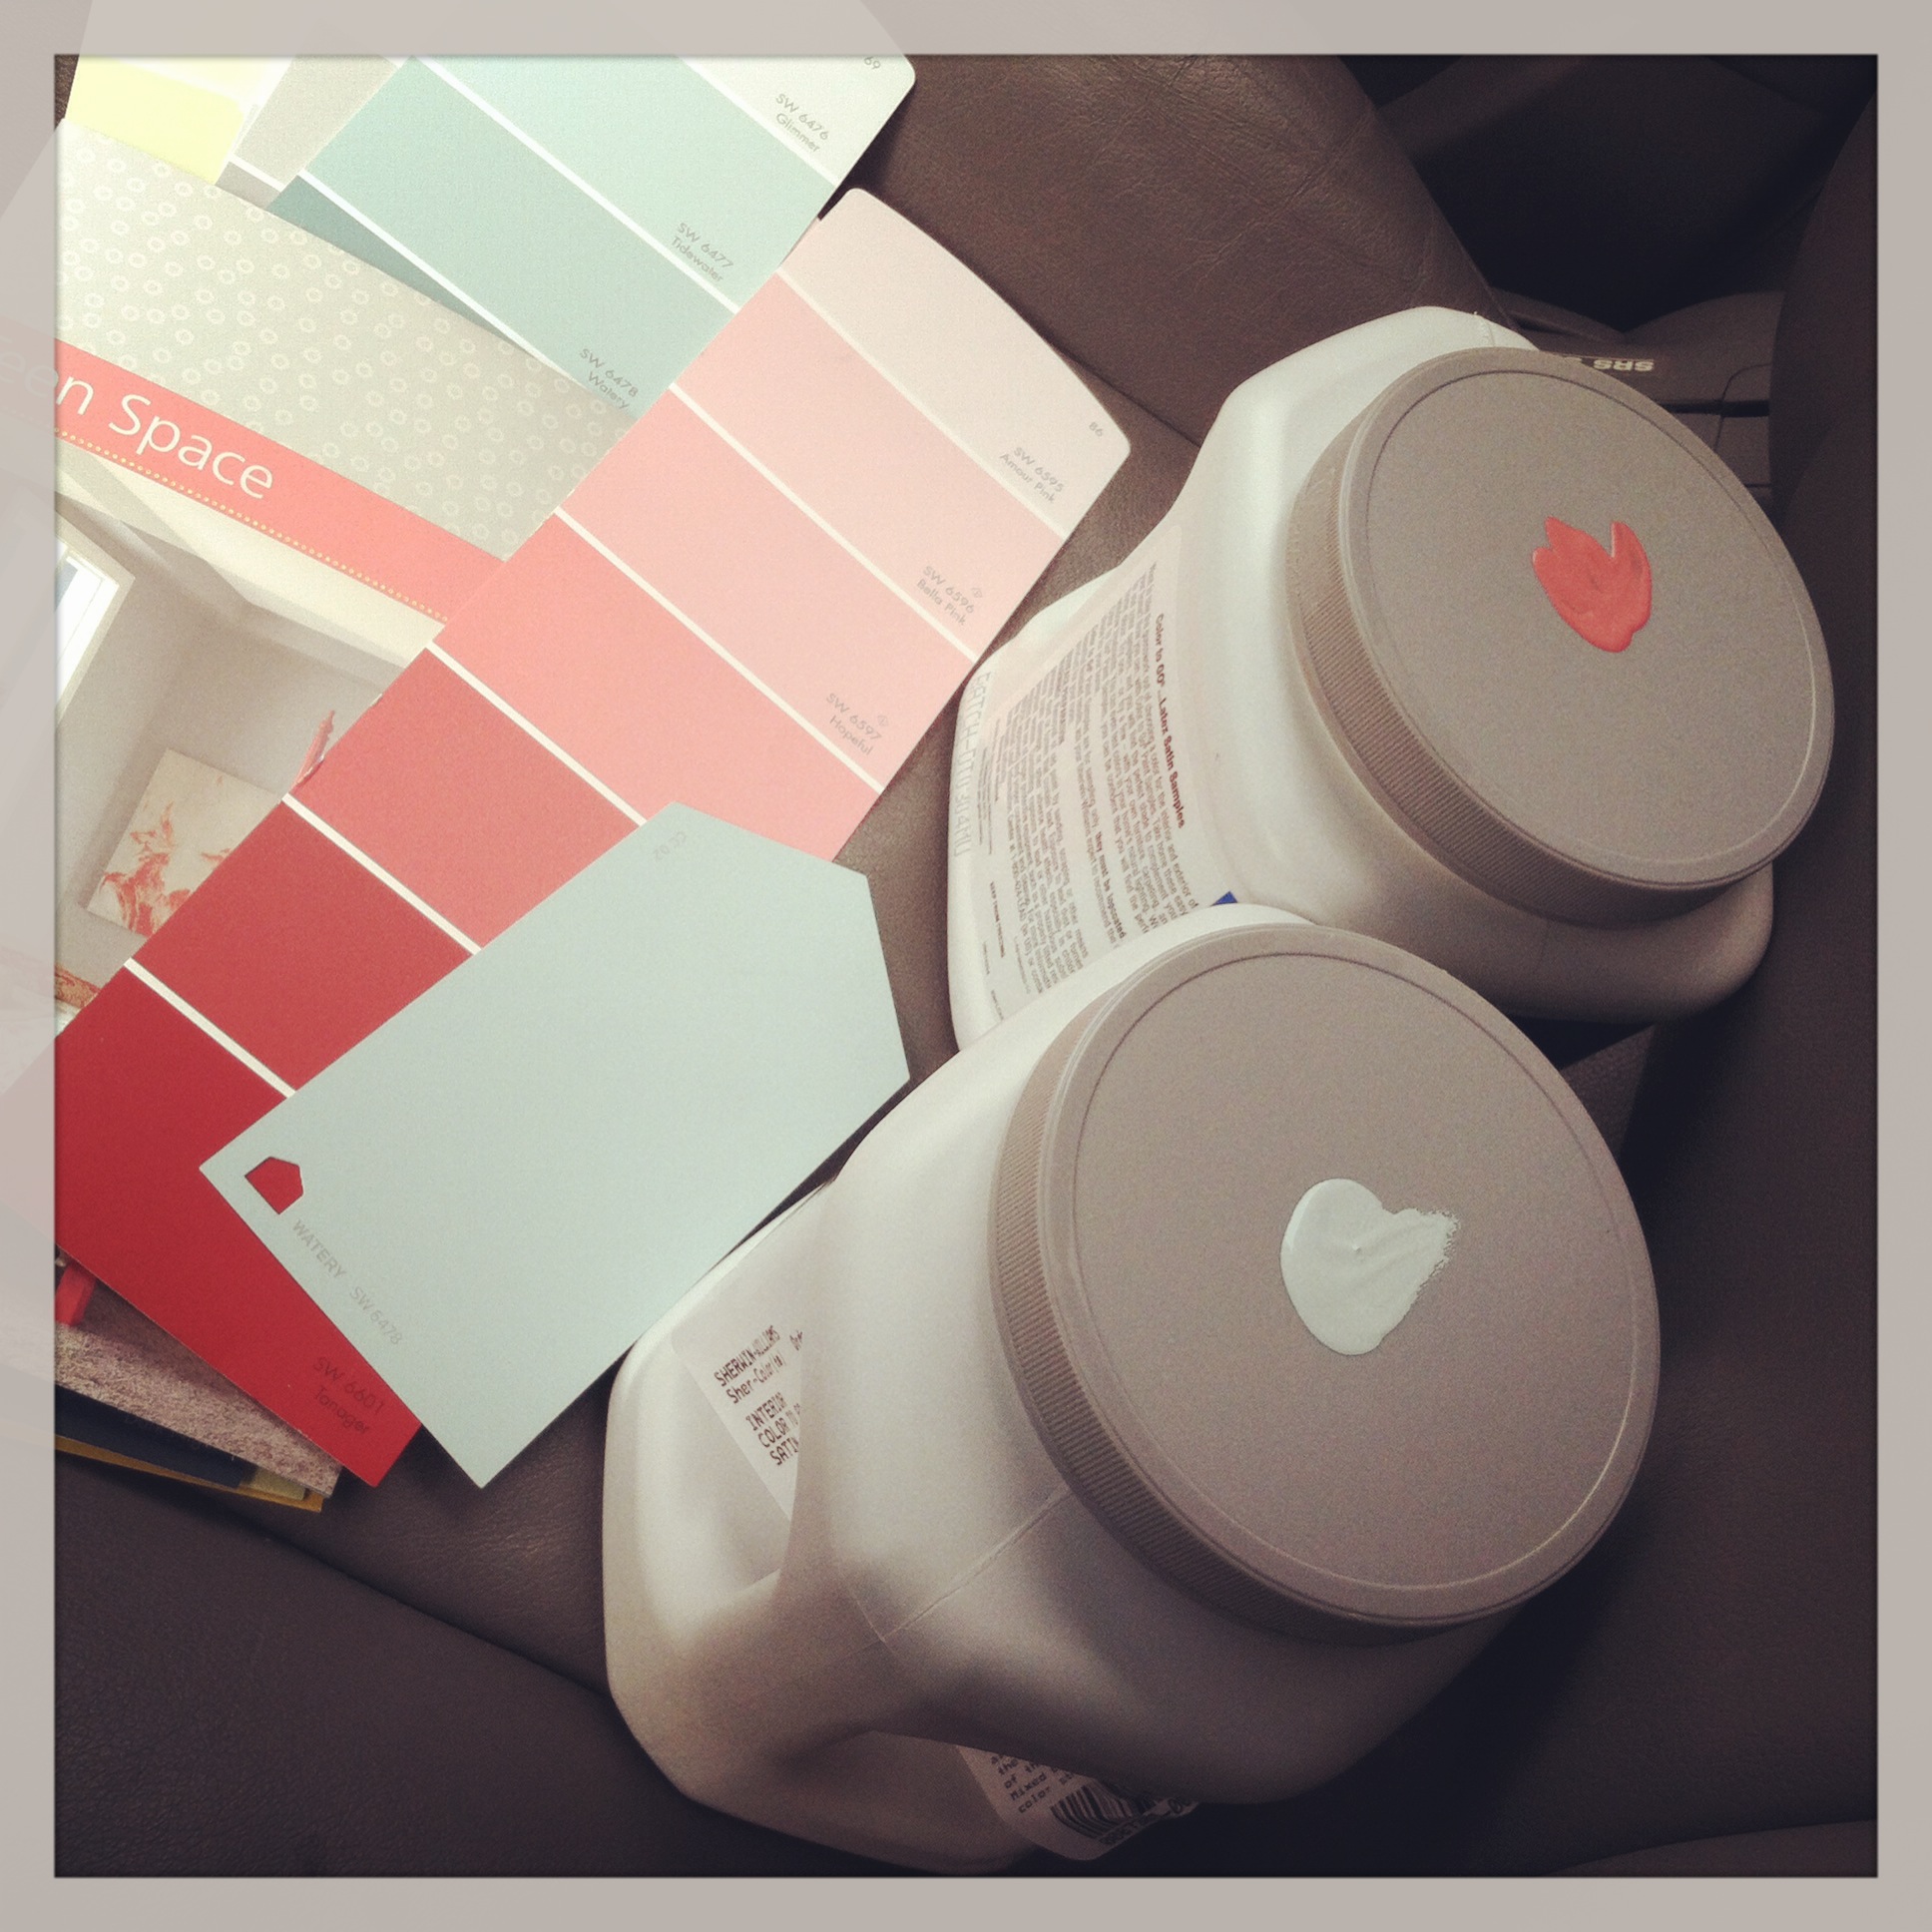
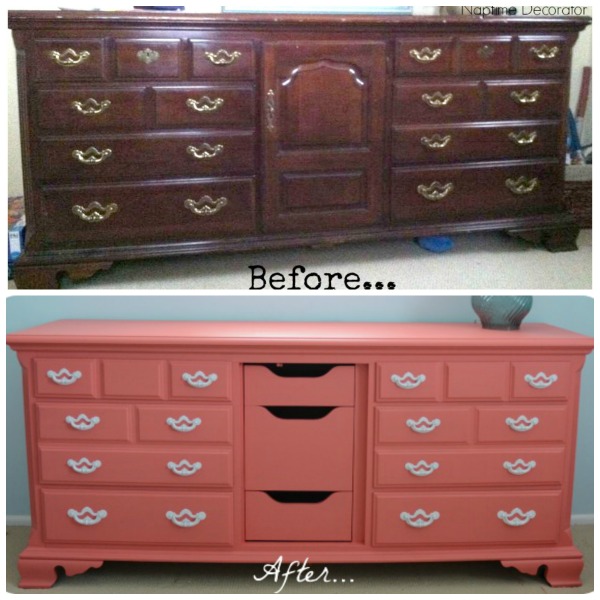
I picked up a sample of Sherwin Williams’ Begonia and Watery. I thought the dresser would be lovely in a coral, and do white beadboard up the wall, with the top third in the soft blue/green-ish Watery color.
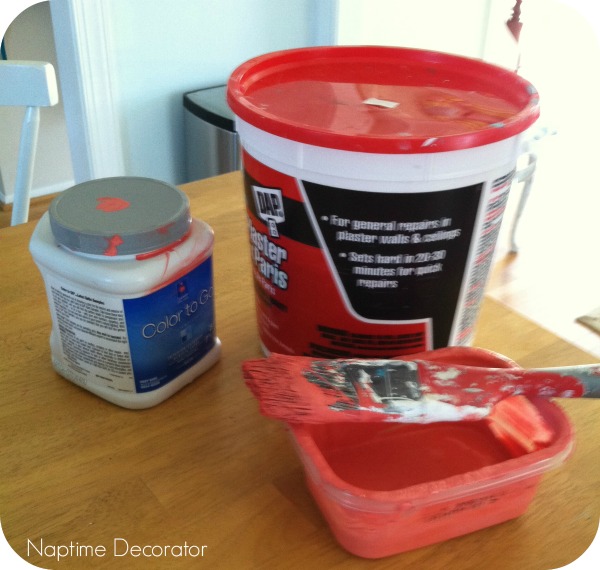
I decided to tackle the dresser head on yesterday. Which means, for those of you who have followed me for a while, I got out my trusty Plaster of Paris.
Again, I apologize for the crappy during photos.
I read long ago that adding a tiny bit of Plaster of Paris into paint makes it go on without sanding or priming. Just adheres nicely without all the prep work. And I’m ALL ABOUT saving steps and time, so I tried it and sure enough, works like a charm. You just need the tiniest bit to mix in your paint – I like to save old plastic containers for this very thing. Add some paint, a little spoonful of Plaster, mix it and start painting.
First, I removed all the gold hardware, wiped it all clean and free of dust, and got to work…
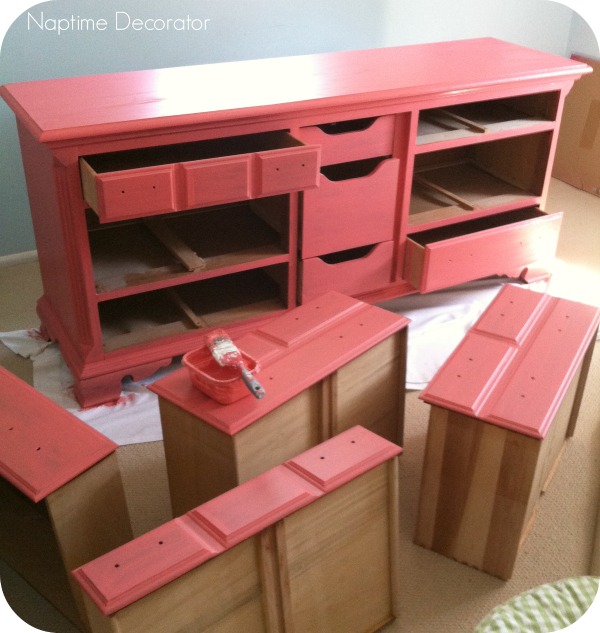
And after 3 or 4 coats (seriously, this dresser kicked my butt), I have one awesome coral dresser!
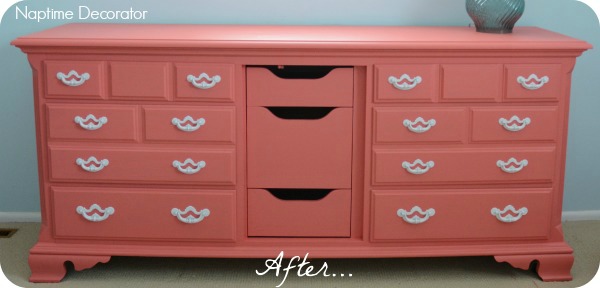
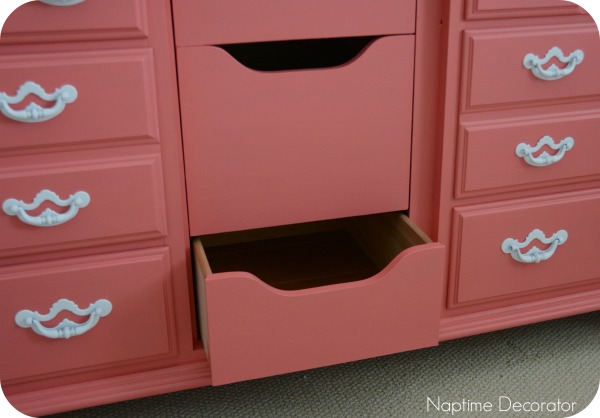
You might notice I removed the middle door there. I just thought it gave it a little more updated look. I wanted to do something on the pullout drawers, but haven’t decided if I’m going to or just leave them alone? Thoughts?
They’re fun – I figured my daughter could stash art supplies, jewelry, dolls, legos – whatever her heart desires in them.
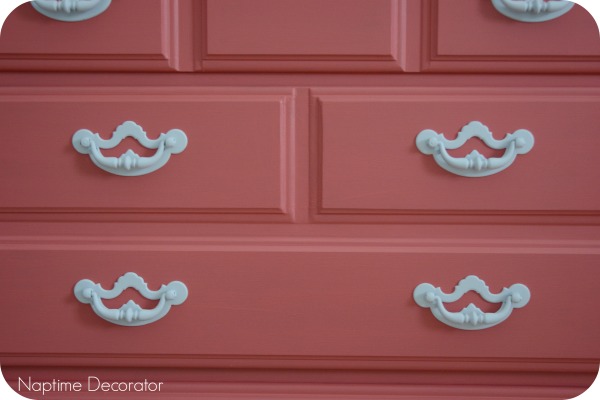
I decided instead of buying all new hardware, I would just use the existing ones and spray paint them white. I LOVE the contrast! I used primer and paint in one, in Flat White. Then I used a clear protective spray paint over the white, to ensure they don’t chip.
So the total cost of this transformation was about $6 for the paint sample, since I had Plaster of Paris and white spray paint already! Can’t beat that for a new dresser, can you?!
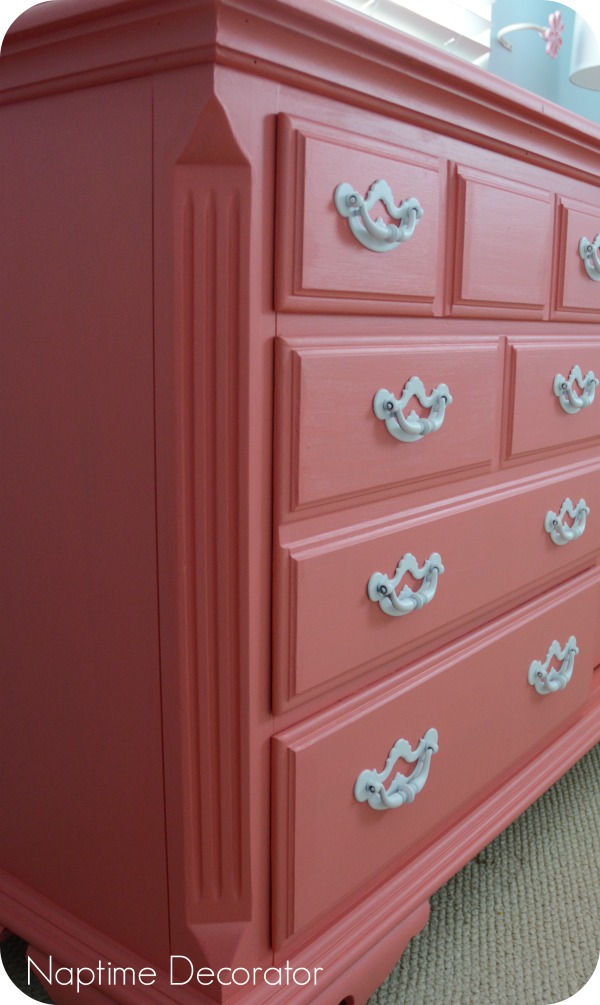
You might also notice in the before picture, that the top drawers have another brassy guy in the middle of the pulls. I removed them and used a little spackle to fill in the holes. The were just decorative anyway.
So that’s the story of the Big Bad Dresser Makeover…and my daughter is THRILLED! Now to work on the rest of the room…and her sister’s room…and her brother’s room…and the office…oh, and finish painting the hallway…
Oh my.
My work is never done. 😉

 Hi there! I’m Liz, a former teacher-turned-stay-at-home mom to three kids, with a passion to create a warm and inviting home on a budget. This blog all started when I’d put the babies down for a nap, and squeeze in a project during those precious couple of hours! My hope is that you visit this page and feel inspired to do a little “naptime decorating” of your own. Thank you so much for stopping by!
maybe on the drawers you could do chalk paint and she could label each one? and also those two empty spots up top look like the perfect spot for her initials
So funny – when this was going to be my son’s dresser, I thought of grey paint, with chalkboard labels on the drawers!! And I was contemplating a monogram! You guys are GOOD! 😉 thanks for the input!
Love it! I like the idea of a monogram on the middle drawer. Did you finish the paint with wax or anything?
HA! That was actually what I was thinking of doing!!! Too funny. Yes, I use Minwax as a protective coat – sorry, should have included that information.
Turned just so pretty for a little girl! Pinning this on my Before and After board~
Thanks, Rondell!
Beautiful! Really gives it new life!
Thanks Stefany!
I am totally impressed. Looks AMAZING! I like the middle drawers just like they are.
Have a happy week and a very blessed Easter,
~Sherri
I love this so much! I am inspired to finally renovate the dresser we got for free several years ago!
Love the color and that you took off the door.
Beautiful job!! Great color choice!
So gorgeous, I love it! What a transformation! Great job as always 🙂
Love it – great job! Question – did you do the work inside your house? No sanding right? I have a buffet that I want to paint but the wood
finish is very slippery/shiny. Think it will still work with the chalk paint and no prep?
Thanks! I do it inside the house – no sanding, just paint!
What did You exactly do to make the drawers in the middle??😃🤔
they were already there, I just removed the door!
Love it so beautiful. I’m in the process of doing my daughter room. Love the colors!… Question? What did you use for the middle? To replace the door that was already there.