Yes, I did it. The Christmas crafts are officially upon us, and I tackled my first one over the weekend. It was funny – I had just walked in the house from a Friendsgiving feast with our best friends and I kid you not – the DIY Leaf Garland that has yet to fall ONCE since I put it up, had actually come undone at the top corner. It was like it was saying, Ok, Liz, you had your turkey and pumpkin pie, let’s start getting in the Christmas mood now, shall we?
I knew just the thing to get this holiday ball rolling. My sister found this Santa sign on clearance – it cost pretty much nothing – and she grabbed it for me, thinking I could do something with it. She was right – it was a nice solid piece of wood, and a great size. I wasn’t crazy about the words, but I held onto it, just waiting for inspiration to strike.
Welp, inspiration struck when I was going through my Christmas bins. You know how I love to switch things up all the live long day? Well, I was no longer using the red J-O-Y letters I had in the dining room last year:
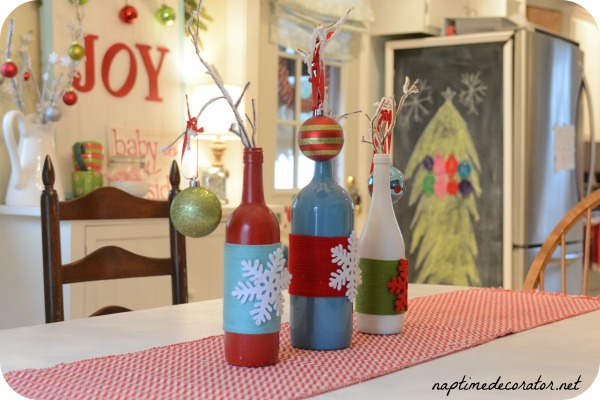
This was the only shot I could find – they’re the letters in the back there. The dining room no longer looks like this, and therefore things will be looking a little different in there this Christmas season;)
I decided to marry the JOY letters and this sign. So if you’re keeping track, so far this project is costing me ZIPPY.
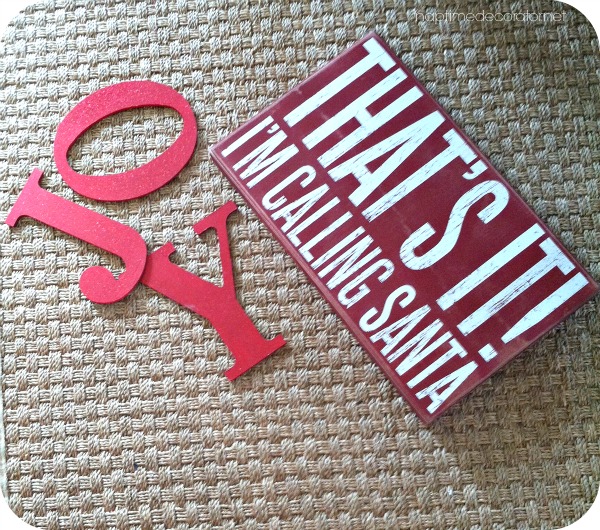
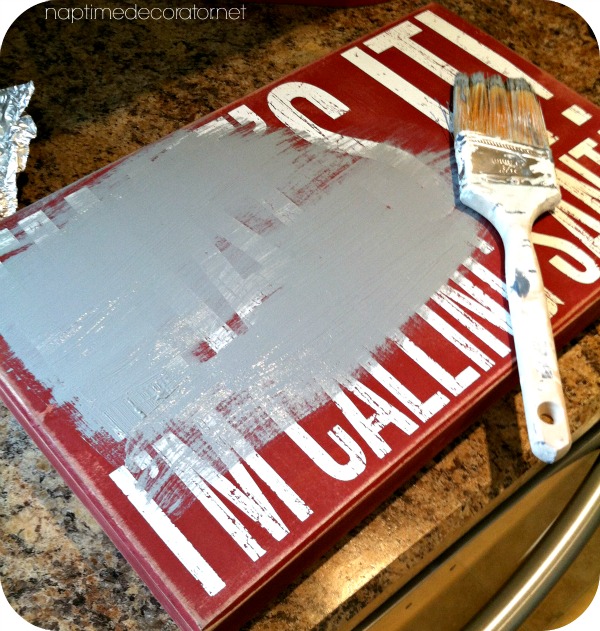
I decided this would be a perfect size for our family room wall, right by the big window. Since I now knew what room it was going in, I could pick the colors. At first I was going to go all Christmas on it and leave the letters red and paint the sign white. Then I thought a minute…gray would look really great. A little unexpected, and it would pull out the gray accents in that room. White letters…yes! I was starting to see it and I was digging it. I got out some chalky finish gray paint, and started covering up the Santa quote.
Then, I sanded the glitter off the red letters, and took them outside to spray paint them white.
THEN! Then I had an idea!
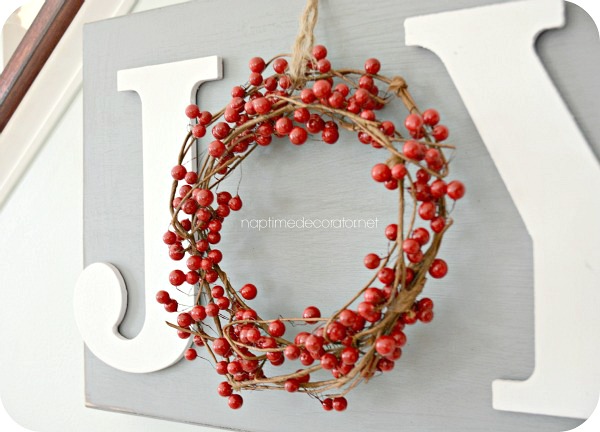
I spotted some red berry garland in my stash. What if I used that for the ‘O’?!!
Every once in a blue moon I get one of these ideas that just make me feel so smart;)
Here it is!
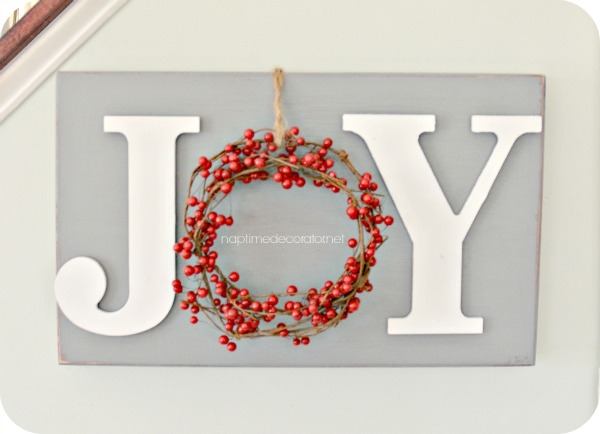
I’m loving this little guy.
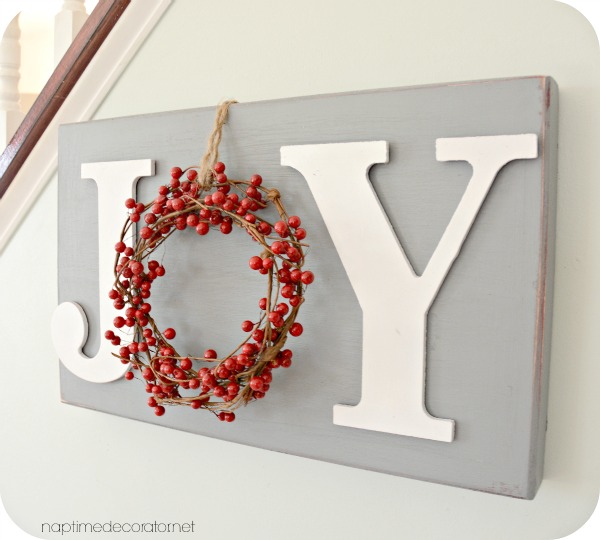
I decided to sand the edges a little, to let the red peek through, and makes it a little imperfect…which I love.

Now, to get the letters on, I just used strong tape. This worked great when I attached them in their previous state to the dining room board, so I figured what the heck? And for the wreath, I just looped a strand of jute through it, and taped it onto the back of the sign.
It looks so cute in the family room – can’t wait to show you more when it’s all done!
There’s a lesson here, folks. Check the clearance aisles – if there’s an awesome sign but the quote doesn’t float your boat, think about what I could be with a little paint and creativity! You could get yourself a brand new sign for next to nothing! It’ll bring you so much…joy. Sorry, I couldn’t help myself with that one.
😉

 Hi there! I’m Liz, a former teacher-turned-stay-at-home mom to three kids, with a passion to create a warm and inviting home on a budget. This blog all started when I’d put the babies down for a nap, and squeeze in a project during those precious couple of hours! My hope is that you visit this page and feel inspired to do a little “naptime decorating” of your own. Thank you so much for stopping by!
I really like it!
Thanks, Heather!
Very cute.
Thank you, Pam!
soooooo cute!!
Thanks, Nicole!
I am inspired by your simple creativity. My kind of decorating. Simple……Cute
…. Perfect
Thank you so much, Cleda!
That’s adorable! I also have that sign but the quote is appropriate for this house!! 🙂
Ha! It is a super cute sign, but didn’t go with the other stuff too well – glad it works in your house!;) Thanks so much!
Super cute! You did a great job.
Blessings…
Sherri
Thanks, Sherri! XO
Is the gray paint you used an actual chalk paint? Can you tell me brand of paint used? I am going to do this for myself and some as gifts, love this!!
it’s a homemade concoction, sorry! I took some samples of greys that I had and mixed in some Plaster of Paris to give it a nice matte finish. And thank you!