The power of paint, people.
It’s ASTOUNDING.
Take a look at this dresser before:
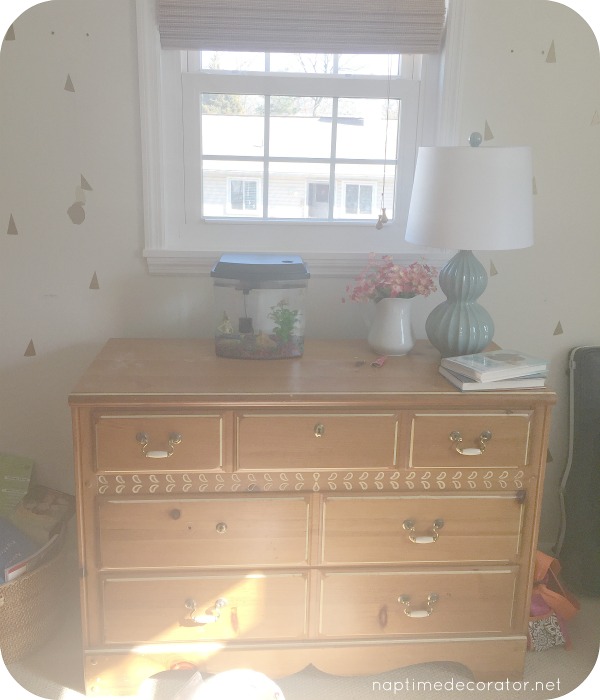
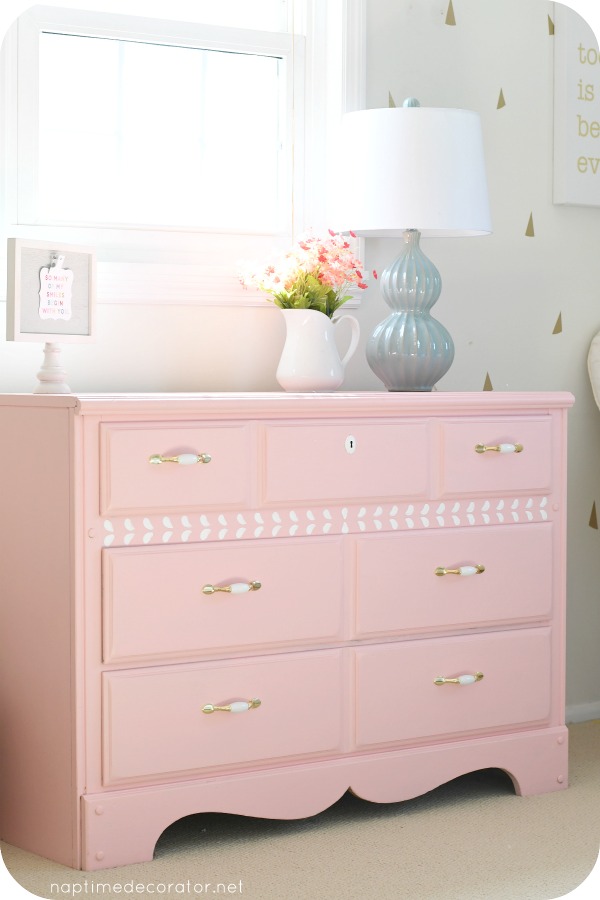
And after some paint and new hardware, take a look at it now:
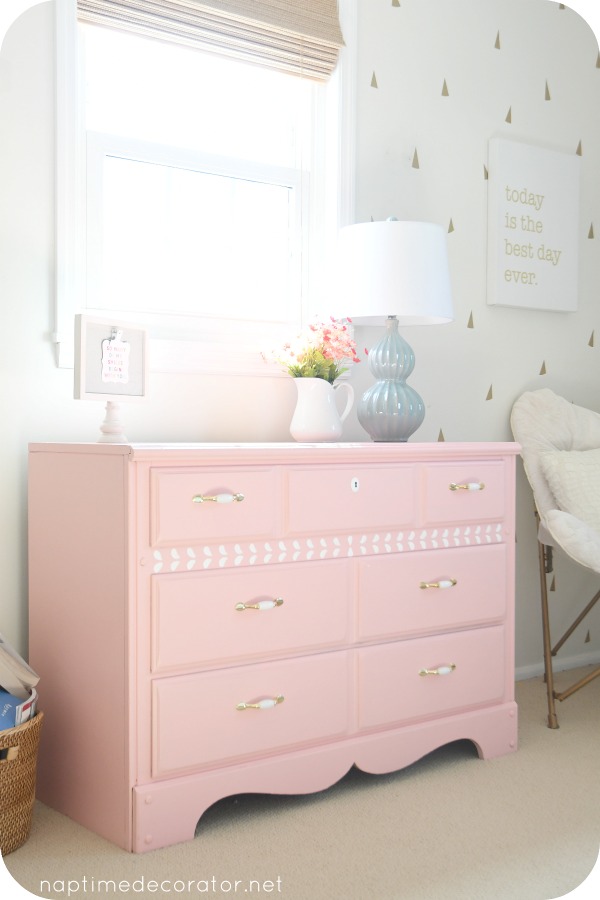
Did you ever think she had it in her to look that cute?!
Let me backtrack for a sec.
If you read my last post, you’re aware we’re making some little changes in my oldest daughter’s bedroom.
It all started with her wanting me to rearrange (ever since I rearranged my son’s room, the girls have the itch – I can relate;) ). So we swapped the bed and her big humongous beast of a dresser. Everything about the new setup I LOVE – the room feels bigger because we moved the bed a little closer to the far wall (I’ll show you it all in the reveal, whenever that is!), except for ONE THING.
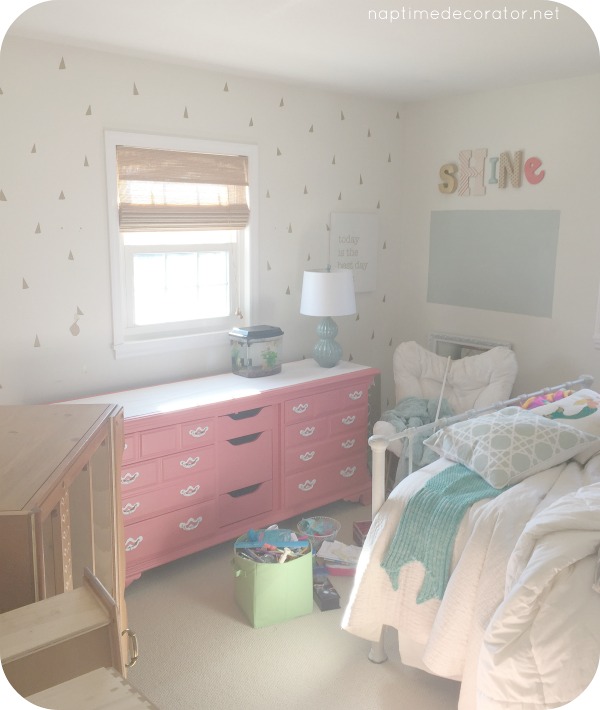
Now the dresser, while fine before when it wasn’t the focal point, is now the first thing you see when you walk in the room. And it hits you like a ton of bricks. I wasn’t digging it. Not only that, but it just wasn’t the smartest use of space in there. She could get away with maybe a shorter one in that same spot, and maybe a taller one along one of her other walls. And if she ever wants to rearrange again, we have a lot more options.
So that was on the backburner of my brain, to be on the lookout for a cheap yard sale dresser I could fix up. I posted that I was getting rid of this one on Facebook, and my sister-in-law came and picked it up! 🙂
And if this isn’t meant to be – my aunt is moving and downsizing. She had a few dressers she wanted gone. I went to take a look at them and a couple of them would be PERFECT!! It gets even more meant to be – these were actually dressers my grandparents bought for her – the same grandparents who lived in the house we own now. So they are returning to their original home. CRAZY, right?!
So I cleaned her up, and picked up a lighter coral. I figured, since we’re doing a little mini makeover in here now, let’s bring some sweet subtle shades into play. Especially after I saw how much she loved that sweet pillow! I went with Sherwin Williams Hopeful. I fell in love with the name, and it was on the same color strip as Begonia, the dark coral of her big long dresser. Meant to be.
I mixed it up with a spoonful of Plaster of Paris so I didn’t have to sand and prime, and it went on beautifully. Waxed it with my Minwax Finishing Paste, and some new hardware (from Lowes) and now she has this cutie in her room.
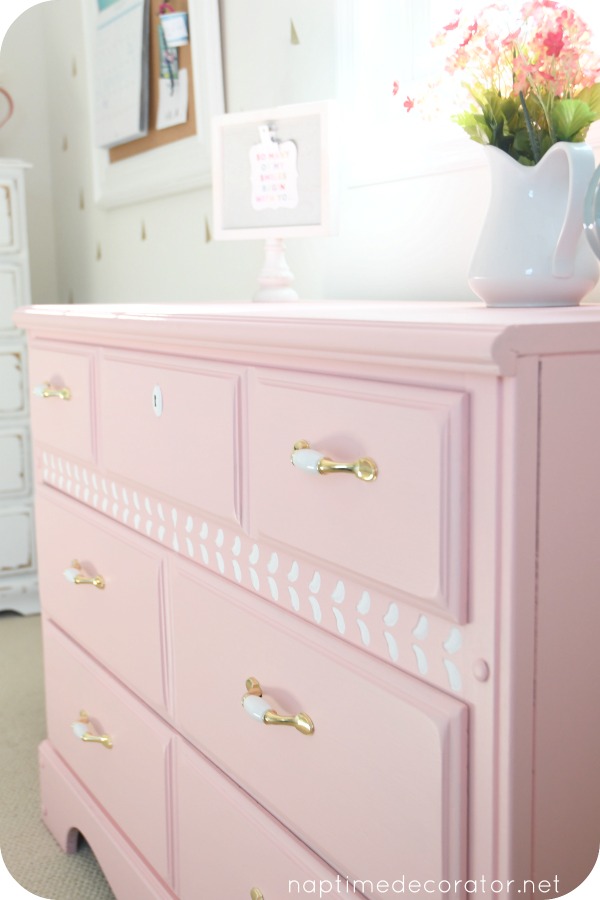
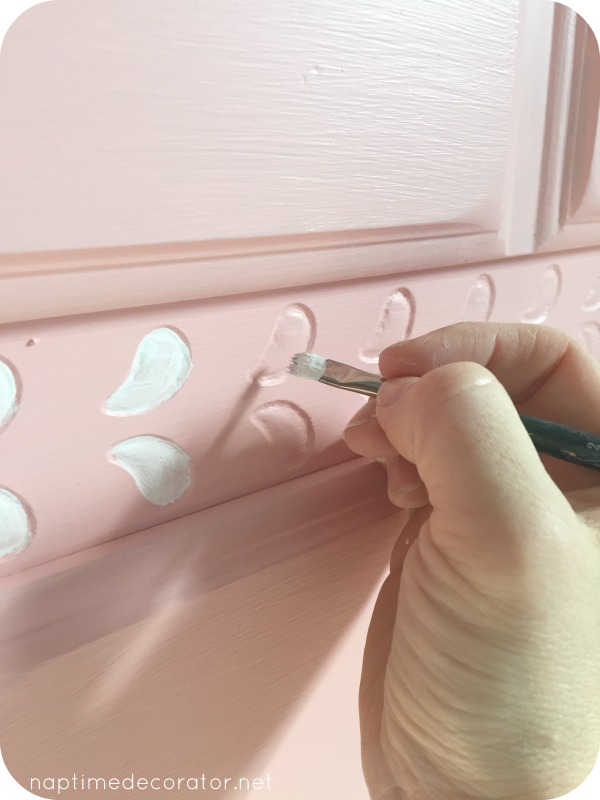
Oh! That little strip of white teardrop shaped thingamabobs – I just got out my white craft paint and a tiny brush to highlight those:
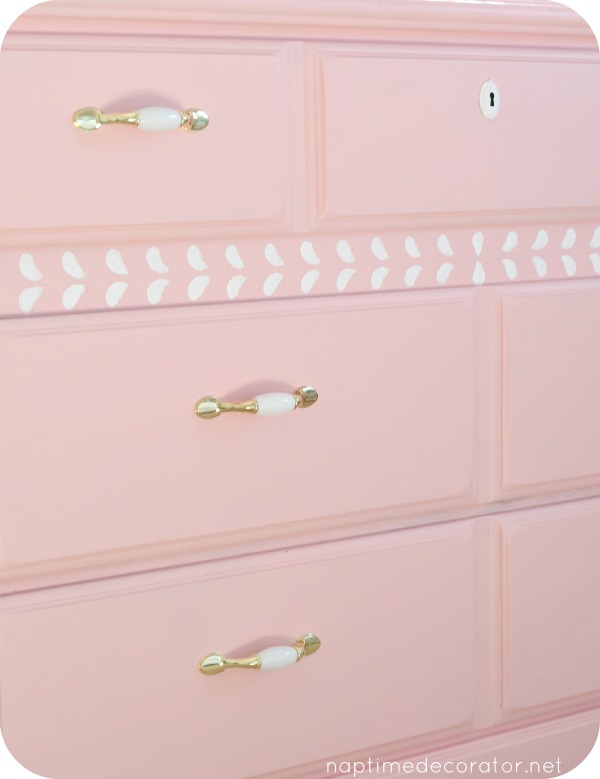
I love the white and gold with this pinky shade of coral. When all is said and done in here, I think it’s going to be adorable.
Seriously. I mean it, friends. NEVER underestimate the power of paint!
Stay tuned for more updates in her new (ish!) room:)

 Hi there! I’m Liz, a former teacher-turned-stay-at-home mom to three kids, with a passion to create a warm and inviting home on a budget. This blog all started when I’d put the babies down for a nap, and squeeze in a project during those precious couple of hours! My hope is that you visit this page and feel inspired to do a little “naptime decorating” of your own. Thank you so much for stopping by!
Wow. That dresser is absolutely Darling now. I love it. And those gold and white pulls. Amazing!! Did you say if you put a spoonful of plaster of Paris in your can of paint you do not have to sand and prime?? I must have missed that post, if you did one because that sounds amazing. How does it work? Thank you.
Thank you! There’s a recipe online I’m sure if you google it – it’s about a spoonful of plaster to a cup of paint. No idea where I read about it originally, but it works great! Or you could buy chalk paint. There’s no prep work for that either!
LOVE!!!
Thanks, Karen!
Love it! The color is amazing !
You are raising future designers!
I can see a Woody Design Firm in your future.
Btw, Eva is really into design as well.
Thanks, Anne! Your lips to God’s ears;) That’s awesome about Eva! I miss all of you!! XO
How pretty!!! Love all your doing in her room 👍
Happy Monday…
Sherri
That is so adorable! So feminine. Great job.
Thanks, Cheryl!
I just discovered your site and it is absolutely fabulous! I am interested in adding the Plaster of Paris to the paint as the finish looks great. Looking it up the directions say to mix 1/3 cup with 1/3 cup water. Is this the way you did it or did you add the plaster directly to the paint can? Thank you