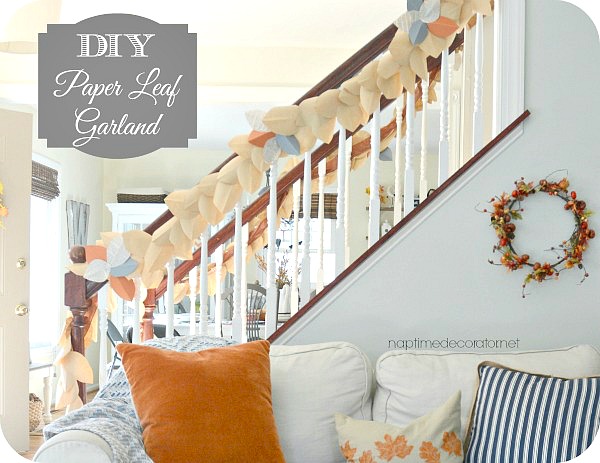
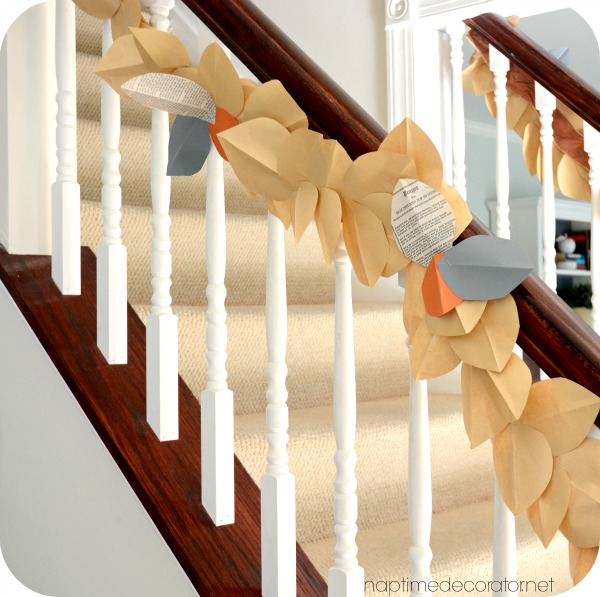
I don’t know if it’s the DIY Book Page Wreath I made a few weeks ago or what, but I can’t seem to stop trying to find ways to decorate with paper these days! It’s so fun, and one of – if not THE – cheapest way to decorate! I mean, what’s not to love? I’m super excited to share this one with you! I wrapped BOTH of my banisters in a fun, Fall-y garland…and spend a whopping $6. That’s right.
And all you need is:
-a roll of craft paper (got mine at Michaels at 50% off, so I spend $2.50 on that -and I still have a good bit left!)
-a stapler
-scissors
-some pretty cardstock/book pages of your choice
-masking tape
-two rolls of ribbon (I got mine at the Dollar Tree! So $2 there)
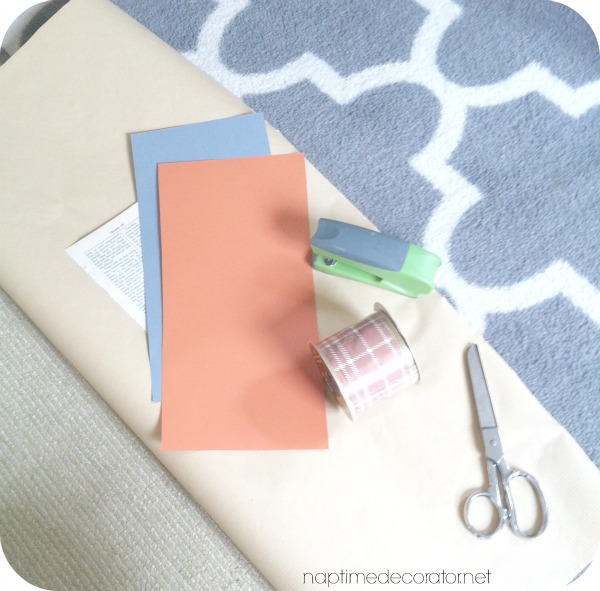
I picked up some grey and orange cardstock, because it matches my decor. Feel free to use whatever you like. This was actually an afterthought – I made the garland with just craft paper, and it needed a little something. I also ended up grabbing some of that old book I used for the book page wreath, and loved the way it added a little interest. Plus, it ties in the book page wreath!
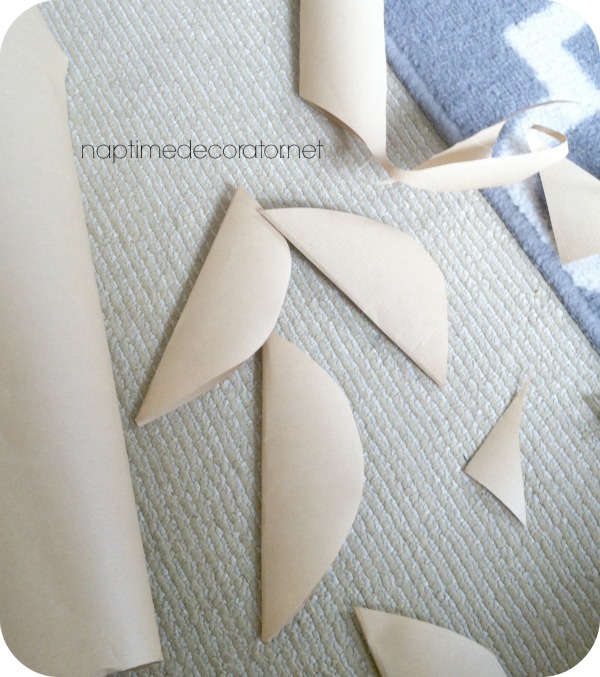
This project is easy, but take a little while to complete. I laid the entire length of the ribbon down on my family room floor, popped in some DVR-ed shows to catch up on, and got to work. I cut some strips of craft paper, about 4 inches wide (some smaller, some larger – whatever size leaves you want, go for it). I folded the strips in half (lengthwise), so I could just cut out half the leaf. Unfold, and voila! You have a perfect leaf!
Working two at a time (to cut down on the amount of staples in the ribbon), I stapled them on the ribbon, one going one way, the other going the opposite. Like this:
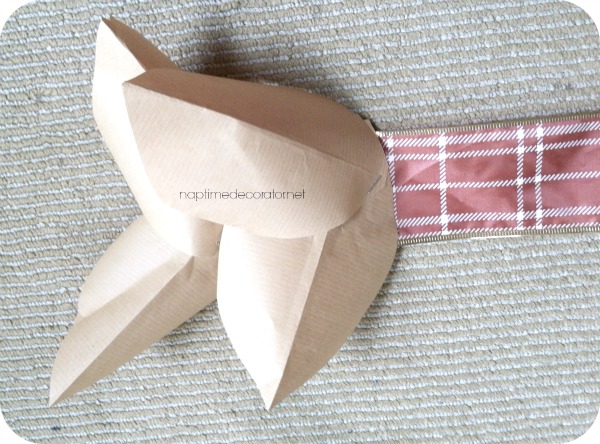
You don’t really end up seeing the staples, because each leaf pairing goes on top of the one before it. Make sense?
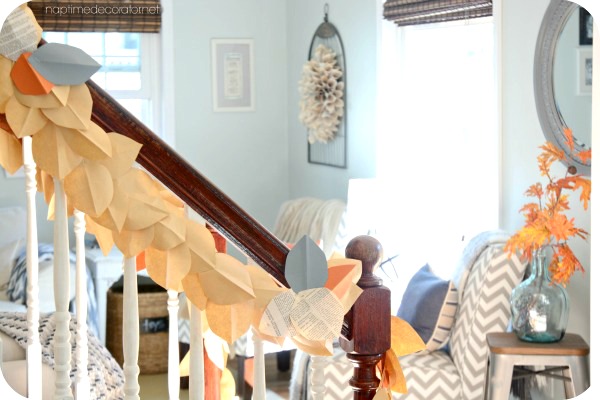
Just keep on truckin’ till you’re done. Once this part was done, I hung it up on the banister. I hung it before adding the colored leaves, because I wanted to add those elements of color and interest at just the right spots on the banister.
I just used plain ol’ masking tape to attach it to my banister.

I wasn’t quite sure what I’d be doing with the grey, orange, and book page leaves, but I ended up making little clusters and stapling them on the bottom, middle, and top.
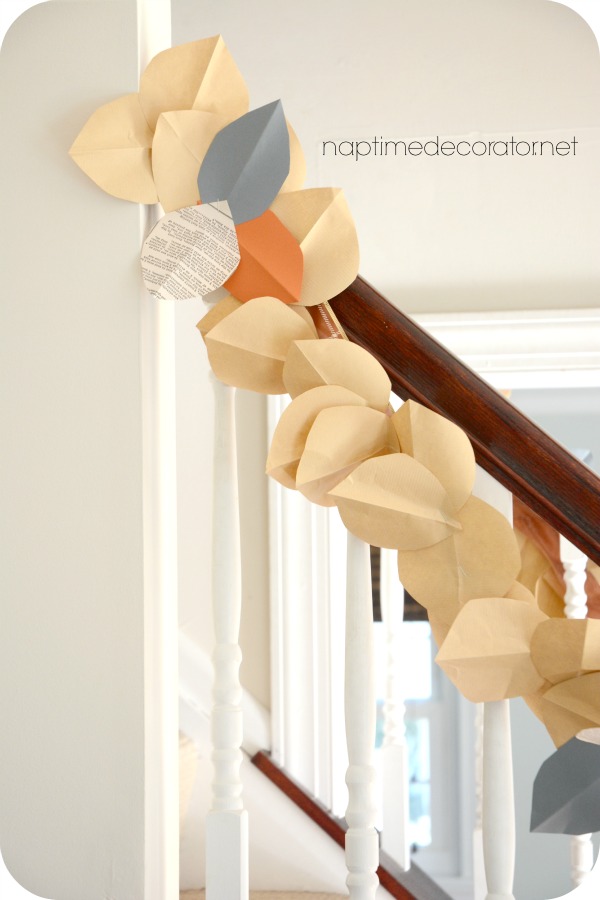
I’m glad I used the book pages, because they help camouflage the staples! I made sure to place them on top of the grey and orange leaves, so the staple isn’t noticeable.
I started at the top (see above photo), and worked my way down, sort of bringing it up in the middle so it had a swag look to it. Once I reached the bottom, I just draped it around the base piece.
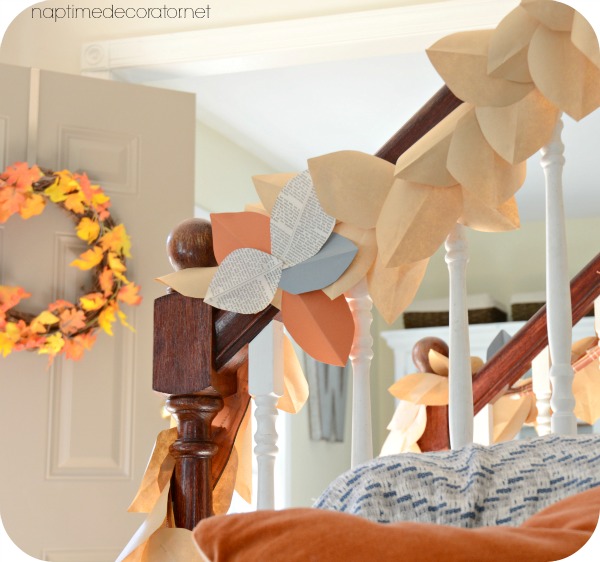
I also added a bit of masking tape to hold the bottom in place, so it appears that it wraps around the base piece a bit.
(You can see my book page wreath is in the back there!)
I’m loving this addition to the Fall decor. Such a fun, yet crazy thrifty way to add a nice festive touch to your home.
My mind is already spinning for Christmas versions…I think I have one in mind and I can’t wait to try it! 🙂 Who knew a little paper and tape could be so cute!?

 Hi there! I’m Liz, a former teacher-turned-stay-at-home mom to three kids, with a passion to create a warm and inviting home on a budget. This blog all started when I’d put the babies down for a nap, and squeeze in a project during those precious couple of hours! My hope is that you visit this page and feel inspired to do a little “naptime decorating” of your own. Thank you so much for stopping by!
Our little town’s library is having its annual book sale. We are talking 10’s of thousands of used books for anywhere between 25 cents and $3. The final hour is fill an entire shopping bag for $5 per bag. You bet I’m gonna be hitting it up for some garland and wreath worthy books.
super cute and thrifty way to decorate! I’m so glad you thought of this and I now get to try it. Beautiful!
Thanks, Nicole!