This month, my friend Jocie (who blogs over at One Project Closer’s The Better Half), brought over her ginormous stash of glass paint and multi surface paint from Deco Art. Since she had a bunch, she asked if we’d like to have a craft night using all her goodies. We were game, and only had to bring a frame and a quote print-out of what we want to paint onto the frame. She used this same technique with the anchor art she made me (which I ADORE!!), and since we knew how awesome that looked, we jumped at the chance to create our own. All we had to do was trace the print-out using either a paint marker, or tiny paint brush. So we poured some wine, snacked on some yummy food, and got painting…


(Joc added some stencils to her frames that she used too!)
Here’s how they turned out…

So cute for her daughters’ bedroom!

A line from my friend and her husband’s wedding song – she ended up painting the W darker, and it turned out fabulous…then at the VERY end of the night, the glass cracked! 🙁 It was so sad! So be super careful, that glass doesn’t take much to crack!

LOVE the way this tree turned out – and the colors are just perfect in their home!

And if you have light paint on your walls and want these to show up better, stick some pretty scrapbook paper/wrapping paper/fabric – anything – like my friend did with hers. Turned out great, right?!

And aren’t these just perfect for an expecting mom? So perfect for a baby’s nursery!

Another friend just had her bathroom done, and made this to coordinate with the color scheme. So cute for a bathroom:)
And for my project, I decided to use an old sign I had from eons ago – I always liked it, but the dark lettering and frame just didn’t vibe with my new look…

I figured with the words on words look of it, it would be perfect for this project! So I took it apart, took the frame outside and spray painted it silver. Then I chose a white paint marker to trace the WONDERFUL LIFE in the background…

I should add, if this is something that’s just going to be hung on a wall, you can certainly use multi-surface craft paint. But if you want to do a plate, or mug, or something that needs to be wiped clean, use the glass paint so you can bake it and cure it, etc. (Just follow the directions on the bottle!)
Then once that part was dry, I used a tiny brush to trace “It’s a Wonderful Life” and chose a robin’s egg blue (surprised? Didn’t think so;). It’s important to use a brush for the second stage, because it’s gentler on the marker-ed paint. The marker is easily chipped if you use another marker on top of it, but the brush is so soft that it works fine. Then I used hot glue to secure the wobbly glass. You know how a loose picture frame feels? That’s what it’s like, so you have to glue that bad boy in there or your glass might fall out.

I thought it would be cute above my blue door!

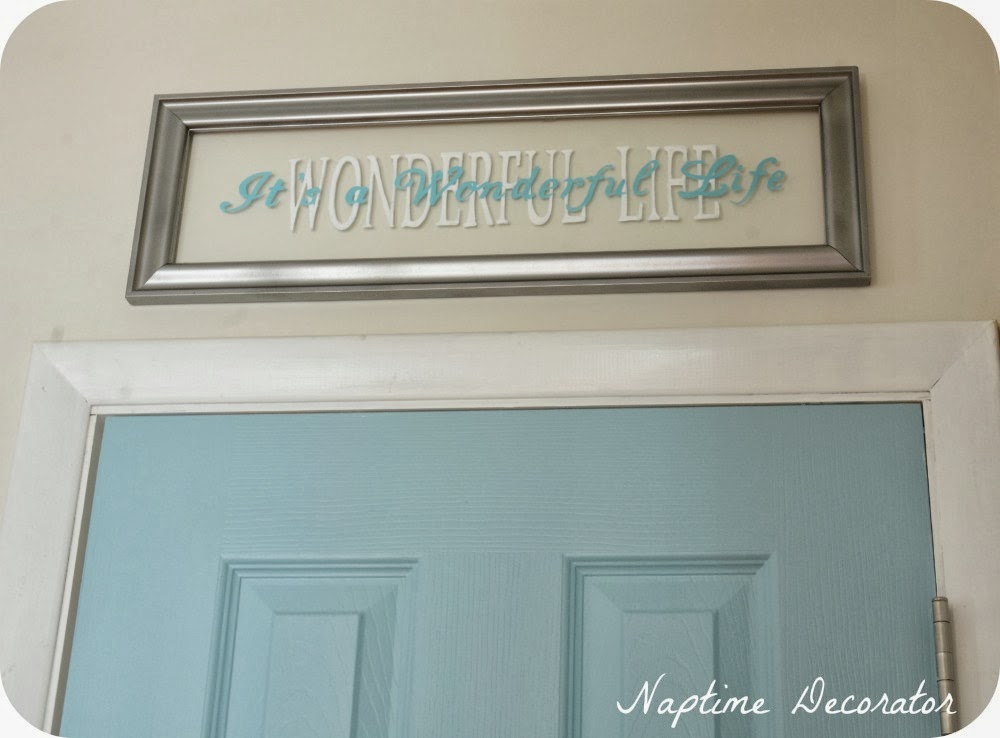
Nice little addition, don’t you think?

And the best part is, it was totally FREE! Can’t beat that!
So that’s this month’s Craft Night. Love that this project lends itself to SO many ideas – nursery, anniversary, really ANY kind of gift, or just make one for your own home. They’re so easy and inexpensive, too, all you really need is a frame, something to trace, and the paint markers or paint and a brush. Thanks, Joc, for being so generous with your stash!
Can’t wait to see what next month brings:)

 Hi there! I’m Liz, a former teacher-turned-stay-at-home mom to three kids, with a passion to create a warm and inviting home on a budget. This blog all started when I’d put the babies down for a nap, and squeeze in a project during those precious couple of hours! My hope is that you visit this page and feel inspired to do a little “naptime decorating” of your own. Thank you so much for stopping by!
how did you cut the quotes out of the paper to paint them onto the glass?? with an exacto knife?
No cutting, just traced them.