My son’s room could be the slowest makeover in the history of makeovers. How long have I been talking about this?! Pretty sure we’re onto years now. Every time I get on a roll, I get sidetracked and move onto something else. Not that I don’t want to work on his room, but when I get an idea on the first (main) floor, I can’t seem to stop, and the upstairs takes a back seat. EVERY. TIME. But this time, I think we’re really moving. (Famous last words).
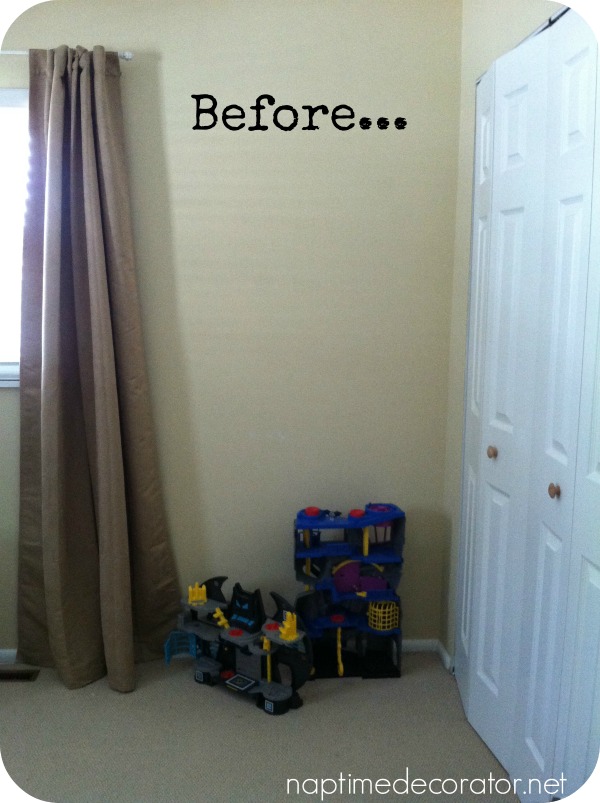
He had this boring corner of his room, just begging for something fun. He just started Kindergarten and LOVES IT. I mean, I’ve never seen a kid so excited about school – when he gets off the bus it’s like he can’t stop talking. I love it. Then he comes home, and grabs paper and markers and starts giving HIMSELF homework?!
So naturally, a chalkboard sounded like a perfect solution. I knew just the look I wanted. Big and rustic and fun.
Here’s what we were working with (pardon all the terrible phone pics!)
…and now…

Remember that table and chairs set? That set the color scheme – we’re going with grey walls (top half), white beadboard on the bottom, and navy/orange accents. And lotsa rustic wood touches to warm it all up. So you’ll see none of that’s been done yet, as his walls are still the nursery paint color, the window hasn’t been trimmed or updated, the closet needs molding as well….the list is LONG, but we’re getting there!
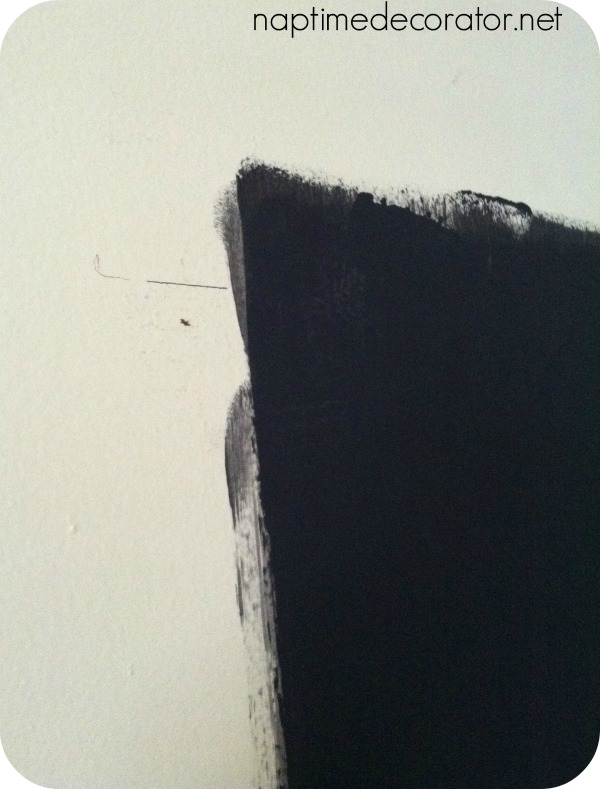
This chalkboard was SO inexpensive, but packs such a punch. First, I painted a large rectangle on the wall with chalkboard paint. They sell it in quart sizes, and I’ve had the same one for years – just grab a brush, and give it a couple coats. Read the can for exact directions, like how long you should wait before you write on it, ‘priming’ the walls with the side of a piece of chalk, etc.
Then I bought a few pieces of 1x6x3s. I cut them to fit the rectangle I had painted. The two smaller pieces are 34 inches long, and the longer pieces are 48.
I sanded them so my little guy won’t get splinters! Then took them outside and stained them with Walnut stain.

Once they dried (I kept them outside for 2 days since they’re so stinky!), we (my husband and I) brought them in and started framing the chalkboard, using a little wood glue and a nail gun.
Since I had the chalkboard paint and the stain on hand, all this project needed was three pieces of unfinished wood! Super thrifty, gotta love that!
First, we held up the pieces just to make sure we knew where to nail them. We started with the top piece and marked where the corner would line up. If you look closely in this pic you’ll see the pencil line: (You’ll also notice I didn’t worry about painting the chalkboard rectangle neatly because I knew the wood border would cover up all the imperfections).
We kept going with the other pieces…a little wood glue on the back, and nail gunned it to the wall. Rockin’ and rollin’. A few nails in each piece and good to go!
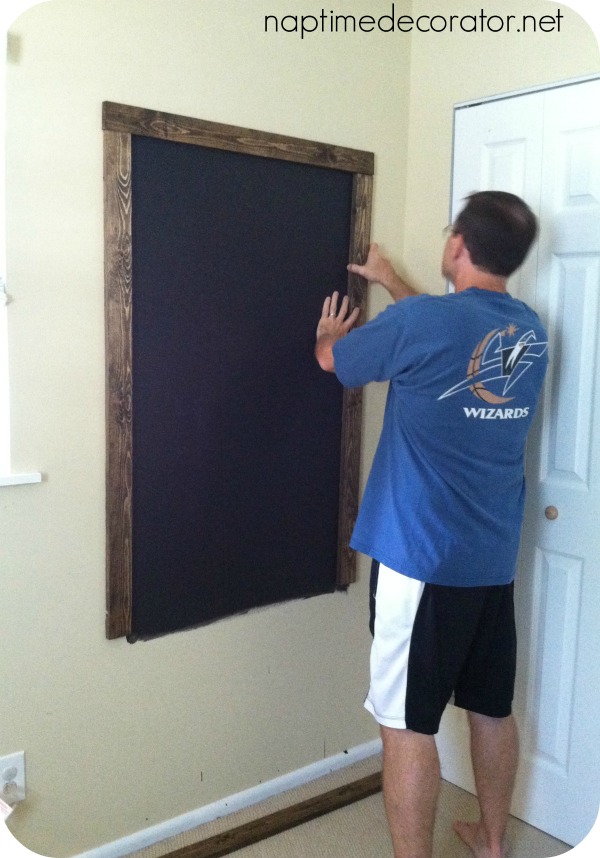
The bottom piece was the last to put up…

Again, my apologies for the crappy photos. When we get moving, the last thing I feel like doing is going to set up the good camera! 😉
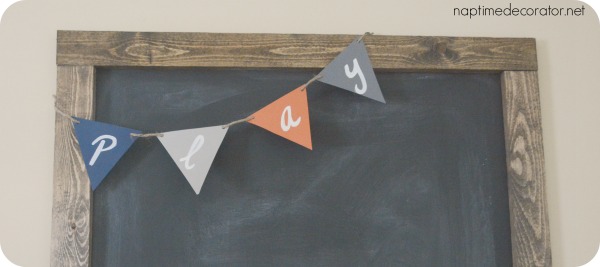
But I did get it out for the After. Here it is!
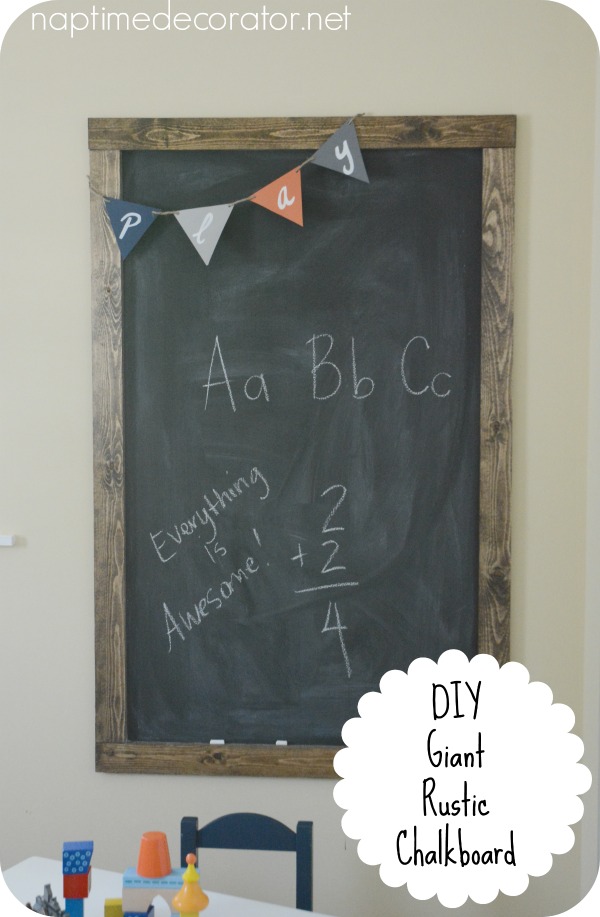
I decided it needed a fun banner, so I did that with some scrapbook paper that matches (er, WILL match, I should say!) his room. I cut four triangles, punched two holes in each top corner, threaded a strand of jute in each triangle and freehanded the word ‘play’ in white craft paint. Took 5 minutes, but I think it’s a super fun touch!
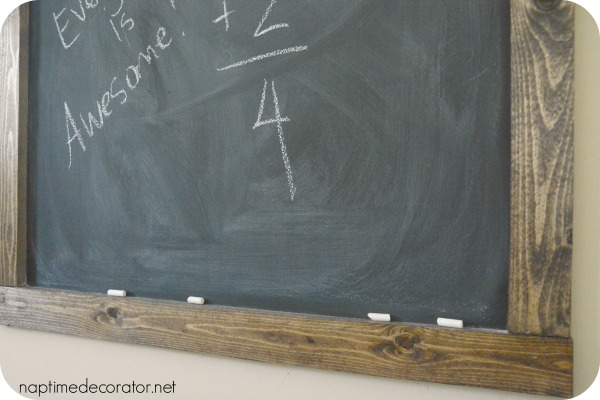
And the wood is thick enough that it’s the perfect little ledge for chalk!

We’re on a roll now, people! Maybe by the time he hits his teenage years we’ll have this room complete!
Stay tuned…;)

 Hi there! I’m Liz, a former teacher-turned-stay-at-home mom to three kids, with a passion to create a warm and inviting home on a budget. This blog all started when I’d put the babies down for a nap, and squeeze in a project during those precious couple of hours! My hope is that you visit this page and feel inspired to do a little “naptime decorating” of your own. Thank you so much for stopping by!
Love it!!!
Love it! The wood also allolws for a good surface to put cute little sticky notes that you want to stand out from the chalkboard like “I love you – please clean up your room :-)” or “Brush your teeth” 🙂
Really cute and I love how you didn’t miter the corners, to keep it rustic. Way to go! You have me wondering what blank wall in my house I can use. . .
Thanks, Heather! funny you should mention that – I debated that one, but in the end thought the “un-mitered” (is that a word?!) ends would make it more rustic;) Glad you noticed!