Before I get into my DIY pillow cover, I just wanted to share my gratitude for YOU on this Thanksgiving Eve. YOU. You wonderful person reading this right now. You took a couple minutes out of your busy day to click this link and you inspire me every day. You keep me going with your words, with your love, with your kindness. You open your heart to me and when I comment back that ‘it means the world,’ I wholeheartedly mean it. I swear, I have the best readers in all of blogland and I want you to know that I am SO INCREDIBLY INSANELY IMMENSELY thankful for you. I hope you have a wonderful Thanksgiving tomorrow. May you find yourself surrounded by love and full bellies, wherever you are. 🙂
Ok, with that off my chest, let’s chat about this pillow!
I was at Marshall’s a few weeks ago (SHOCKING, I know). I spotted this pillow and couldn’t grab it fast enough. It was that cute.

(Yes, that’s my pouf in that cart!)
I was with my mom and she said to me, “You can totally make that.”
And I thought, YES! Yes, I can!
Which is a good thing, because I was already doing damage. Saving myself $20 was definitely a plus;)
I have quite a few Fall pillows that have zipper covers, so I already knew I had the insert, just had to pick up the cover.
Enter Hobby Lobby. If you don’t know about their pillow cover collection, YOU SHOULD. Seriously. And always a 40% off coupon on your smartphone?! I got a perfect canvas pillow cover for $3! I found some jingle bells to add on the corners as well:

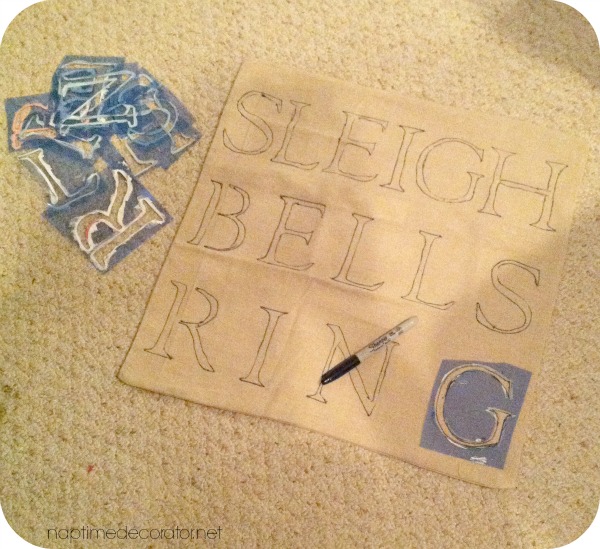
I knew I had just the stencils to use – my 4 inch Rustic Alphabet Letters from Hobby Lobby. I bought them several years ago and use the heck out of them. Truly.
I got out the lower case letters, and they just didn’t take up as much space as I’d like. So I took out the upper case and they worked perfectly! I decided to space them out so that the first and last letters of each line lined up. This ensured the entire pillow front was covered in letters. Does that make sense? Just had a hunch it would look cool that way.
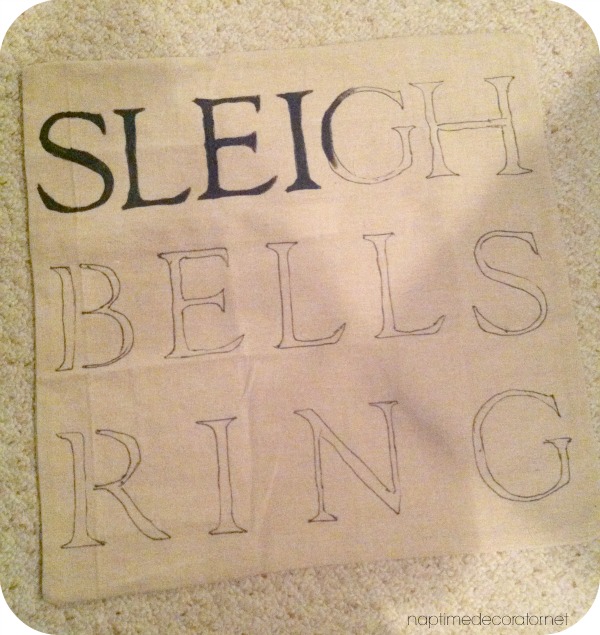
Got out my Sharpie and traced the inside first…(bad phone pics…oops. #badlittleblogger)
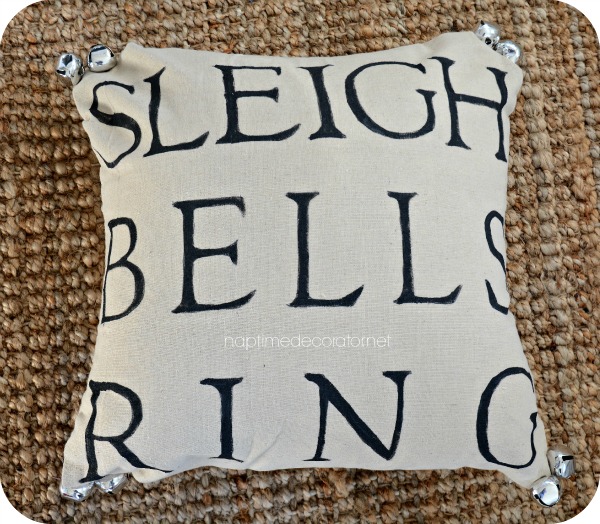
Then I used black fabric paint in matte finish and a small brush to fill it all in:
When it was dry, I put the insert back in, and zipped it up. I was about to stitch the bells on, but then thought it’d be quicker to just hot glue. In hindsight, I should’ve stitched. I have a feeling I’m going to have to anyway, since one bell fell off already! 😉
I have it sitting on the entry bench and I’m loving it!
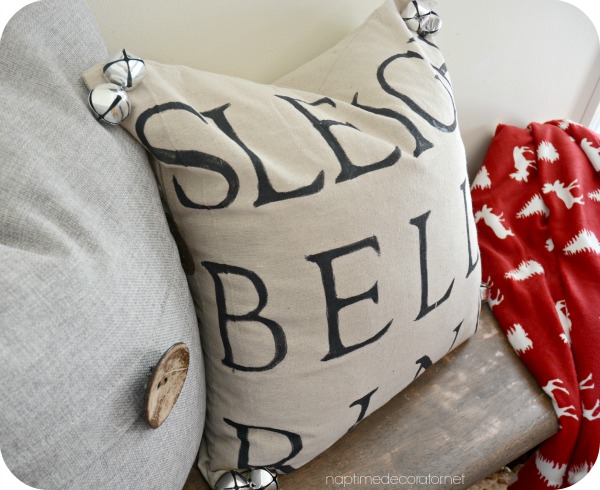
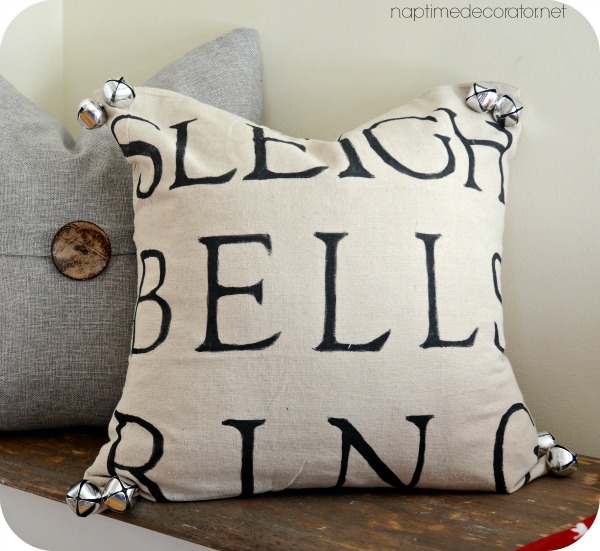
If you give this a go, learn from my mistake and don’t put the letters so low – the word ‘ring’ gets a little hidden when the pillow smooshes;) I figured you can still figure out what it says though, right?! I hope!
I love that the possibilities are endless with these blank canvas pillow covers. And I really love that I can make a brand new pillow for just a few bucks. Shout out to one of my favorite places on Earth, Marshalls, for the inspiration (and Mom for suggesting I give it a go)!
Happy Thanksgiving, dear friends!

 Hi there! I’m Liz, a former teacher-turned-stay-at-home mom to three kids, with a passion to create a warm and inviting home on a budget. This blog all started when I’d put the babies down for a nap, and squeeze in a project during those precious couple of hours! My hope is that you visit this page and feel inspired to do a little “naptime decorating” of your own. Thank you so much for stopping by!
Oh my gosh – I LOVE IT! I can’t get to Hobby Lobby fast enough to buy supplies – thank you for the inspiration! Oh, and Happy Thanksgiving to you and your adorable family!
Thanks so much, Lynn!! Happy Thanksgiving to you and yours! XO
I actually prefer yours! I love how the words spread out and cover the whole front. Very appealing.
Hope your Thanksgiving is wonderful, too.
thank you!!
So cute! I didn’t know Hobby Lobby sold the pillow covers!