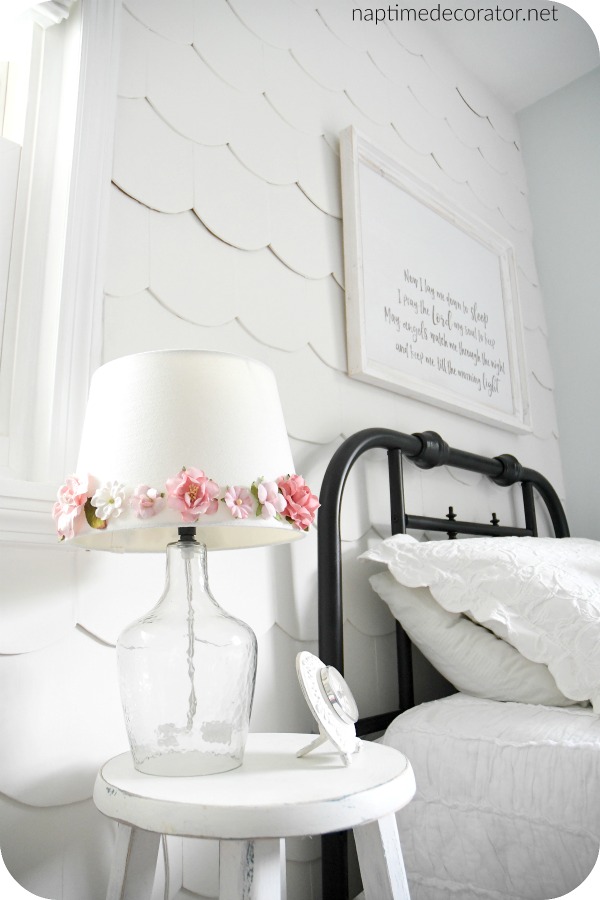
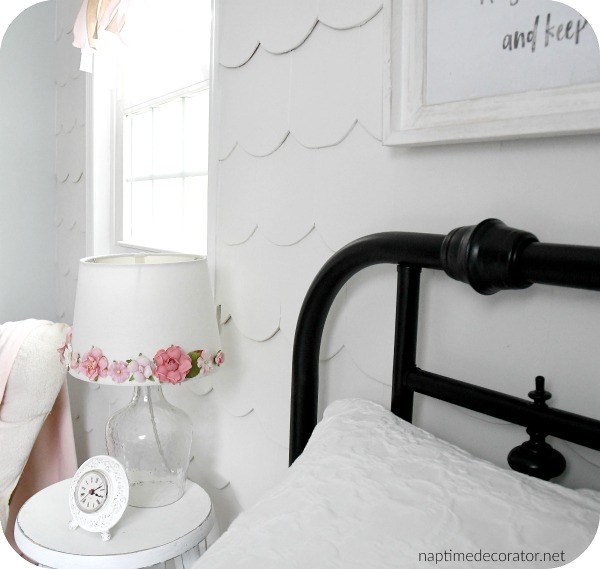
Thank you all so much for your kind words and love for my daughter’s scalloped wall! I am so happy you love it as much as I do:) Check out yesterday’s post here first, in case you missed that! I was super inspired by an episode of Fixer Upper but when I found out I’d have to shell out over $500 for a tiny accent wall of scalloped shingles, I stayed awake at night trying to come up with a Plan B.
Here’s my Plan B…
As promised, I’m diving into all the details in this post in case anyone else is as crazy as yours truly – I kid (sorta). Hehe…no, in all seriousness, if you’re a patient person and don’t mind a few hours of work here and there, you can get it done. It took me about five days of working for probably 3-4 hours at a time. My daughter’s room is TINY, so this one wall wasn’t too big a project. Would I do this in a huge room? Maybe not. Well, I might – you know me. I am just THAT crazy for pretty design;)
Ok, so let’s start at the beginning.
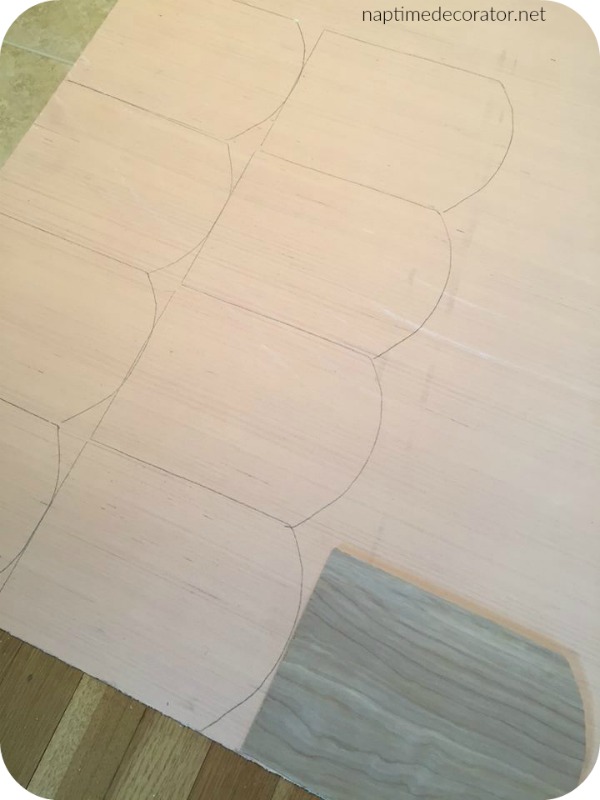
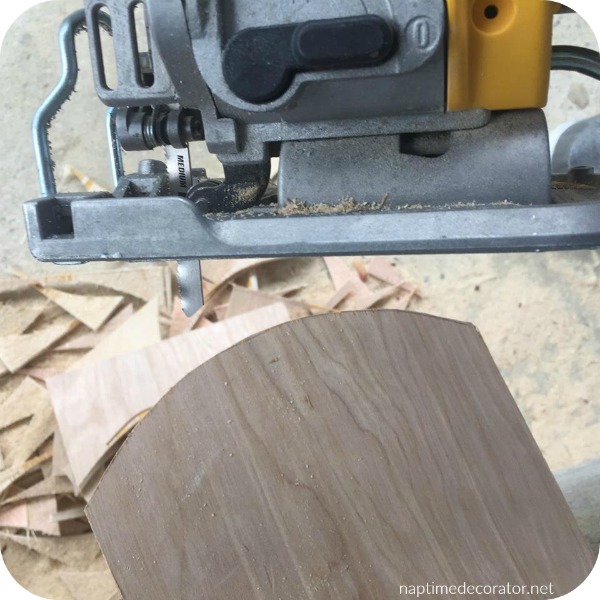
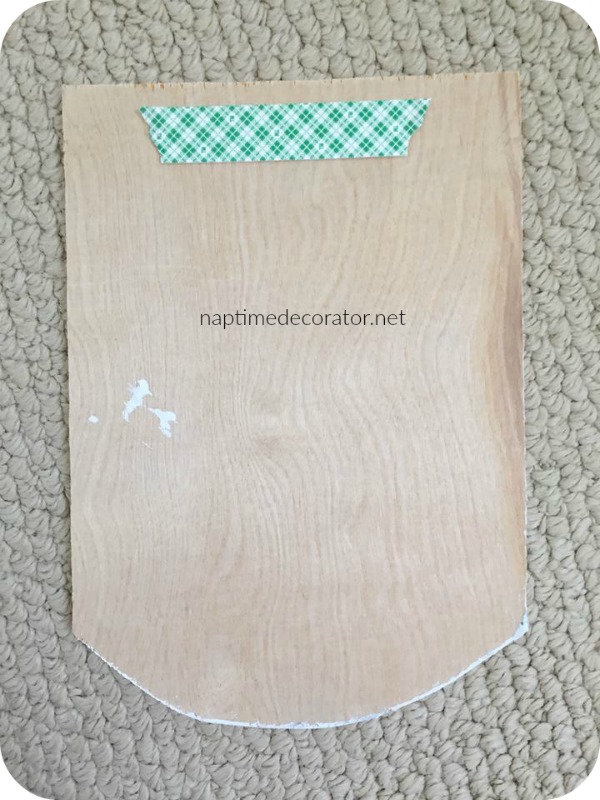
I grabbed a piece of paper and traced a scallop shape. I used the edge of a bowl to help me. Then I cut it out, and traced that shape onto a piece of plywood I had here leftover from a plank wall. (There’s ALWAYS a spare piece of plywood laying around here!). I cut that piece out just to see how big of a pain in the neck it would be, and it really wasn’t so bad. So I traced that piece onto the rest of the plywood:
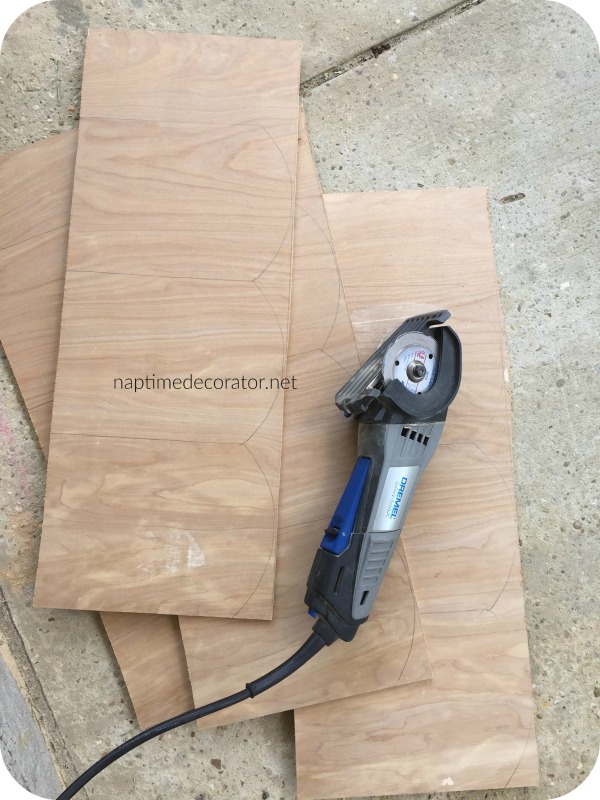
Then, I cut them into strips with my dremel saw:
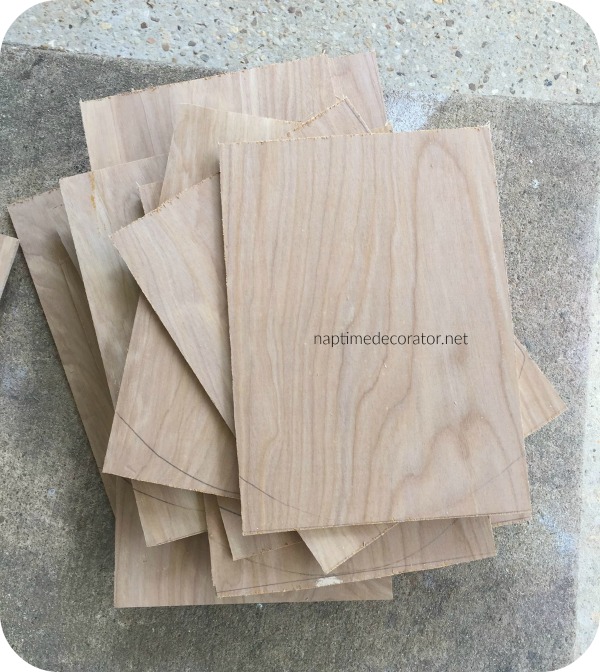
Then, I cut each rectangle shape out (also with the dremel):
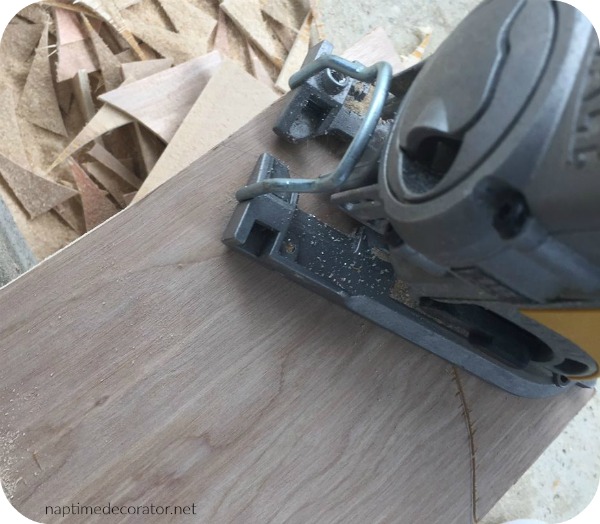
Here’s where I retire the dremel and bust out my jigsaw – to cut out that curved edge:
Tada!
Repeat. And repeat.
And repeat some more.
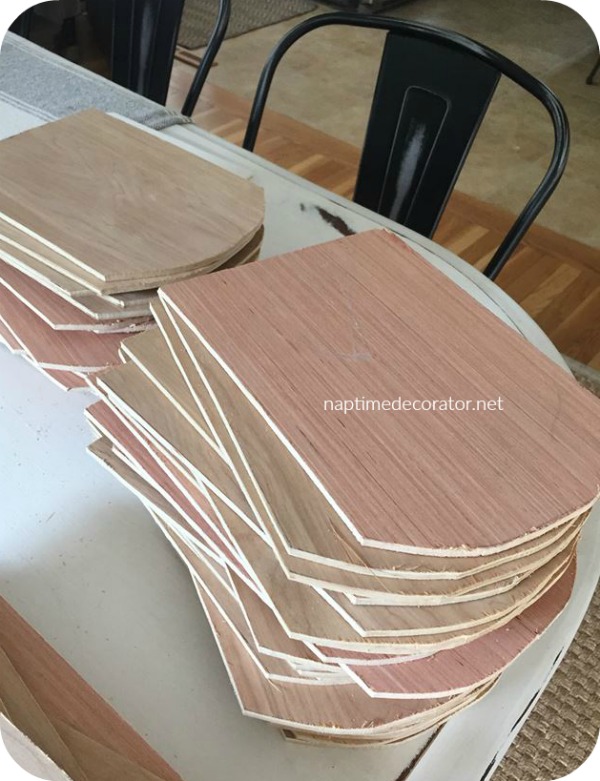
You can see the edges aren’t perfect. So I used my orbital sander to sand each one so it was nice and smooth and scalloped:)
Then it was time to start getting these bad boys up on the wall!
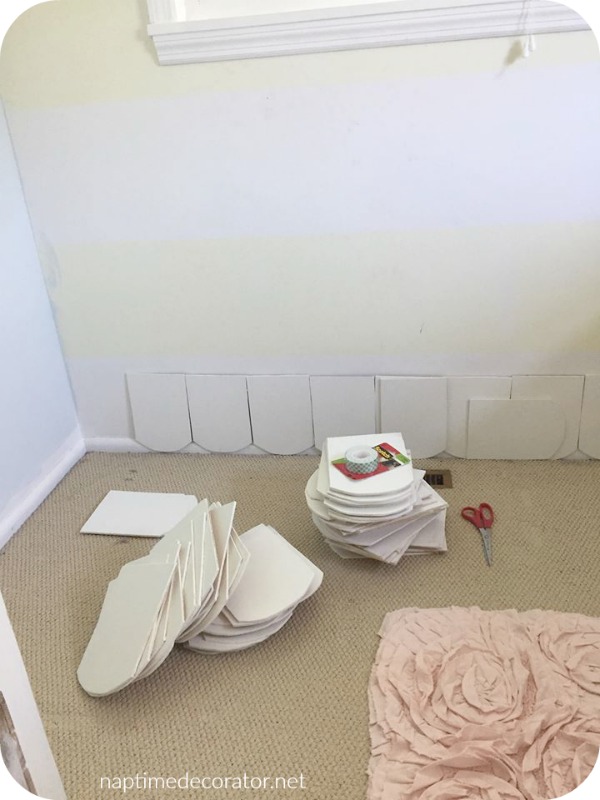
If you look at the bottom there, you’ll see that’s where I decided to start. (I also painted a bunch first, thinking that’d be smart, but I stopped that after a while because it was really six of one, you know? I was anxious to get them up and see how the wall was shaping up, so it was more immediate gratification this way).
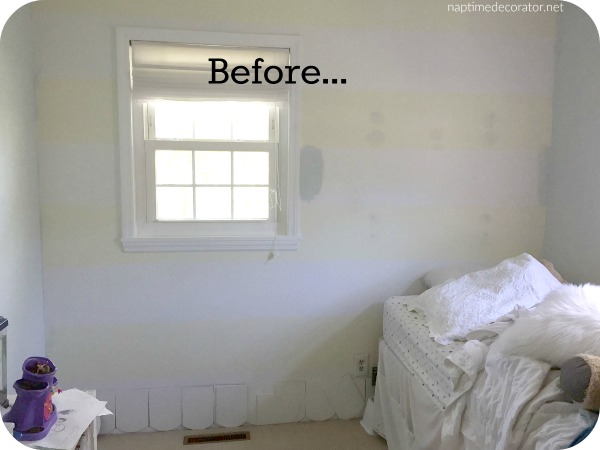
You’ll see in this pic we still have the 1965 baseboards up. That’s going to change soon (which is why the blue paint doesn’t go all the wall down). I decided to just go over the existing baseboard on this wall. One less wall to have to do!
I wasn’t exactly sure how to get these up on the wall. But I was walking around Home Depot and found mounting tape that was extra strength. I figured that’d probably do a good job – I mean, these are SO lightweight, so if they’ll hold up ten pounds, I’m sure this would hold. I followed the directions (holding for 30 seconds, etc), and one by one they went up.
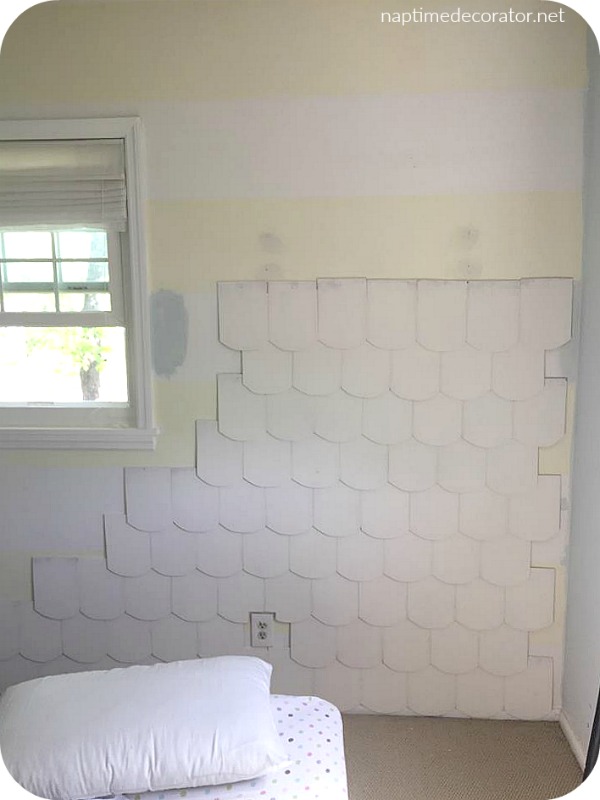
However, once we started getting up high, I did get out my nail gun. I felt pretty confident that these scallops would hold, but since her bed is right underneath, I didn’t want them falling on her in the middle of the night! This is something unlike any other project I’d done before, and I really didn’t know how everything would hold and I wanted to be safe. I didn’t nail every single piece, but here and there I shot in a nail. (I also started using the tape differently as we went up – to leave room for the nail, I switched from a big long piece in the center like the photo shows, and went with two smaller pieces of tape on each side. So we’re covered on the sides AND the nail in the middle).
I did a lot of eyeballing, but every once in a while I got out the measuring tape to make sure my lines weren’t completely uneven. If you look in these pics, you’ll notice I layered the pieces on top of each other staggered – like the middle of the bottom scallop goes above the line edge of the one under it. Does that make sense? I measured that length (the line directly under the middle bottom scallop) and they were all roughly 5 inches.
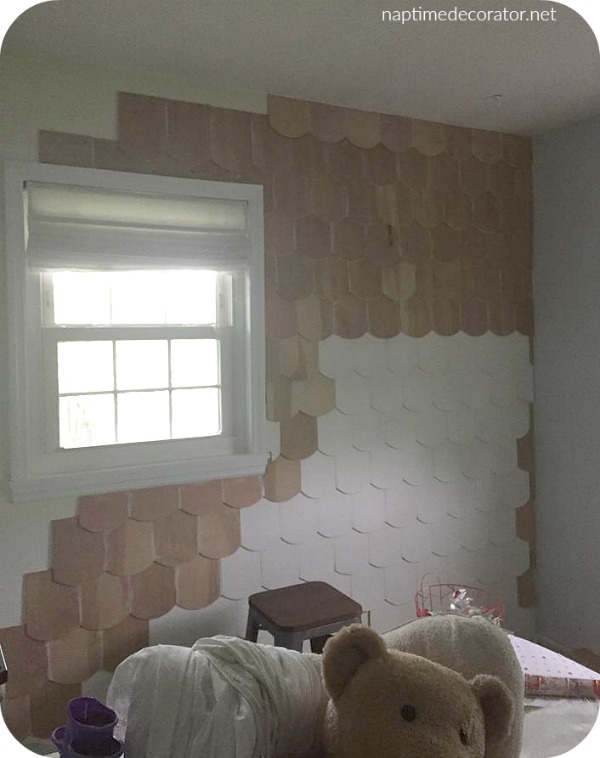
Chugging along…I really felt like the Little Engine That Could. My daughter loved running in from school to see how much progress was made. Some days I only had an hour or two to spare, some days I had more time. The edges and around the window were the most time consuming because there was SO MUCH measuring and then running up and down the steps and outside to cut. And cut. And cut.
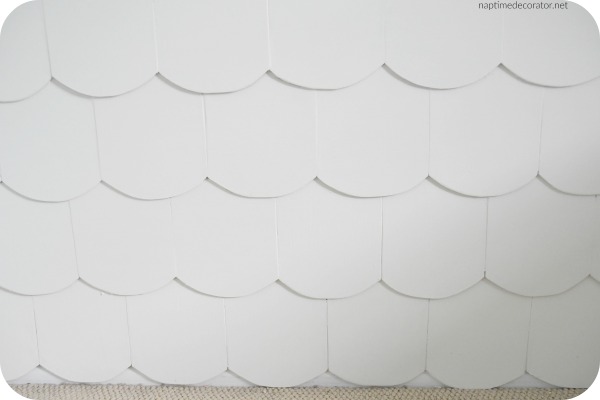
Finally, oh happy happy day, it was DONE!
Every. Last. Piece was cut, sanded, and secured. I caulked just a little between each one – I mean, honestly, I was not perfect in my cutting each shape, so there were gaps here and there. Caulk is my best friend. For real.
Time to paint!
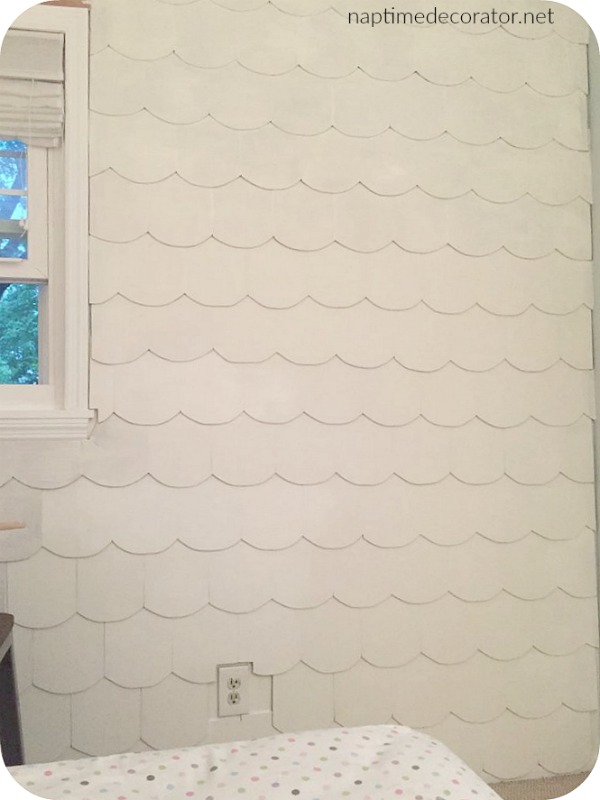
If you look around the window and edge of the wall though, you’ll notice it’s far from perfect. So I ended up getting out my caulk gun for those spaces as well and yes, it was a miracle worker.
(I went with Sherwin Williams Alabaster Primer and Paint in One because we had it leftover here. It’s a lovely, somewhat warmer white).
And my labor of love was complete!

I cannot even tell you how shocked I am that it worked. Really. And to think it set me back less than $40. Crazytown.
Now, I had some plywood on hand, but I’m guessing I used less than three 4×8 sheets in total.
Other materials you’ll need:
-Dremel saw
-Jigsaw
-pencil
-scallop template
-mounting tape
-nail gun
-caulk
-orbital sander
-paint
-workspace and clamps for cutting/holding the wood
-safety goggles, respirator mask*
*SAFETY FIRST!!!! Make sure you protect yourself and ONLY use power tools if you know how to use them! I always wear safety goggles and a respirator mask because particles and wood chips go flying.*
If I missed anything and you’ve got a question, feel free to ask! I hope this inspires you next time you think a project is out of your budget – might take you longer and more work, but how rewarding in the end when you’ve created something beautiful and saved a ton of money!
But really, the best part of this whole project is how much my daughter loves her new space. She recently left me this love note…
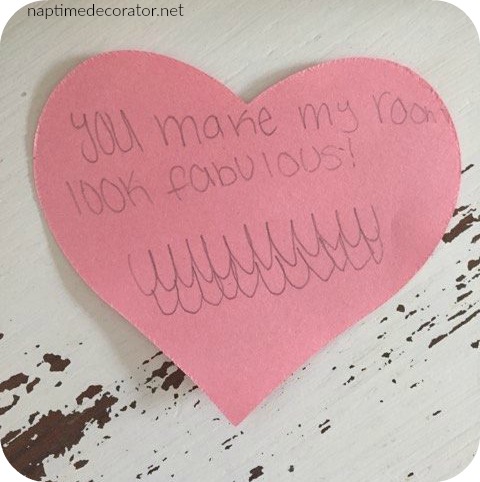
I mean, that scallop drawing…
It was totally worth it:)

 Hi there! I’m Liz, a former teacher-turned-stay-at-home mom to three kids, with a passion to create a warm and inviting home on a budget. This blog all started when I’d put the babies down for a nap, and squeeze in a project during those precious couple of hours! My hope is that you visit this page and feel inspired to do a little “naptime decorating” of your own. Thank you so much for stopping by!
I absolutely love this!!! I might try my hand at this in my daughter’s room. 🙂 You did such a great job!
Thank you so much!
Great idea and what to do.
Love this!!!
Just wanted to follow up since it has been some time to see how you think the mounting tape is holding up?
Thanks, Deb!! It’s holding up GREAT – no issues whatsoever so far!
Looking to do this in my daughters room so beautiful! Just wondering the size of the wall you covered and the size of each scallop? Thank you!
I was curious as well what size is the individual scallop? and how much did you overlap?
How thick was the plywood you used?