*This page contains affiliate links for your convenience. For more information, see the FTC guidelines here.*
I just cannot even put into words how excited I am about this latest project, you guys.
Let me backtrack to 12 years ago for a minute.
We moved into our house when I was 6 months pregnant. That was a busy summer, as we were doing a LOT of changes to make this house our home. A bunch of walls were knocked down, new paint, new carpet, new hardwoods, new furniture, getting the nursery ready – somehow the kitchen was last on the list, and our first baby was due at the end of August. We were running out of time and money, and we got new appliances, but painted the existing 1965 cabinets, went with a cheap counter and sheet of vinyl flooring. We finished it just a couple days before our girl was born.
I was into the whole red/yellow/sage green thing that was very big back then – and I loved it so much.
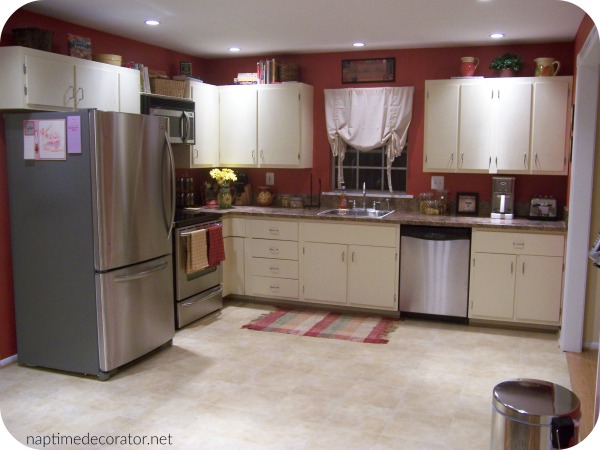
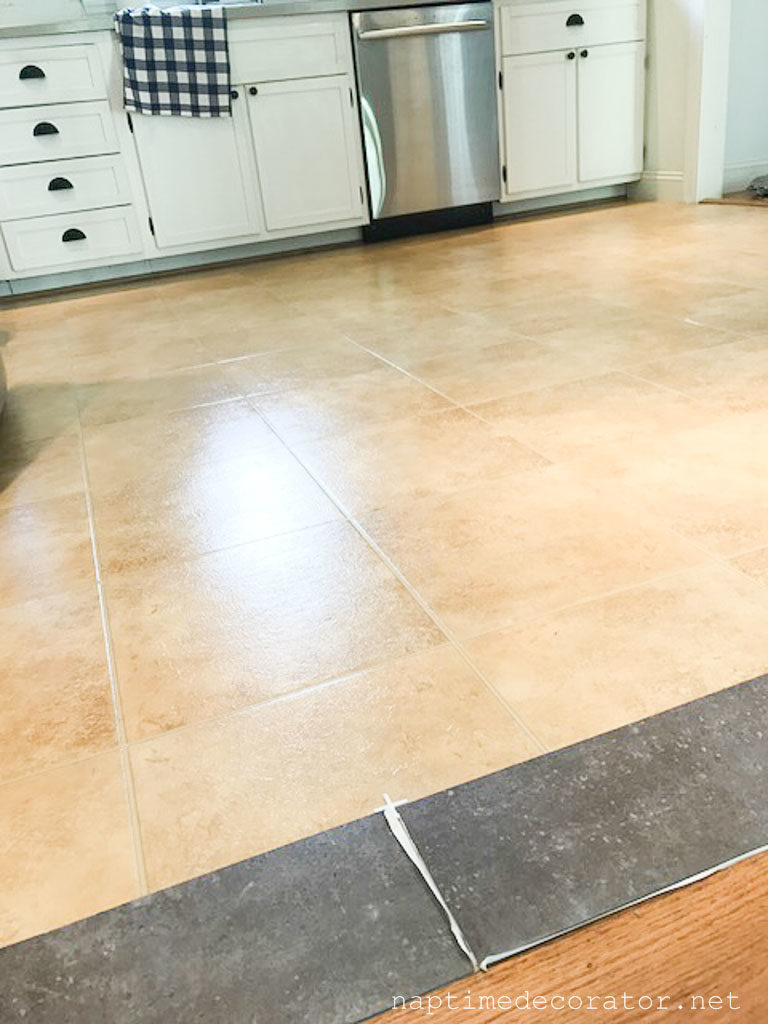
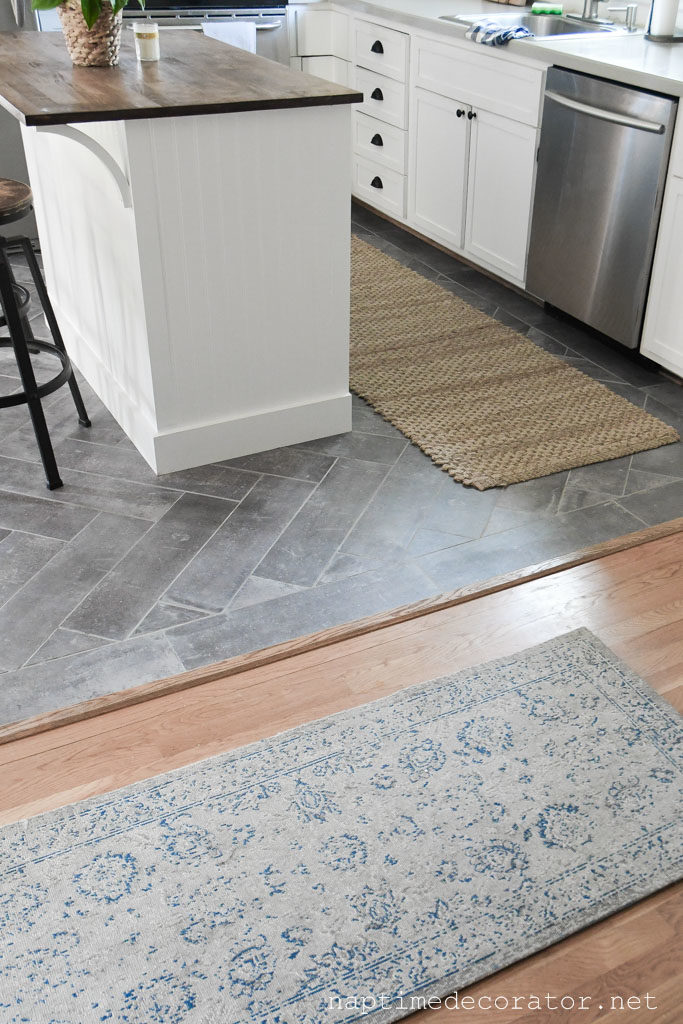
But our tastes and styles often evolve over time, and I have since brightened up in here with white cabinets, then tearing off the fronts for open shelving, and everything was turning more my style except for those counters and floors. I have just updated the counters with a cheap fix (stay tuned for a post soon on those!), and learned about these peel and stick floor tiles, thanks to a friend of mine who used them in her half bath. We were chattting about the gold laminate floor that I wish I could change, but don’t have the budget at the moment, and she told me about them. She researched, read lots of reviews, and this stuff is even groutable so it really looks like the real deal. This TrafficMaster Industrial Stone sounded like the PERFECT fix for us at this point in time. It came in a slate/grey color which would be ideal in here, and go directly over the laminate, and cost only about $150 when all was said and done. I decided to go for it and ordered six cases and couldn’t wait to get started!
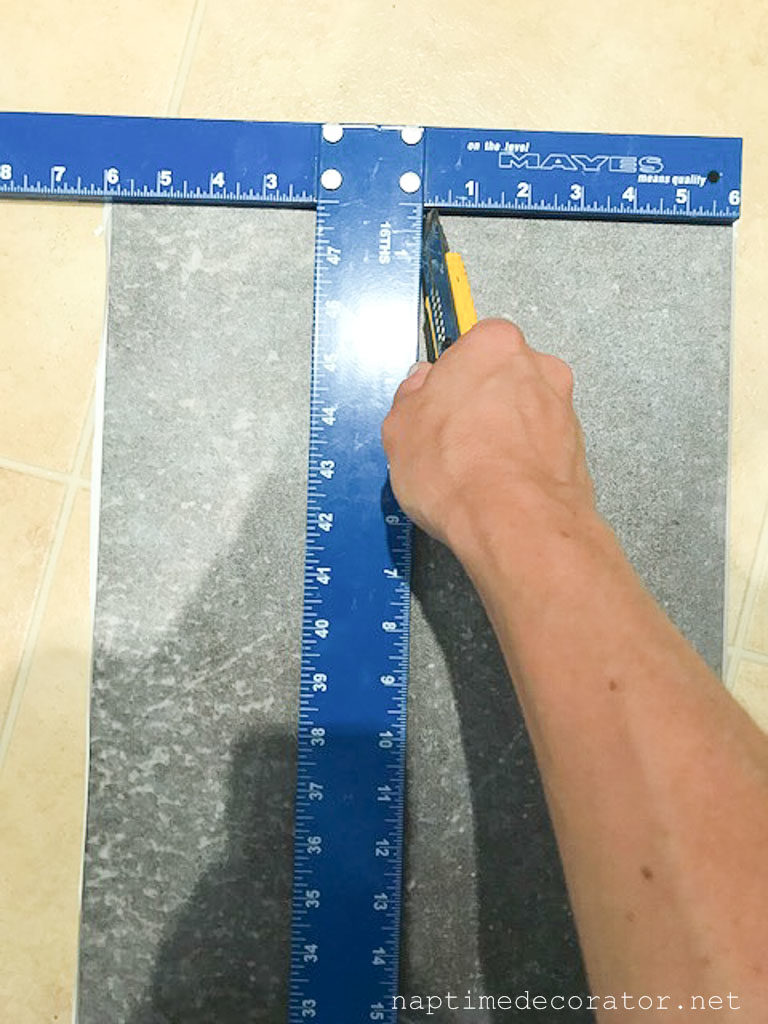
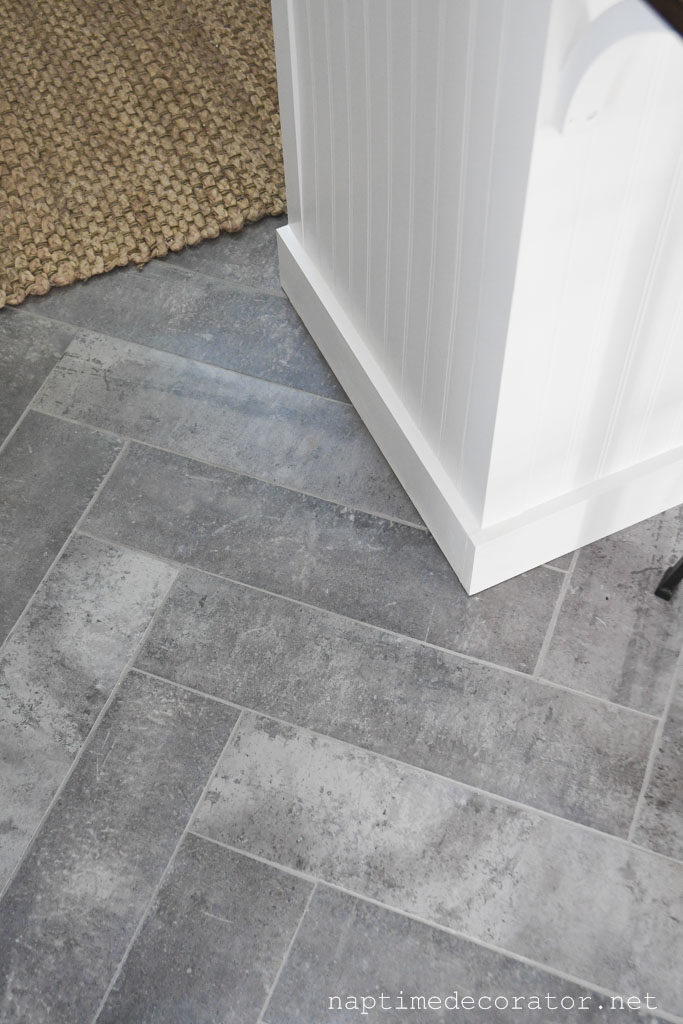
Even though I thought the 12×24 rectangular shape would look great (as it does in my friend’s bathroom), I decided to go for a herringbone look. So I cut them in half so they were 6×24 strips. I used a T-square and exacto knife – it was actually pretty easy. After scoring it a couple times, they just snap right in half. I did this process right on my old floor, just in case the knife went through but it really didn’t.
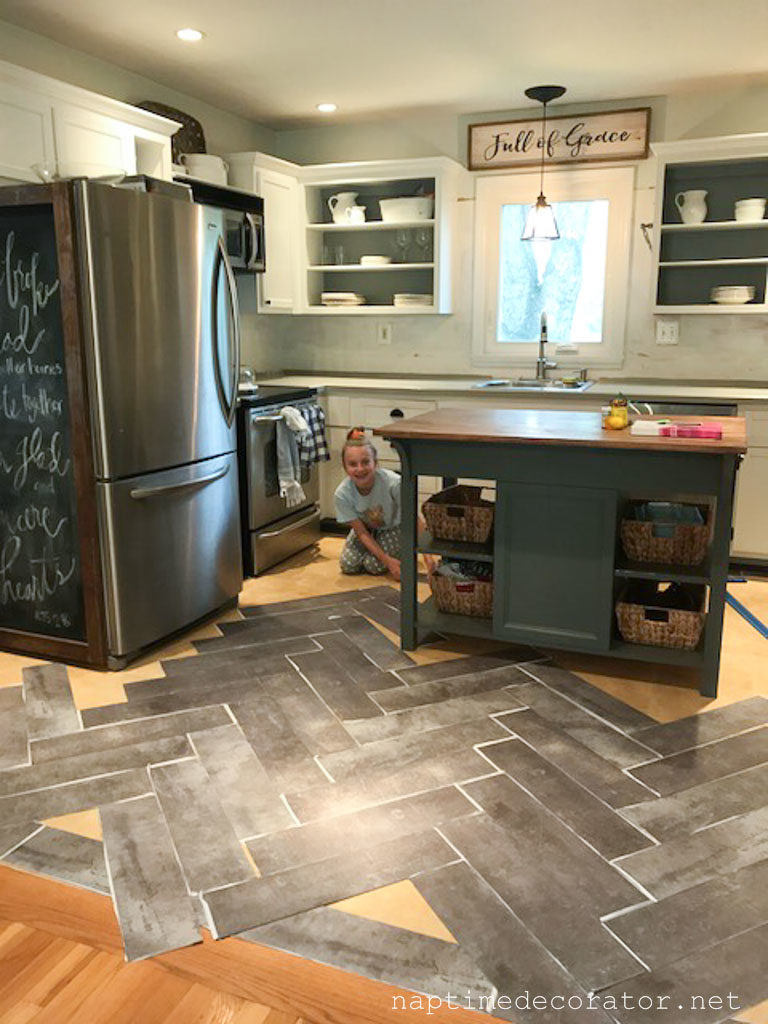
I started laying them out (with little helpers who were very excited as well!) just to see and get an idea what it would look like, and I was swooning already…
(I’m just going to apologize now for all for these crappy during photos – apparently I drink lots of coffee and then decide to take wonderful shaky phone pics. Goodness.)
Once I figured out how it would all work (I started from the middle of the kitchen and went from there), my husband and I took the island out, cleaned the floor, and primed it with a self stick primer that was recommended to use when applying this peel and stick tile (link at the bottom of the post).
I let that dry about an hour or so, and it was time to start!
I did the border first…

(Someone loves it just as much as me;)
Then went to the middle of the kitchen and started unpeeling, one by one. I bought spacers but in the end didn’t even use them, because the shape of the ones I bought didn’t really work with the herringbone pattern, they were more for just laying square/rectangles on top of each other, not staggered like mine. And the tiles were too thin to stand the spacers up – but the grout I chose was a light grey, similar to the tile, so it’s very forgiving;)
It was a LATE night, let me tell you. But I really wanted to get it done before the morning, so we could walk on the kitchen the next day. My husband was at a gig, and the kids were in bed, so I just went at it.
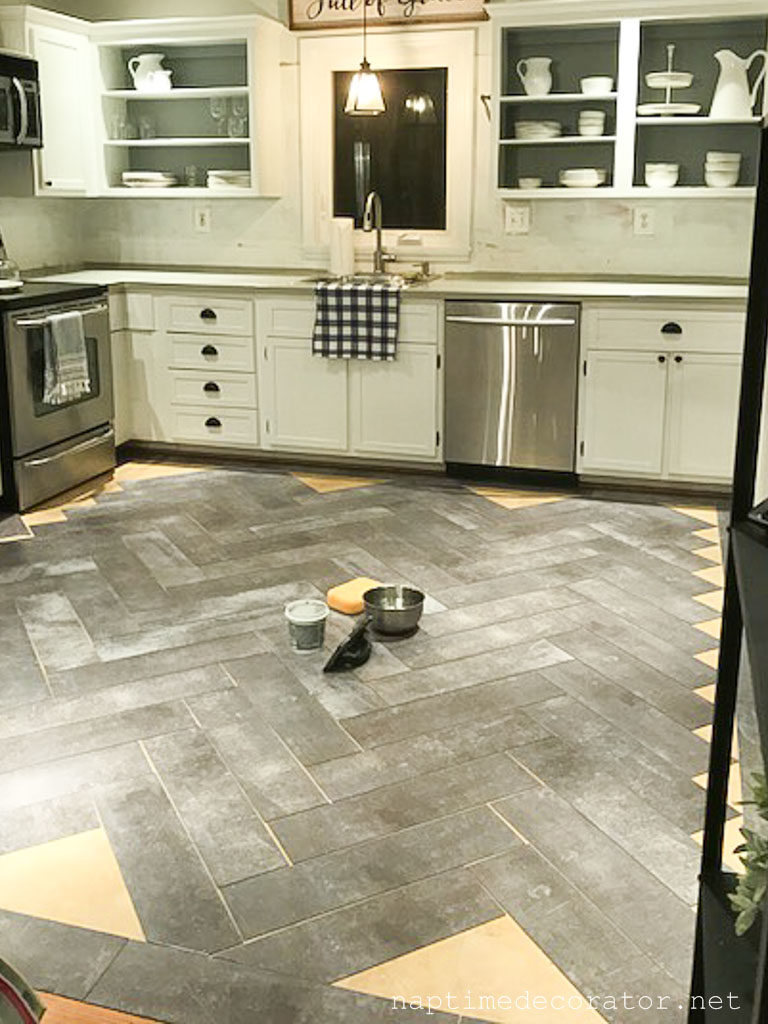
Once the pieces were all stuck on there, I used a grout float and a tub of Delorean Gray (pre-mixed), a big sponge and grouted away. I got about half done, then called it a night and finished up the next day. I have never grouted before, and was scared, (just ask my friend – I must’ve texted her 800 questions and you-tubed it;), but there’s really nothing to it. Wipe it on in the creases with the grout float, then wipe off with a damp sponge. Just have to make sure to do small sections at a time, so you can wipe it off before it dries. Seriously, pretty much all the info you need is on the back of the box of tiles. Just follow those directions, and you are good to go!
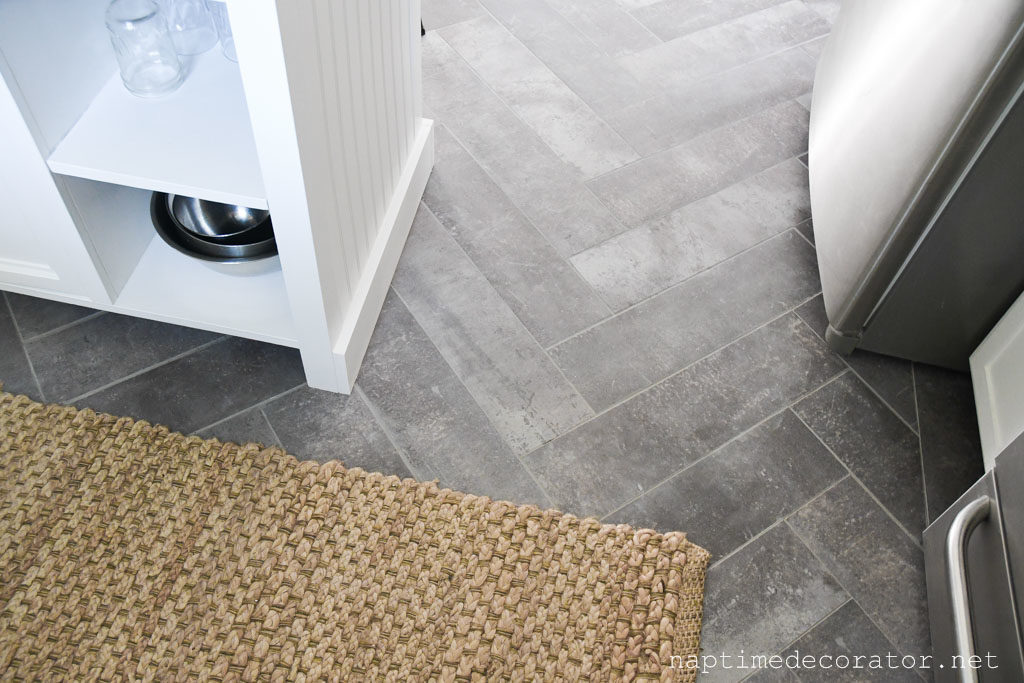
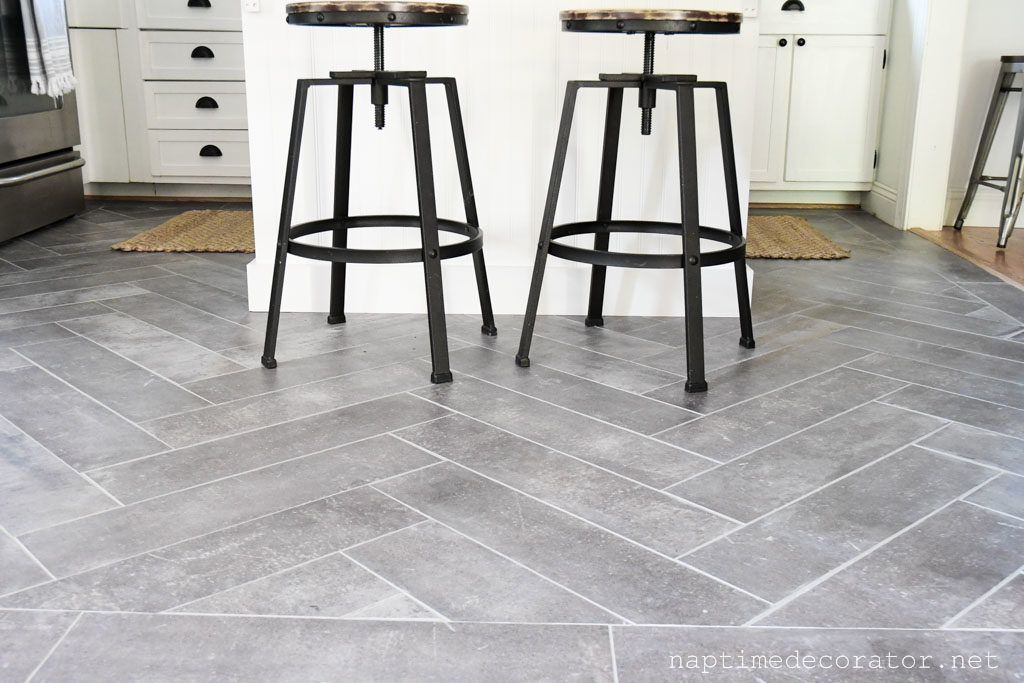
You guys, I never thought I’d say I’m in love with a peel and stick tile, but I SO AM.
I have to say, this stuff really feels like it’s staying put, too. Of course it’s too soon to tell, but I think it’ll be a great fix until we can completely gut our kitchen. If you are looking for an inexpensive solution to floors you don’t love, I feel like this is an awesome option. The reviews were great, so I figured why not give it a go. Plus, having my friend use them in her bathroom and so far so good for her, was also a selling point. Talk about a drastic improvement for $150 – I mean, take a look!
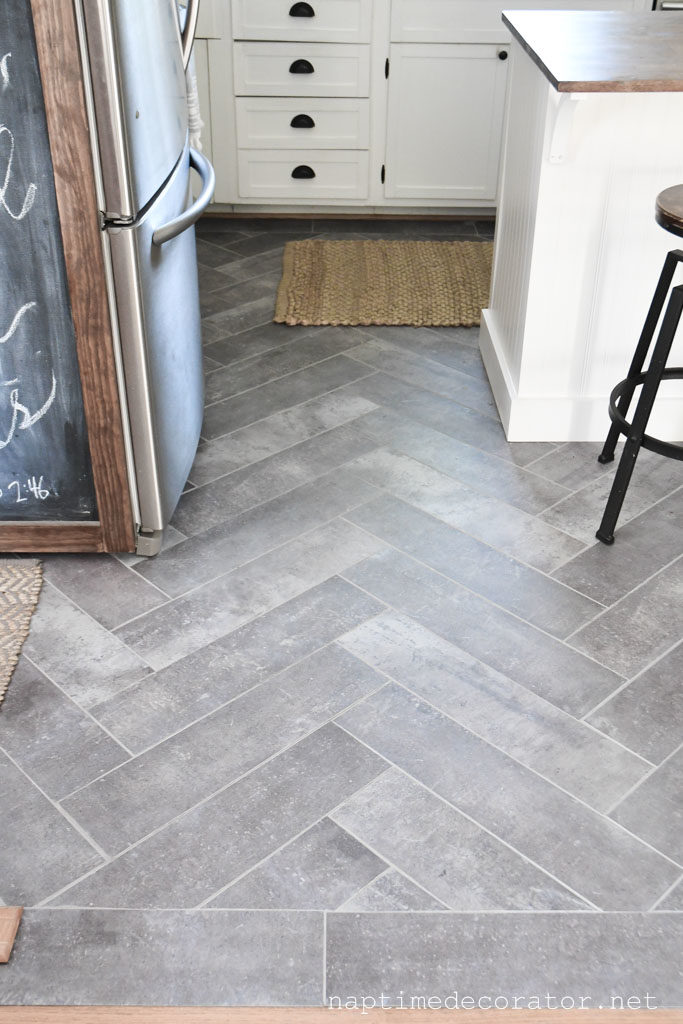

I love how the grey picks up my hallway runner too!
And yes, the island got a makeover as well – I’ll write that post next! So many fun changes in here, I can’t wait to share them all with you. There are so many really great things out there to create a lovely home on a budget, it’s crazy! You don’t always have the money to do a full reno, but you can still have a home you love, I am such a believer in that.
I can’t wait to show you the top half of this room – we ripped off the upper cabinets yesterday and are planning a whole thing – not even 100% WHAT, but it’s between a couple fun ideas! Stay tuned for that:)
Here’s everything you need to do this project, with affiliate links when applicable:
–T-square
–Exacto knife
–Floor Primer
–Scissors (good to have on hand for super small cuts)
–Grout (I used premixed Delorean Grey, but use whatever you like, and I needed two quarts for my kitchen)
–grout float
–large sponge
–bucket of water
I think that’s about it! I hope this helps those of you who are desperate for a new floor but didn’t think it was a possibility. So many budget friendly options are out there, if you don’t mind putting in a little work. If you have any questions, feel free to leave a comment and I’ll get back to you!
Thanks for reading and happy tiling! 🙂

 Hi there! I’m Liz, a former teacher-turned-stay-at-home mom to three kids, with a passion to create a warm and inviting home on a budget. This blog all started when I’d put the babies down for a nap, and squeeze in a project during those precious couple of hours! My hope is that you visit this page and feel inspired to do a little “naptime decorating” of your own. Thank you so much for stopping by!
Your floor looks great! I used similar peel and stick tiles to creat a buffalo check pattern and am trolled with the results. Hope to use the planks in the bathroom next.
Oooh bet that looks awesome! I love buffalo check! Thanks for sharing:)
I have this exact tile in my mud room and I love it. It’s been up over a year and perfect.
That’s great to know!! It seems very durable!
Your floor looks FABULOUS!!
Love the runner by your kitchen sink too – where did you find it?
Thanks, Michelle! It’s from Target:)
Thanks for this!!! Love it. We have similar kitchens and this is helping me figure out what floor to do. I like it so much I may do the same thing.
Awesome!! I’m so glad it helped!
Amazing! The floor and island have really brightened up the space! You are good!!!
Can’t wait to see what you do with the cabinets.
Thank you so much, Anne!! 🙂
Turned out just gorgeous!
OOOH! I am so excited about this look!!!! I just LOVE it! I saved this so that when we get to redoing our master bathroom floor, we can install this. I really like the herringbone pattern and plan on using it but with the Light Gray tile—we have coastal colors in here and I think your gray would be too dark. But I like your color too and plan on using it in our utility room. We are in the midst of installing Red Oak 5″ plank hardwoods in our common area (LR, K, DR, hall & hall bath). The color of the hardwoods is called Smoke—it looks like distressed wood in a gray/khaki color which will look great when it connects to the utility room off of our kitchen. Thanks for the idea! BTW, I always look forward to your posts—your decorating taste is so similar to mine and I love your creative ideas. Keep up the faith and all of the great work you are doing.
So you have totally inspired me and I am putting in peel and stick groutable tiles in my kitchen–today!! In a different shade/side (I love yours but my space felt too small and dark for the darker gray). My question for you is, did your remove the thresholds (between your kitchen and wood floors) when you installed the peel and stick or just went right up to it? Thanks so much for this post and your inspiring and creative ideas!!
I just went right up to it! So excited for you! Thanks for your kind words:)
I love this so much!! I want to do this in my laundry/mudroom. So gorgeous. How’s it holding up?