Um, wasn’t sure what to title this one, as you can probably guess.
It’ll make sense once you’ve read the post…I hope. 😉 Let me explain…
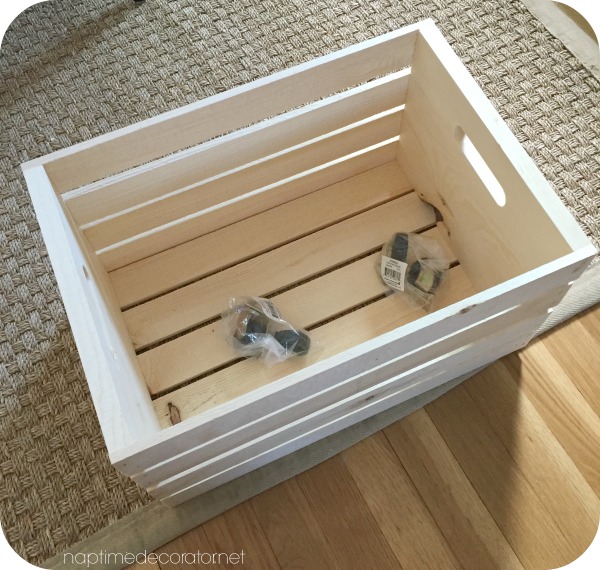
So I bought two of those unfinished crates from Michaels (actually, I bought one – I already had one in storage for YEARS now, waiting to do a project that never happened…). And some caster wheels from Lowes…
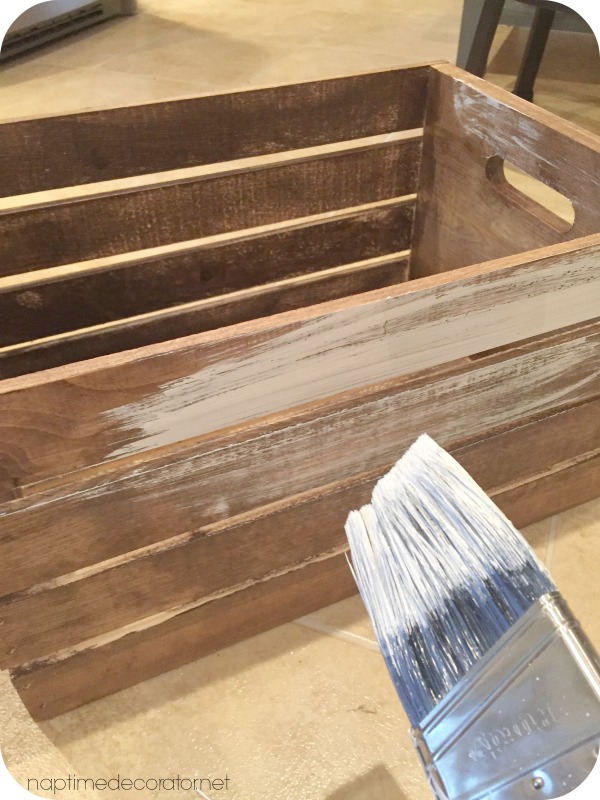
I took them outside and stained them with Minwax Special Walnut…

I dry brushed just a little white craft paint on them…
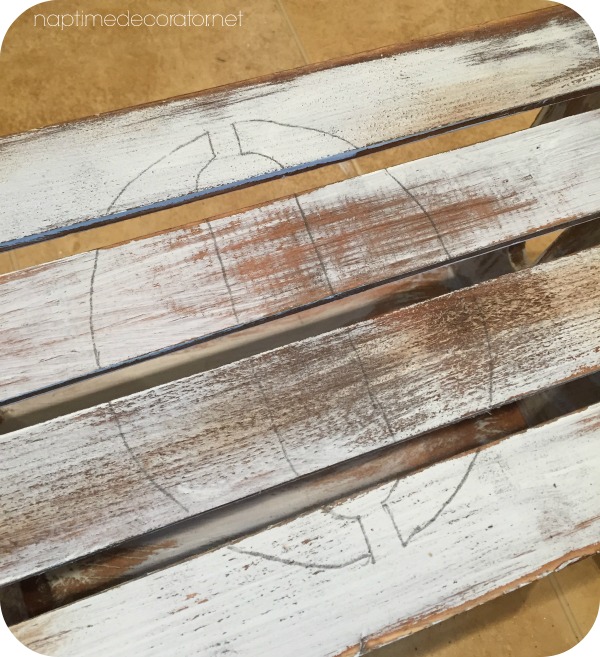
I wanted to add some flair. Numbers perhaps? Sure, why not?! Did I have large numbers? Nope.
So I went DIY and made some makeshift stencils, as I like to do. I went on my computer, typed in some numbers in a huge font (I used the ‘Stencil’ font. Ha!) and traced my screen lightly (sshhhhh I shouldn’t really be tracing my screen;) – use a printer if you can). I mean, I barely had my pencil on the screen, but it was enough to go over in marker so I could see it better.
Then, I used carbon paper I already had – you can buy some at Michaels or Amazon – and placed it underneath the number. I traced it with a little pressure onto the crate, and the carbon paper transferred beautifully!

I just took a small brush, some black acrylic craft paint, and filled her in!

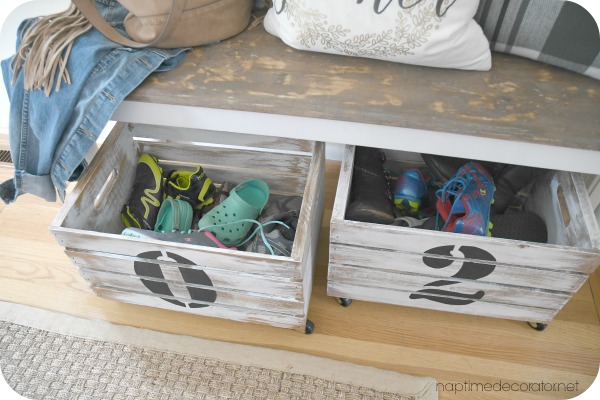
Last step – attached the casters. They come in sets of two, so I bought two packs for each crate. You’ll crack up at this one. I was on a time crunch, the kids were about to get home from school and I didn’t feel like looking through the 80 gazillion screws we have so I HOT GLUED THEM ON. I have every intention of putting them on properly this weekend, but I mean, I can’t keep my readers waiting, right?!!!
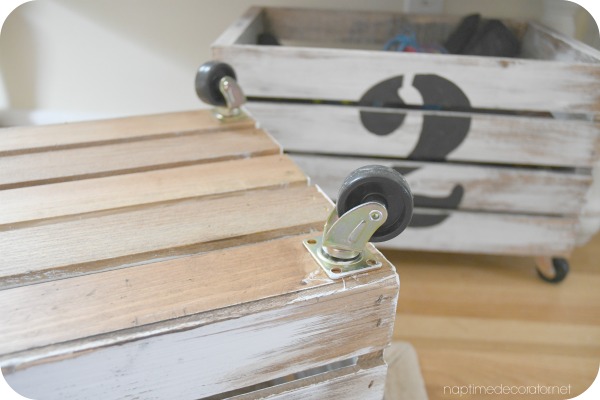
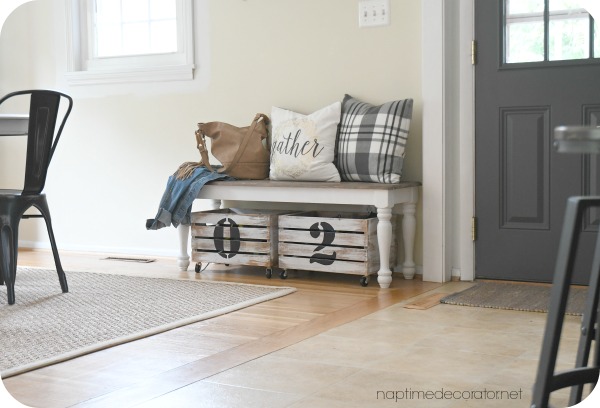
And here they are!

You might be asking yourself, “Why did Liz choose 0 and 2?”
And the answer would be, ‘Because I think they’re pretty numbers.’
Seriously. Wish I had a good reason, like 2 is our lucky number or our anniversary or we have two kids or something, but nah. Just liked the way it looked. But the back is still plain, so I can always do something else and turn them around if I decide I want something different.
Now, you might notice this is where my coffee bar was…big changes happening in here people!! I’ll share soon, but it’s so pretty in my head!!
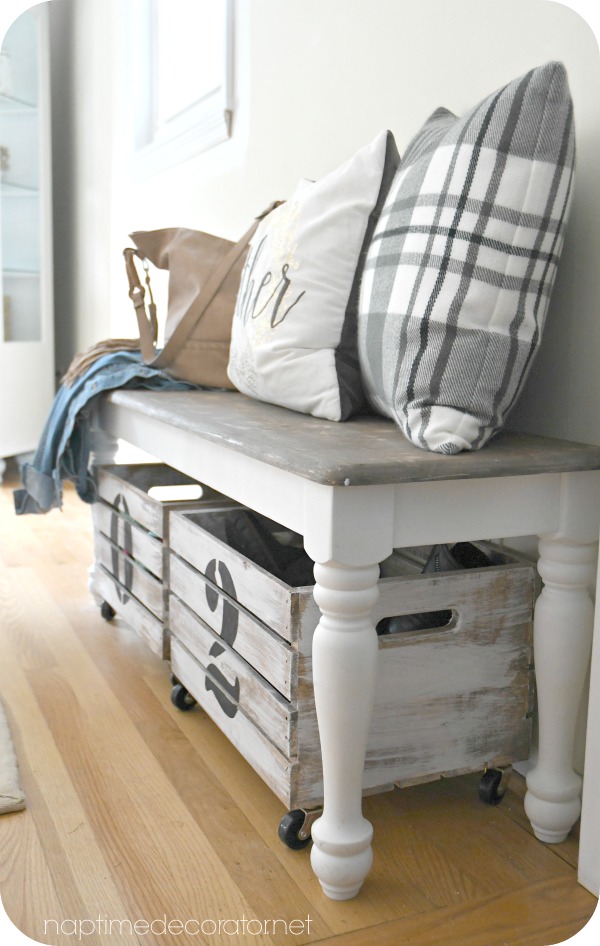
This bench was at the foot of our bed – I’m on the lookout on my travels for a really cool one, either for our room or here, but it works for the moment. It’s SO perfect for our shoes, as it’s right by the side door. And a perfect landing spot for a purse or bookbag, or whatever…
As for the new dining room plan, there’s some rearranging happening, some shiplap going up, some curtains…oh it’s gonna be FUN!
And yep, I’m aware the family room is still a hot mess – but I mean, I have no control over when inspiration will strike, right?! This room really won’t take much though – with the exception of the shiplap, it’ll be quick. Famous last words?! We shall see…
Stay tuned! Have a great weekend, friends!

 Hi there! I’m Liz, a former teacher-turned-stay-at-home mom to three kids, with a passion to create a warm and inviting home on a budget. This blog all started when I’d put the babies down for a nap, and squeeze in a project during those precious couple of hours! My hope is that you visit this page and feel inspired to do a little “naptime decorating” of your own. Thank you so much for stopping by!
Pretty, and practical! I’m in need of a firewood box in my living room. Maybe this could work for that, too?
I love this project! It looks great.
Have a great week…
Sherri
I’m looking for a bench like that – it’s gorgeous! I discovered your blog by chance today and I” hooked. Thank you!
So doing this! I can never get my entry in order.
Awesome! Good luck!